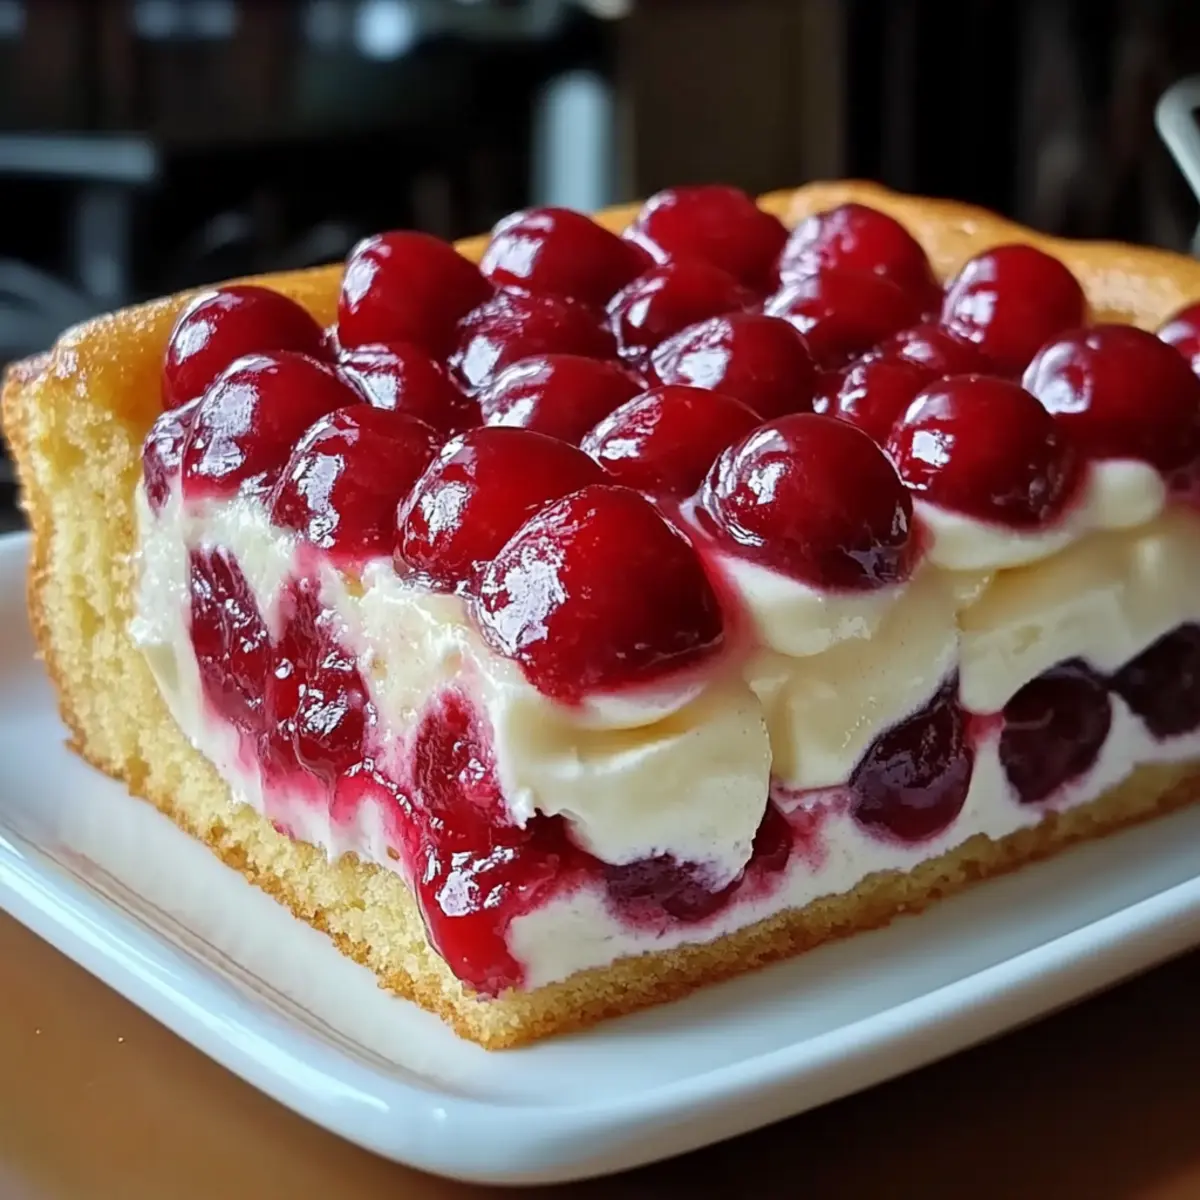
The moment I unwrap a Twinkie, I’m transported back to the carefree days of childhood, where every bite was a sweet adventure. That’s exactly the feeling I aim to capture with my No-Bake Twinkie Pudding Cake. This easy and nostalgic dessert is effortlessly assembled, making it the perfect addition to any potluck or family gathering. With just a few simple ingredients—creamy vanilla pudding and vibrant cherry pie filling—it transforms into a delightful treat that not only satisfies your sweet cravings but also stirs those cherished memories. Plus, since it’s a no-bake recipe, you can save time and energy while still impressing your guests. Are you ready to indulge in a slice of nostalgia? Let’s dive into this simple yet satisfying creation!
Why is No-Bake Twinkie Pudding Cake a Must-Try?
Nostalgic Delight: Every bite of this cake brings back childhood memories, reminding us of simpler times and sweet treats.
Effortless Assembly: With no baking required, this dessert can be whipped up in moments, perfect for busy weeknights or last-minute gatherings.
Flavorful Layers: The creamy pudding paired with the tartness of cherry pie filling creates a taste sensation that is both refreshing and indulgent.
Versatile Options: Feel free to experiment with different pie fillings to suit your preferences or to keep things interesting—blueberry or strawberry could add a new twist!
So why not experience a nostalgia-fueled dessert and serve this delightful treat at your next family gathering or potluck? It’s bound to become the star of the show, just like my Caramel Brownie Cheesecake or the delightful Gingerbread Latte Cake.
No-Bake Twinkie Pudding Cake Ingredients
For the Cake Layers
- Twinkies – The star of the show, providing a soft and sweet base that makes this a delightful dessert.
- Vanilla Pudding – Adding creaminess and flavor; for the easiest preparation, use instant pudding mix.
For the Topping
- Cherry Pie Filling – This bright and tart filling creates a perfect contrast to the sweetness of the Twinkies and pudding; feel free to swap in your favorite fruit pie filling for variety.
Optional Garnish
- Whipped Cream – A light and fluffy topping that amplifies the indulgence; adding this will make your No-Bake Twinkie Pudding Cake even more delightful!
- Fresh Berries – Consider adding fresh berries for added flavor and a pop of color on your plate.
Step‑by‑Step Instructions for No-Bake Twinkie Pudding Cake
Step 1: Gather Ingredients
Begin by collecting all your ingredients to make the No-Bake Twinkie Pudding Cake: Twinkies, instant vanilla pudding mix, and cherry pie filling. Ensure your pudding mix is chilled to enhance the creamy texture. Set up a large serving dish or a trifle bowl that will showcase the colorful layers of this nostalgic dessert.
Step 2: Create the First Layer
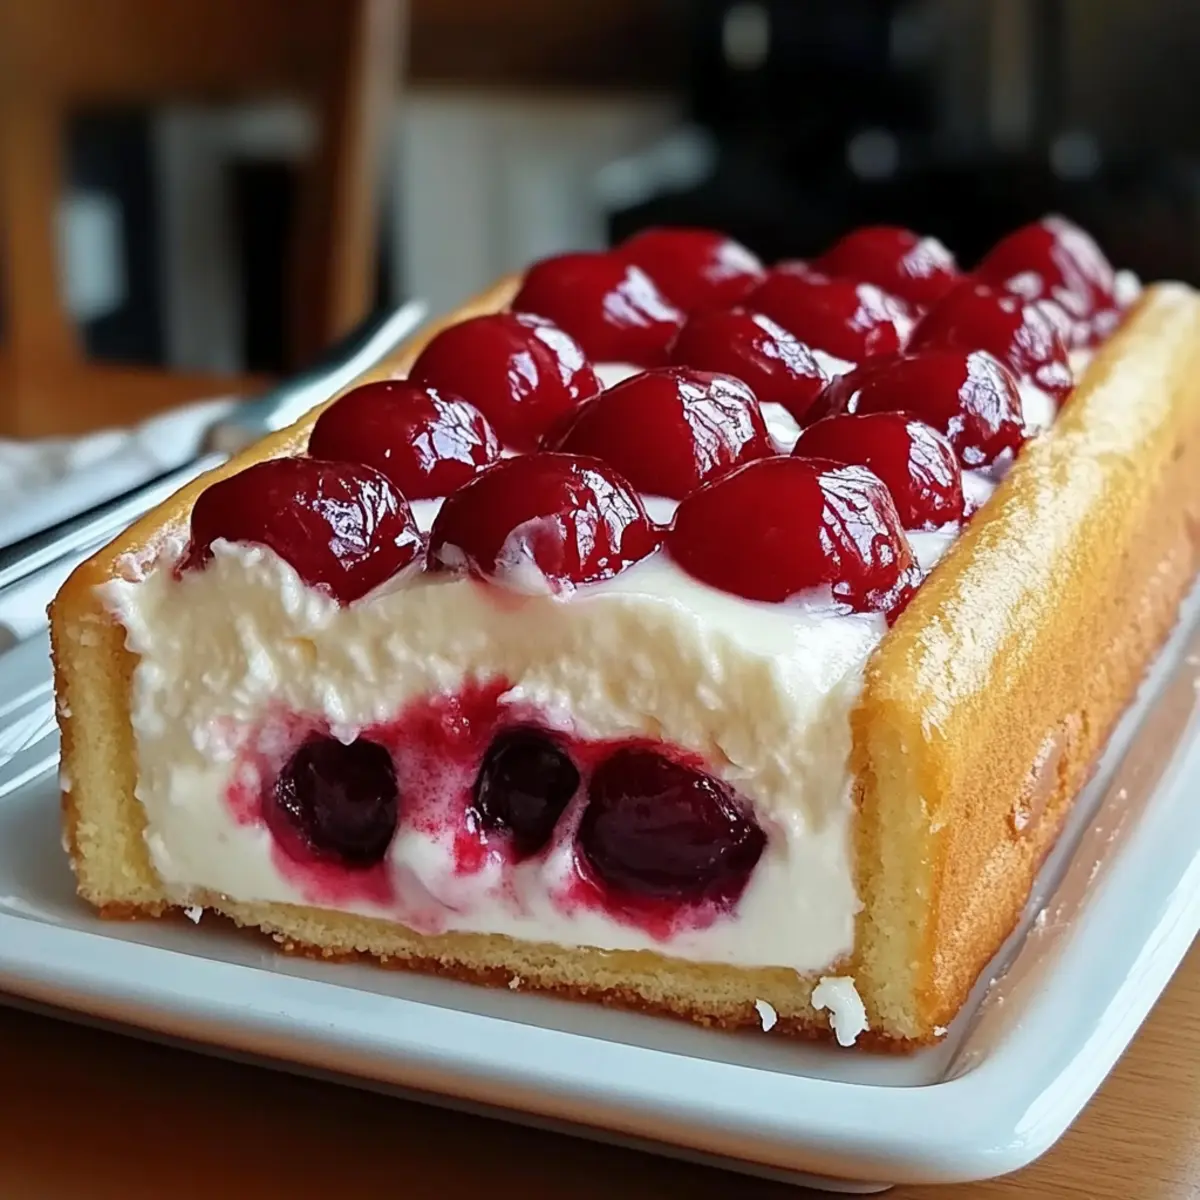
Slice the Twinkies in half lengthwise and layer them neatly in the bottom of your chosen dish, covering the base completely. Press them gently for stability. This first layer of sweetness will serve as the foundation for your cake. Make sure the Twinkies are placed side by side to create a nice, even base.
Step 3: Prepare the Pudding
In a medium bowl, whisk together the instant vanilla pudding mix as per package instructions, usually with cold milk, until smooth and thickened, about 2 minutes. Once the pudding reaches a creamy consistency, take a moment to appreciate its lusciousness before spreading it over the Twinkie layer.
Step 4: Add Cherry Filling
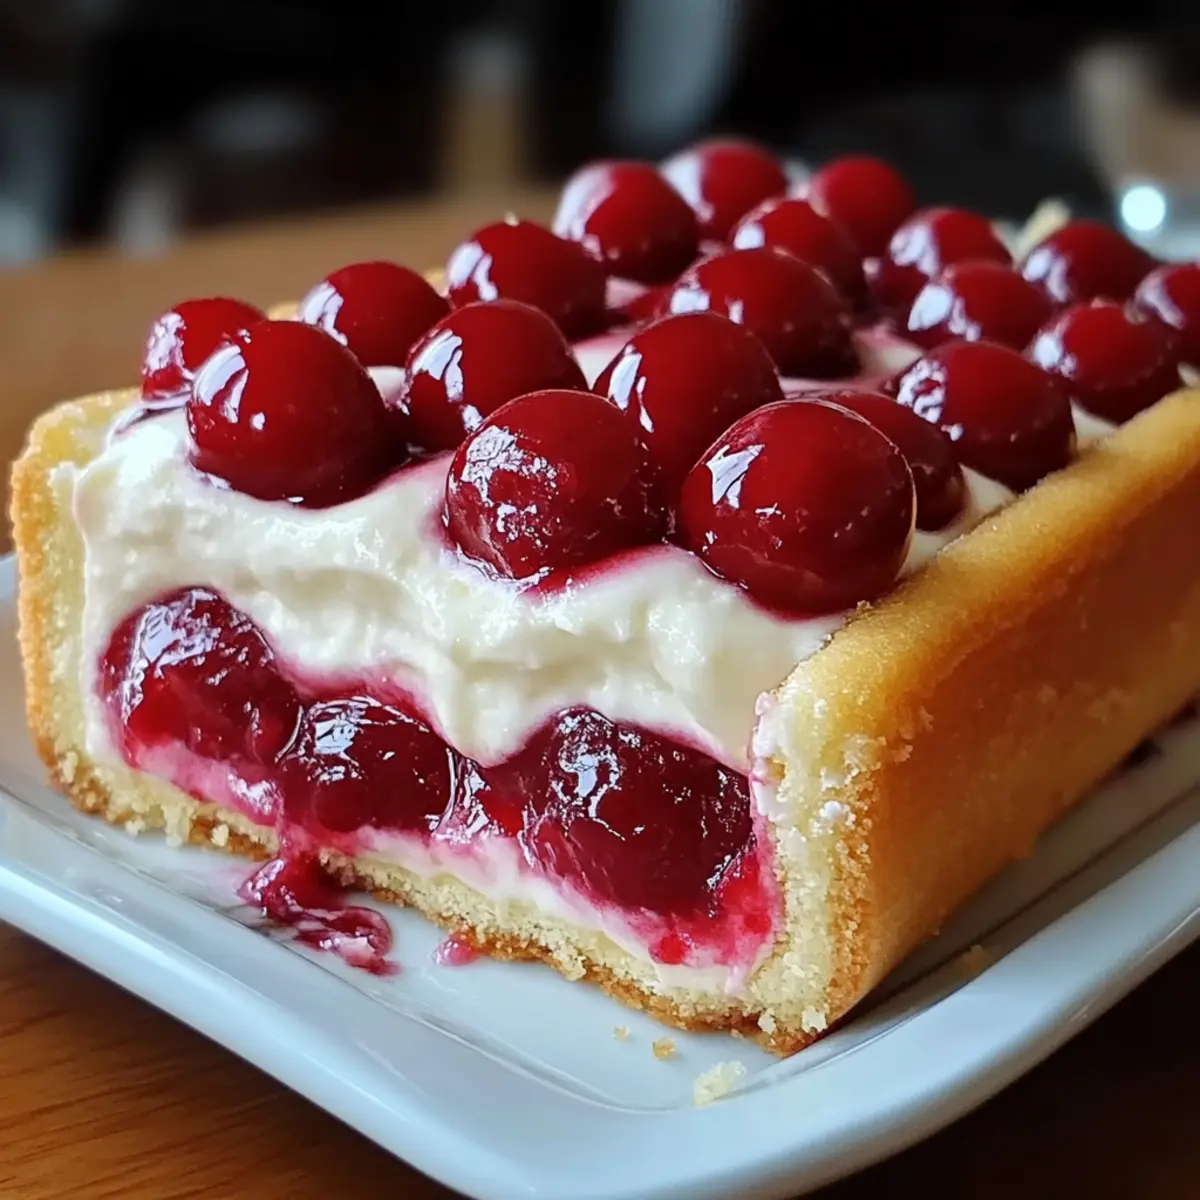
With your pudding layer lovingly spread, it’s time to add brightness! Spoon a generous amount of cherry pie filling over the pudding, ensuring you cover it evenly. The vibrant red filling adds a delightful contrast and delicious tartness that complements the sweet layers below.
Step 5: Repeat the Layers
Continue building your No-Bake Twinkie Pudding Cake by repeating the layers: another round of Twinkies, followed by more vanilla pudding and another scoop of cherry filling. Keep layering until all ingredients are used, making sure the final layer ends with a luscious layer of cherry pie filling for a visually appealing finish.
Step 6: Chill
Cover your assembled dessert tightly with plastic wrap or a lid and refrigerate for at least 4 hours, or overnight if possible. This chilling step is crucial, as it allows the flavors to meld beautifully and the pudding to set, creating that creamy texture you’ll love when slicing into the cake.
Step 7: Serve and Enjoy
When ready to serve your No-Bake Twinkie Pudding Cake, slice into portions with a sharp knife, and consider adding a dollop of whipped cream and fresh berries on top for an extra indulgent touch. Gather around the table to enjoy this simple yet delightful dessert that brings back the joy of childhood!
How to Store and Freeze No-Bake Twinkie Pudding Cake
-
Fridge: Store in the refrigerator, covered tightly with plastic wrap, for up to 3 days. This ensures the No-Bake Twinkie Pudding Cake stays fresh and delicious.
-
Freezer: Although freezing is not recommended for this dessert due to the creamy texture, you can freeze it for up to 2 weeks if necessary. Thaw in the fridge overnight before serving.
-
Serving After Chilling: For the best flavor experience, serve the cake cold right out of the fridge. This also helps maintain its delightful texture.
-
Reheating: Since this is a no-bake dessert, reheating isn’t necessary or recommended, as it’s best enjoyed chilled!
Expert Tips for No-Bake Twinkie Pudding Cake
- Chill Time: Allow the No-Bake Twinkie Pudding Cake to chill overnight for the best texture and flavor integration.
- Layering Technique: Ensure each layer is spread evenly to avoid sogginess and maintain stability when cutting slices.
- Pudding Prep: Whisk the vanilla pudding until fully set before layering; under-mixed pudding can lead to a runny texture.
- Fruit Filling Alternatives: Experiment with pie fillings like peach or mixed berries for a delightful twist on the nostalgic flavor.
- Garnishing Ideas: Top with whipped cream and fresh berries just before serving for an eye-catching presentation that enhances taste.
What to Serve with No-Bake Twinkie Pudding Cake
Enhance your dessert experience with perfectly paired sides that elevate the delightful flavors of your Twinkie creation.
-
Creamy Whipped Cream: A dollop of light whipped cream adds a luxurious touch, softening the dessert’s sweetness while enhancing its richness.
-
Fresh Berries: Serve mixed berries like strawberries, blueberries, or raspberries on the side for a refreshing contrast; their tartness brings balance to the rich pudding cake.
-
Chocolate Ice Cream: A scoop of rich chocolate ice cream beside your cake creates a decadent pairing; the chocolate complements the cake’s flavors beautifully.
-
Nutty Almond Biscotti: Crunchy almond biscotti gives a delightful textural contrast, making it a great option for dipping into the pudding layers.
-
Iced Tea or Lemonade: A glass of refreshing iced tea or zesty lemonade offers a cool, thirst-quenching counterpoint to the sweet and creamy dessert.
-
Chocolate-Covered Strawberries: Elevate your dessert spread by pairing it with chocolate-covered strawberries; their sweet juiciness mirrors the cake’s cherry delight.
-
Mini Fruit Tarts: Serve alongside mini fruit tarts for an elegant touch. Their flaky crust and fresh fruit topping provide an appealing bite that harmonizes well.
Add any of these delightful options to your table, and you’re set for a memorable dessert experience that everyone will love!
No-Bake Twinkie Pudding Cake Variations
Feel free to get creative with your No-Bake Twinkie Pudding Cake and make it your own!
- Sugar-Free: Substitute traditional pudding and pie filling with sugar-free alternatives for a lighter dessert option.
- Fruit Fillings: Try mixing it up with blueberry or strawberry pie filling for added color and flavor. Each fruit brings a new twist!
- Coconut Twist: Incorporate shredded coconut into your pudding or layer it on top for a tropical flavor boost. It adds delightful texture and sweetness.
- Chocolate Pudding: Swap out vanilla pudding for chocolate for a rich, indulgent version that chocolate lovers will adore. It’s a decadent twist that elevates the nostalgic flavor.
- Dairy-Free: Use dairy-free pudding and coconut cream instead of whipped cream for a delicious dairy-free option everyone can enjoy. It maintains the creamy texture while being inclusive.
- Mini Dessert Cups: Assemble individual servings in small cups for a fun party twist! Layer them in glass cups for an attractive presentation that’s perfect for gatherings.
- Nutty Addition: Add chopped nuts like walnuts or pecans between layers for added crunch and flavor depth. It brings a delightful texture contrast!
- Extra Whipped Cream: For lovers of whipped cream, layer extra whipped cream between the pudding and pie filling layers for an indulgent treat. Who can resist that creamy goodness?
By making these easy substitutions and variations, your No-Bake Twinkie Pudding Cake can become a versatile dessert that suits everyone’s taste. Planning a gathering? This nostalgic treat will surely remind you of sweet childhood memories, just like my Strawberry Cheesecake Cookies or the mouthwatering Cookie Butter Cheesecake. Enjoy customizing!
Make Ahead Options
These No-Bake Twinkie Pudding Cakes are perfect for meal prep enthusiasts looking to save time! You can assemble the cake up to 24 hours in advance by following the usual layering method, ensuring you cover it tightly with plastic wrap to maintain freshness. The pudding will stay creamy, and flavors will meld beautifully, making it even more delightful when served. For the best texture, let the cake chill overnight, as this ensures it sets correctly. Just before serving, slice into portions and add a dollop of whipped cream or fresh berries for that extra touch! Enjoy the ease of this dessert while still impressing your guests!
No-Bake Twinkie Pudding Cake Recipe FAQs
How do I choose ripe Twinkies for the cake?
Absolutely! When selecting Twinkies, look for packages with intact seals and a soft texture. Slightly puffed wrappers indicate freshness. Avoid any with dark spots or holes, as these can indicate spoilage.
What’s the best way to store leftovers?
Very! Store any leftover No-Bake Twinkie Pudding Cake in the refrigerator, covered tightly with plastic wrap, for up to 3 days. This keeps the dessert fresh and prevents it from absorbing odors from other foods.
Can I freeze No-Bake Twinkie Pudding Cake?
Yes, but with caution! Although freezing isn’t ideal due to the creamy texture, you can freeze it for up to 2 weeks. To freeze, wrap individual slices in plastic wrap and then place them in an airtight container. Thaw in the fridge overnight before serving.
My pudding layer is too runny; what should I do?
No worries! If your pudding is runny, it might need more whisking or time to set. Make sure to whisk the pudding mix with cold milk for the recommended time—about 2 minutes—until it thickens. If it’s still not firm enough, refrigerate it for an additional 10-15 minutes before layering.
Can I make a version of this dessert that is safe for pets?
Very! While Twinkies are not suitable for pets, you can create a pet-friendly version using a layer of mashed pumpkin or yogurt instead of the pudding, and skip the cherry filling altogether. Just ensure the ingredients you use are safe for your furry friends.
Are there any allergy considerations for this recipe?
Indeed! The No-Bake Twinkie Pudding Cake contains dairy and gluten from both the Twinkies and pudding. For dairy-free options, consider using coconut cream or almond milk for the pudding. Always check for gluten-free Twinkie alternatives or use a sponge cake that fits dietary restrictions.

Delightful No-Bake Twinkie Pudding Cake
Ingredients
Equipment
Method
- Gather all your ingredients to make the No-Bake Twinkie Pudding Cake: Twinkies, instant vanilla pudding mix, and cherry pie filling.
- Slice the Twinkies in half lengthwise and layer them neatly in the bottom of your chosen dish.
- Whisk together the instant vanilla pudding mix and cold milk until smooth and thickened, about 2 minutes.
- Spoon a generous amount of cherry pie filling over the pudding, covering it evenly.
- Continue layering Twinkies, pudding, and cherry filling until all ingredients are used.
- Cover the dessert tightly with plastic wrap and refrigerate for at least 4 hours or overnight.
- Slice the cake and top with whipped cream and fresh berries when ready to serve.
Leave a Reply