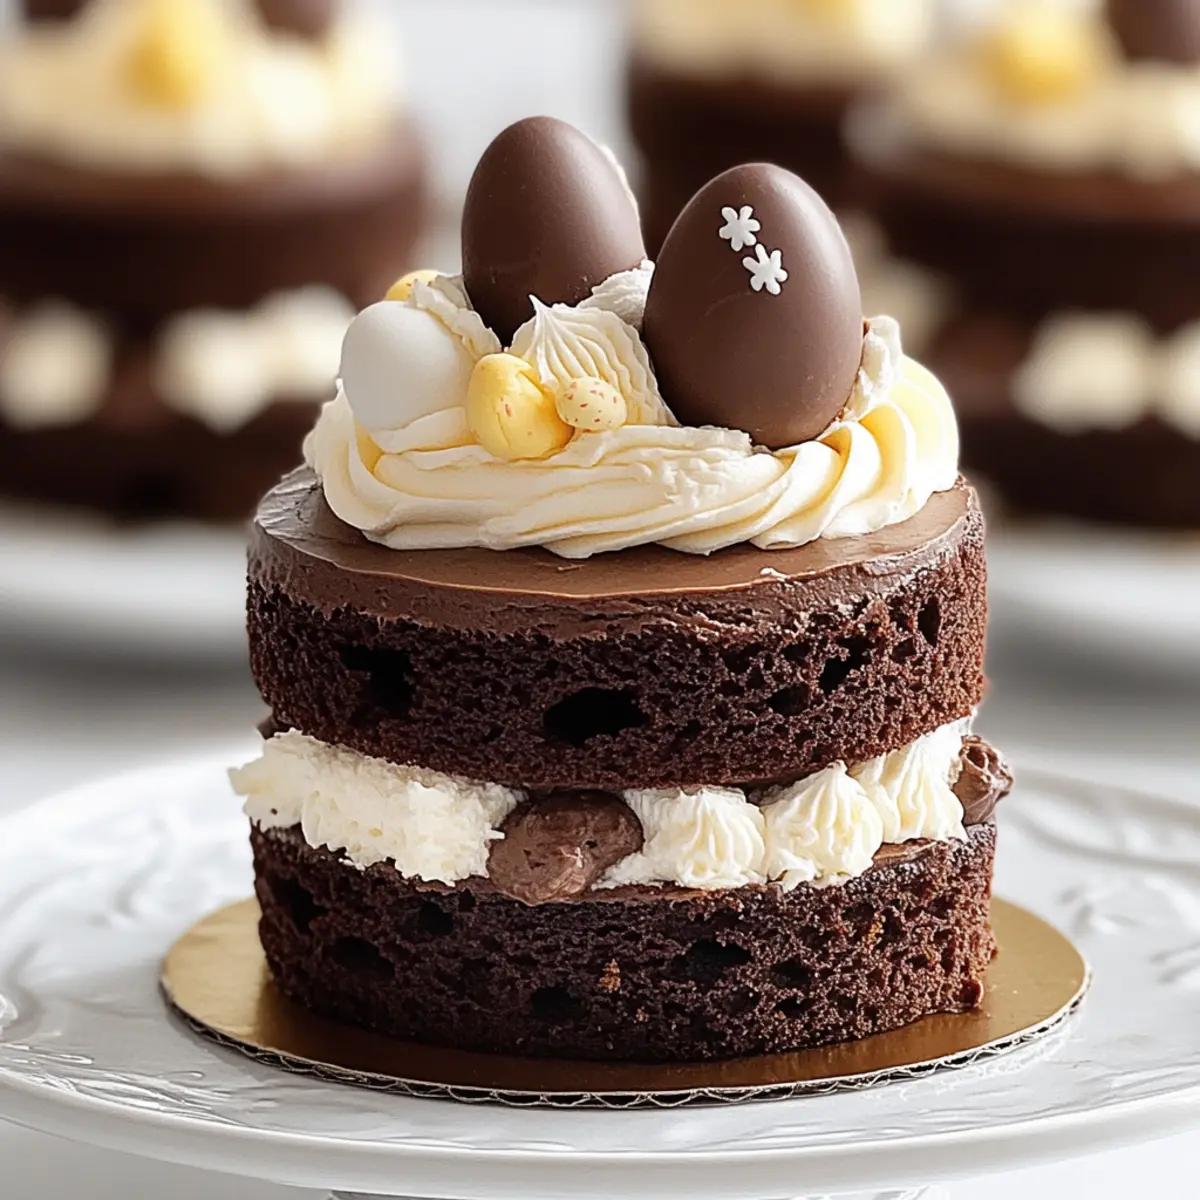
As I stood in my kitchen, surrounded by the vibrant colors of Easter decorations, the idea for Mini Easter Layer Cakes came to life. Each petite cake is a delightful unity of rich chocolate and fluffy buttercream, making them the ideal treat for your festive gatherings. What I love most about this recipe is not only the joy it brings to the table but also its versatility—customizable toppings ensure that each cake is uniquely yours. Plus, they’re quick to whip up, making them a stress-free option amidst the holiday hustle. Are you ready to impress your loved ones with these charming little delights? Let’s dive into the world of sweet creativity!
Why Are Mini Easter Layer Cakes Special?
Unique Presentation: These cakes are adorable and charming miniatures that steal the spotlight at any gathering.
Easy to Customize: With endless topping options, you can cater them to any theme or preference, ensuring each guest feels special.
Quick to Make: From batter to frosting, this recipe is time-saving, allowing you to focus on celebrating rather than stressing.
Decadent Flavor: The rich chocolate cake paired with fluffy buttercream creates a satisfying taste experience that delights everyone, children and adults alike.
Perfect for Sharing: These mini cakes are ideal for gatherings, making it easy for guests to enjoy a bite-sized treat without the mess.
Make this beautiful dessert an addition to your Easter celebrations, or explore more festive ideas with our other delectable Easter dessert recipes.
Mini Easter Layer Cakes Ingredients
For the Cake
- Ghirardelli Sweet Ground Chocolate and Cocoa – Provides a rich chocolate flavor; regular cocoa can substitute, but add an extra 1/4 cup of sugar.
- Flour – Offers structure to the cake; all-purpose flour is recommended for best results.
- Granulated Sugar – Adds sweetness and moisture; you can adjust the amount based on personal taste.
- Baking Soda – Acts as a leavening agent for a fluffy texture.
- Cream of Tartar – Stabilizes egg whites if used; contributes to the cake’s overall texture.
- Salt (optional) – Enhances flavor; adjust according to your preference.
- Buttermilk – Adds moisture and a tangy flavor; regular milk can substitute with a splash of vinegar.
- Butter (softened) – Provides richness and moisture; margarine can be used as a substitute if needed.
- Eggs – Bind the ingredients and contribute to the cake’s structure; ensure they’re at room temperature for better mixing.
- Vanilla Extract – Enhances the flavor; almond extract can be swapped for a unique taste.
For the Frosting
- Shortening – Contributes to the frosting’s texture; can substitute with all butter for a richer flavor.
- Butter – Adds creaminess and flavor to the frosting.
- Vanilla Extract – Enhances the flavor profile of the frosting.
- Confectioners’ Sugar – Sweetens and thickens the frosting; sift for a smoother texture.
- Milk – Adjusts the frosting’s consistency; cream can be used for a richer taste.
These delightful Mini Easter Layer Cakes will be a beautiful addition to your festive celebrations, inviting smiles and sweet moments around the table!
Step‑by‑Step Instructions for Mini Easter Layer Cakes
Step 1: Preheat the Oven
Begin by preheating your oven to 350°F (175°C). While the oven heats, prepare two round cake pans by greasing them and lining the bottoms with wax paper. This will ensure the cakes release easily after baking, so get those pans ready for the delightful Mini Easter Layer Cakes you’re about to create!
Step 2: Mix the Cake Batter
In a large mixing bowl, combine the all-purpose flour, Ghirardelli Sweet Ground Chocolate and Cocoa, granulated sugar, baking soda, cream of tartar, and optional salt. Mix these dry ingredients thoroughly. Then, add the buttermilk and softened butter, mixing on medium speed for about 2 minutes until smooth. Incorporate the remaining buttermilk, eggs, and vanilla extract, blending until you achieve a velvety batter.
Step 3: Bake the Cakes
Once your batter is ready, evenly divide it between the prepared cake pans. Place them in your preheated oven and bake for 30 to 45 minutes. Check for doneness by inserting a toothpick into the center of the cakes; it should come out clean. Once done, cool the cakes in the pans for 10-15 minutes before carefully transferring them to wire racks to cool completely.
Step 4: Prepare the Buttercream Frosting
While the cakes are cooling, it’s time to make the creamy buttercream frosting! In a large bowl, beat together softened butter, shortening, and vanilla extract until light and fluffy. Gradually add in the confectioners’ sugar, mixing thoroughly. If the frosting is too dense, add a splash of milk to reach your desired consistency, ensuring it’s perfect for spreading between the layers and to frost the outer layer.
Step 5: Assemble and Decorate
Once the cakes have cooled completely, it’s time to create your Mini Easter Layer Cakes! Use a sharp cookie cutter to cut out mini layers from each cake. Layer them by placing a dollop of buttercream frosting between each layer. Once stacked, frost the outer layer generously and feel free to add colorful Easter sprinkles or other festive decorations to customize and enhance your charming treats for the festive occasion.
Mini Easter Layer Cakes Flavor Variations
Feel free to unleash your culinary creativity by customizing these delightful Mini Easter Layer Cakes to suit your tastes and make them truly special!
- Vanilla Swap: Replace the chocolate base with a fluffy vanilla cake for a light and airy alternative that still shines at your gathering.
- Berry Boost: Top each layer with fresh berries, adding a burst of color and freshness that contrasts beautifully with the rich frosting.
- Cupcake Conversion: Transform your mini layer cakes into cupcakes by adjusting the baking time to just 20-25 minutes for a fun, portable treat.
- Nutty Addition: Fold in chopped nuts into the batter for added crunch and a nutty flavor that pairs beautifully with the chocolate.
- Gluten-Free Option: Substitute all-purpose flour with a gluten-free flour blend to cater to gluten-sensitive guests without compromising on taste.
- Citrus Zest: Add a hint of lemon or orange zest to the frosting for a refreshing twist that brightens each decadent bite.
- Spicy Kick: Blend a pinch of cinnamon or cayenne pepper into your cake batter for a surprising warmth that enhances the chocolate flavor.
- Dairy-Free Version: Use almond or coconut milk and a dairy-free butter substitute for an entirely dairy-free variation without sacrificing richness.
Tickle your taste buds with these delightful twists, and if you’re looking for further inspiration, don’t forget to explore our other festive Easter dessert recipes for more sweet ideas!
What to Serve with Mini Easter Layer Cakes?
Elevate your Easter gathering or brunch with delightful pairings that accentuate the charm of these sweet treats!
- Fresh Berries: Juicy strawberries, raspberries, or blueberries add a vibrant, refreshing touch that balances the richness of the cakes.
- Vanilla Ice Cream: The creamy sweetness of vanilla ice cream complements the chocolate layers, creating a delicious contrast in texture.
- Coffee: A warm cup of rich coffee enhances the chocolate flavors, making each bite of cake feel indulgent and cozy.
- Whipped Cream: Light and airy whipped cream provides a lovely contrast to the dense mini cakes while enhancing the overall sweetness.
- Mint Sprigs: Adding a few fresh mint leaves brings a cool, herbal note that cuts through the richness, enhancing the cake experience.
- Chocolate Sauce: Drizzling warm chocolate sauce over the layer cakes lends an extra touch of decadence that chocolate lovers can’t resist.
- Homemade Lemonade: A zesty, refreshing lemonade is perfect for cleansing the palate, adding a bright twist alongside the sweet cakes.
- Carrot Sticks with Dips: For a savory element, crunchy carrot sticks with a delicious dip provide a nice counterpoint to the dessert’s sweetness.
- Pineapple Coconut Smoothie: This tropical drink introduces brightness and a light texture that pairs beautifully with the chocolatey mini cakes.
- Easter-themed Cocktails: Create festive cocktails with pastel colors and fruity flavors to celebrate the occasion in style—perfect for adult gatherings!
Make Ahead Options
These Mini Easter Layer Cakes are perfect for meal prep enthusiasts who want a stress-free festive treat! You can bake the cake layers up to 2 days in advance. Simply let them cool completely, wrap them tightly in plastic wrap, and refrigerate to maintain their moisture and flavor. The buttercream frosting can also be prepared ahead of time and stored in the refrigerator for up to 3 days; just bring it to room temperature and give it a quick whip before frosting the cakes. When you’re ready to assemble, cut the layers and frost them before serving for delightful, easy-to-make treats that will impress your guests with minimal last-minute effort.
How to Store and Freeze Mini Easter Layer Cakes
Fridge: Store finished cakes in an airtight container for up to 3 days; allow them to reach room temperature before serving for the best taste.
Freezer: If you want to keep them longer, wrap individual cakes tightly in plastic wrap and then in foil; they can be frozen for up to 2 months.
Thawing: To enjoy frozen Mini Easter Layer Cakes, transfer to the fridge to thaw overnight before serving, allowing the flavors to revive beautifully.
Reheating: If desired, you can warm them gently in the microwave for about 10-15 seconds; just be careful not to overheat and dry them out!
Expert Tips for Mini Easter Layer Cakes
Uniform Layers: Ensure even mini cakes by using a sharp cookie cutter or a serrated knife to slice the layers smoothly.
Chill for Smooth Frosting: If the cakes feel soft, refrigerate for about 30 minutes before frosting to achieve a neater finish.
Professional Touch: Use an offset spatula or piping bag for beautiful frosting application; it elevates the overall presentation of your Mini Easter Layer Cakes.
Make Ahead: Consider baking the cake layers up to two days in advance. Store them wrapped tightly in plastic for freshness and then frost just before serving.
Texture Control: To prevent dry cakes, carefully monitor baking time and avoid opening the oven door too early; use a toothpick for doneness.
Customization Options: Don’t hesitate to experiment with flavorings in the frosting, like almond or lemon extract, to create your unique twist on these festive treats.
Mini Easter Layer Cakes Recipe FAQs
How do I choose ripe ingredients for Mini Easter Layer Cakes?
Absolutely! When selecting your ingredients, ensure your eggs are fresh and at room temperature, which helps them mix easily into the batter. For buttermilk, check the expiration date and ensure it feels thick and creamy. Also, look for darker, richer cocoa like Ghirardelli Sweet Ground Chocolate, as it enhances the cake’s flavor more than regular cocoa.
What is the best way to store Mini Easter Layer Cakes?
Very good question! Store your finished Mini Easter Layer Cakes in an airtight container in the fridge for up to 3 days. To keep them fresh, allow them to reach room temperature before serving, as this will enhance their rich chocolate flavor and soft texture.
Can I freeze Mini Easter Layer Cakes?
Absolutely! To freeze, wrap each mini cake tightly in plastic wrap, then in aluminum foil to prevent freezer burn. They can be stored in the freezer for up to 2 months. When you’re ready to enjoy them, simply transfer the cakes to the fridge to thaw overnight, allowing their flavors to regain their full potential.
I encountered problems with the frosting not holding its shape. What can I do?
Very common issue! If your frosting is too soft and won’t hold its shape, this could be due to too much milk or not enough confectioners’ sugar. To fix it, add more sifted confectioners’ sugar gradually, mixing well until the desired consistency is achieved. Ideally, your frosting should be light and fluffy—perfect for decorating without running.
Are Mini Easter Layer Cakes suitable for people with allergies?
That’s a thoughtful consideration! These cakes contain gluten (from flour), dairy (from butter and buttermilk), and eggs. For gluten-free variations, you can replace all-purpose flour with gluten-free flour blends. For a dairy-free option, use non-dairy milk and butter replacements. Always be sure to check labels for allergens or cross-contamination risks!
How do I add a personal touch to my Mini Easter Layer Cakes?
If you’re looking to get creative, the options are endless! Consider incorporating fresh fruit, such as berries for a burst of color and flavor, or drizzle with a chocolate ganache for a decadent twist. You may also want to personalize the toppings with seasonal decorations—such as edible flower petals or themed sprinkles—ensuring every cake feels uniquely festive for your celebration.
Mini Easter Layer Cakes That Will Wow Your Guests
Ingredients
Equipment
Method
- Preheat your oven to 350°F (175°C) and grease two round cake pans, lining the bottoms with wax paper.
- In a large mixing bowl, combine the all-purpose flour, Ghirardelli Sweet Ground Chocolate and Cocoa, granulated sugar, baking soda, cream of tartar, and optional salt. Mix thoroughly.
- Add buttermilk and softened butter, mixing on medium speed for about 2 minutes until smooth. Incorporate the eggs and vanilla extract.
- Evenly divide the batter between the prepared cake pans and bake for 30 to 45 minutes. Cool the cakes in the pans for 10-15 minutes before transferring to wire racks.
- Beat together softened butter, shortening, and vanilla extract until fluffy. Gradually add confectioners' sugar and mix well.
- If the frosting is too dense, add a splash of milk to reach your desired consistency.
- Cut out mini layers from each cake using a cookie cutter. Layer them with buttercream and frost the outer layer. Decorate as desired.
Leave a Reply