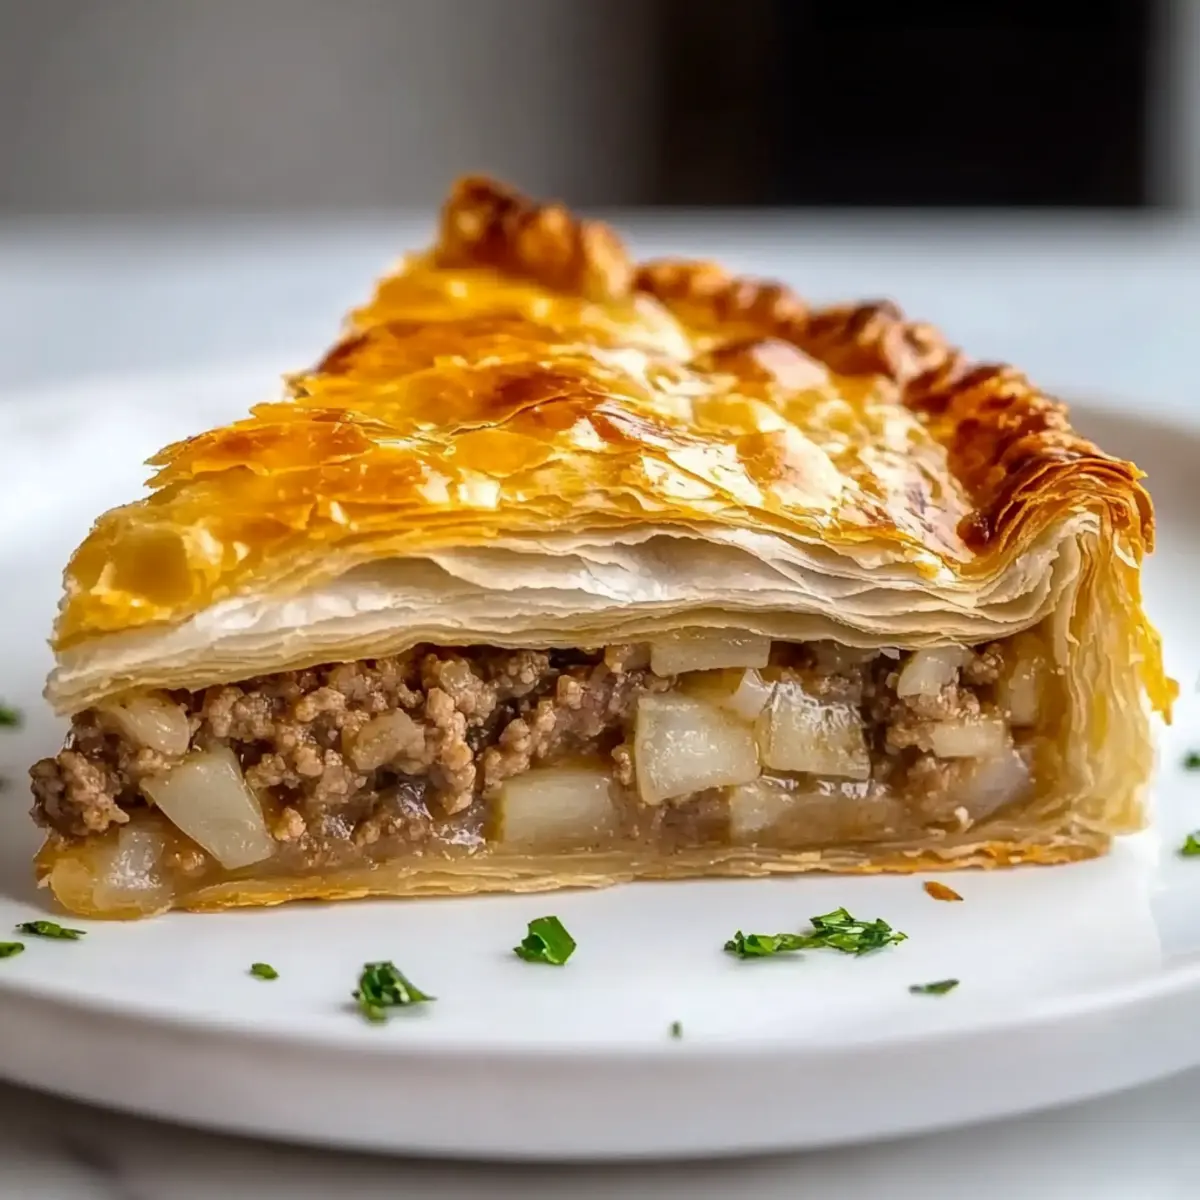
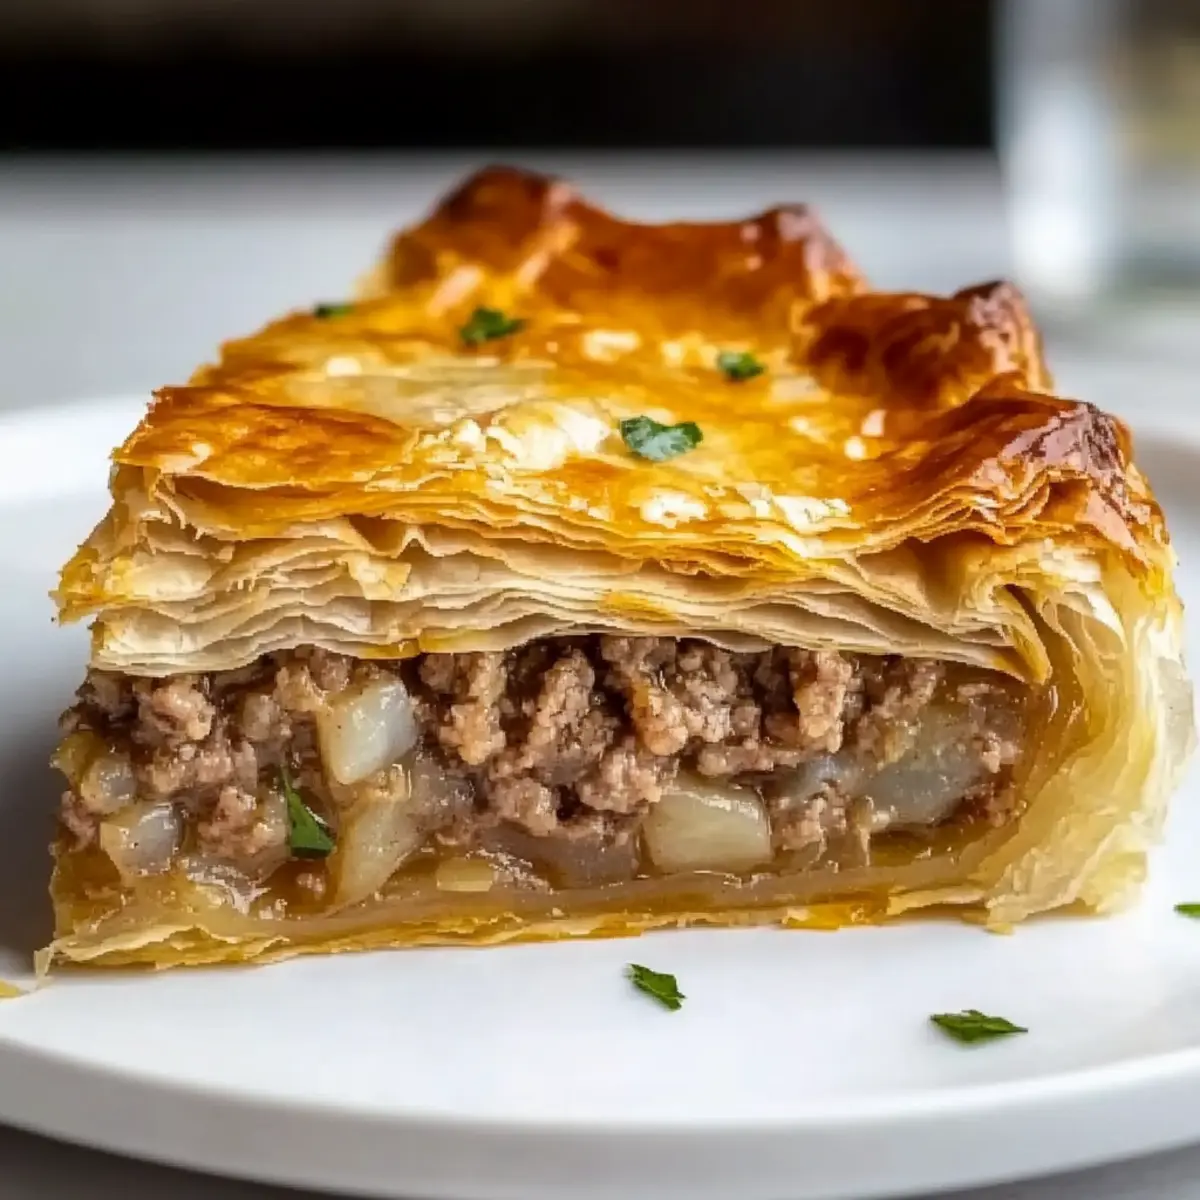
As I rolled out the delicate sheets of phyllo, the kitchen filled with the promise of a delicious feast. This Kreatopita recipe, a savory Greek meat pie, is my secret weapon for cozy weeknight dinners or gatherings where I want to impress my guests with something truly special. With its flaky, golden layers and a hearty filling of seasoned ground beef and rice, this dish doesn’t just comfort the soul—it also feeds the heart with Mediterranean charm. It’s surprisingly quick to prepare and a fantastic way to turn an ordinary meal into a sumptuous occasion. So, are you ready to dive into the rich flavors of Greece and create a dish that is sure to become a family favorite?

Why is Kreatopita a must-try dish?
Comforting, Flavorful Experience: This Kreatopita recipe delivers authentic Greek flavors that warm the heart and soul.
Variations for Everyone: Whether you’re a fan of ground beef or experimenting with ground turkey, this dish can easily adapt to your taste preferences!
Quick to Prepare: With simple steps and minimal prep time, you’ll be able to whip this up for a weeknight dinner or special occasion without breaking a sweat.
Crowd-Pleasing Aroma: As it bakes, the delightful scent will entice family and friends, making it a showstopper at any gathering.
Perfect Pairings: Serve it alongside a fresh Greek salad or homemade tzatziki for a truly delightful meal!
Make sure to check out my tips on serving this dish with warm pita bread or something similar for a complete Mediterranean experience!
Kreatopita Recipe Ingredients
For the Filling
- Phyllo Dough – Essential for those flaky, crispy layers that define the pie; store-bought works perfectly while keeping it wrapped to avoid drying.
- Ground Beef – Provides the primary flavor base; feel free to substitute with ground lamb for an authentic twist or even pork.
- Onion – Adds aromatic sweetness; shallots or leeks can be great alternatives if desired.
- Rice – Acts as a filler to absorb flavors; brown rice or quinoa can be substituted, but remember to pre-cook brown rice for tenderness.
- Tomato Sauce – Delivers moisture and umami richness; crushed tomatoes or tomato paste can be a thicker alternative.
- Oregano – Offers herbal brightness to elevate your dish; Italian seasoning works as a suitable substitute.
- Salt and Pepper – Enhances overall flavors; adjust according to your preference.
For Assembly
- Butter or Oil – Use for brushing between phyllo layers, ensuring that each sheet achieves that golden crispiness.
Let the magic of this Kreatopita recipe unfold as you gather your ingredients and prepare to embark on a delicious culinary journey!
Step‑by‑Step Instructions for Kreatopita Recipe
Step 1: Sauté Onions
In a large skillet, heat a drizzle of oil over medium heat. Add finely chopped onion and cook, stirring frequently, until the onions turn soft and translucent, about 5 minutes. You’ll know they’re ready when they are fragrant and slightly golden, setting a delicious foundation for your Kreatopita filling.
Step 2: Cook Beef
Next, add the ground beef to the skillet, breaking it apart with a wooden spoon. Cook for about 6-8 minutes, stirring occasionally, until the meat is well browned and no longer pink. This browning step is crucial for developing rich flavors that will enhance your meat pie.
Step 3: Combine Filling
Stir in the rice, tomato sauce, oregano, salt, and pepper into the beef mixture. Add a splash of water to keep the filling moist, then reduce the heat to low and let it simmer uncovered for about 10 minutes. The mixture should thicken slightly, and the rice will absorb the wonderful flavors, creating a hearty filling for your Kreatopita.
Step 4: Prep Phyllo Layers
While the filling simmers, preheat your oven to 180°C (350°F). In a buttered baking dish, layer 5 sheets of phyllo dough, brushing each with melted butter to ensure a crispy texture. This step is vital for achieving that delightful flakiness that characterizes your Kreatopita.
Step 5: Assemble Pie
Spread the beef and rice mixture evenly over the first layer of phyllo. Carefully layer the remaining 5 sheets on top, again brushing each with butter. This will create a luscious top crust, sealing in the delicious filling and adding to the overall flaky texture of the pie.
Step 6: Bake
Place the baking dish in the preheated oven and bake for 40-45 minutes, or until the top is golden and crisp. Keep an eye on it; you want a beautiful, inviting color that tells you your Kreatopita is fully cooked and ready to delight your taste buds.
Step 7: Cool and Slice
Once baked, remove the pie from the oven and let it cool for about 10 minutes before slicing. This resting time allows the layers to set a bit, making it easier to serve. As it cools, the tempting aroma of the Kreatopita will infuse your kitchen, inviting everyone to gather around the table!

Storage Tips for Kreatopita Recipe
-
Fridge: Store leftover Kreatopita in an airtight container for up to 3 days. This keeps it fresh and ready for delicious reheating!
-
Freezer: Wrap individual slices in plastic wrap and place in a freezer-safe bag for up to 2 months. This way, you can enjoy a taste of Greece whenever you like.
-
Reheating: To restore the crispness, reheat the frozen slices in the oven at 180°C (350°F) for about 20-25 minutes, or until heated through and golden on top.
-
Thawing: For best results, thaw the frozen slices in the refrigerator overnight before reheating. This will help maintain the texture of your delightful Kreatopita!
Kreatopita Recipe Variations
Embrace the opportunity to personalize your Kreatopita and make it your own with these delightful variations!
-
Lean Meat: Substitute ground turkey for a lighter filling. This maintains a delicious flavor while reducing fat content, perfect for those watching their calories.
-
Vegetarian Delight: Go meat-free by using hearty vegetables like spinach or mushrooms instead of meat. This twist not only enhances the flavor but also adds a touch of vibrant color!
-
Quinoa Alternative: Swap rice for quinoa for a nutrient-packed filling. This gluten-free option is rich in protein and adds a lovely nutty flavor to the pie.
-
Herb Infusion: Boost flavor with fresh herbs! Add parsley, dill, or basil to the filling for a fragrant, garden-fresh taste. A little herb magic can elevate your dish to new heights.
-
Mini Kreatopitas: For a fun twist, make mini versions of the pie by using muffin tins. Each tiny pie is perfect for parties or lunchboxes!
-
Spicy Kick: Add a pinch of cayenne pepper or red pepper flakes to the filling for an unexpected heat that plays beautifully with the savory meat and rice.
-
Cheesy Touch: Incorporate some feta cheese into the filling for a creamy, salty element that complements the savory beef perfectly. It’s like having a taste of Greece in every bite!
-
Tomato Upgrade: Instead of plain tomato sauce, use roasted red pepper sauce for a richer, smokier flavor that takes your Kreatopita to another level.
For more culinary inspiration, consider pairing this lovely dish with a refreshing Greek salad or a deliciously creamy tzatziki to complete your meal!
Expert Tips for Kreatopita Recipe
-
Keep Phyllo Moist: Cover unused phyllo sheets with a damp towel to prevent them from drying out while you work on the pie assembly.
-
Avoid Soggy Filling: Ensure the filling isn’t overly wet. If it seems too liquidy, simmer a bit longer to allow excess moisture to evaporate.
-
Brown the Beef: Don’t rush the browning process! Giving the beef enough time to brown adds depth of flavor to your Kreatopita.
-
Layer with Love: When layering phyllo, use plenty of butter between sheets; this ensures a beautifully flaky and crispy outcome that impresses!
-
Rest Before Serving: Let the baked pie cool for about 10 minutes before slicing. This resting time helps the layers set, making serving easier.
-
Experiment with Fillings: Feel free to get creative! Adding spinach or zucchini not only boosts nutrition but also adds a fresh twist to your Kreatopita recipe.
What to Serve with Kreatopita Recipe
Imagine a cozy gathering where delightful flavors harmonize beautifully, elevating your Kreatopita experience.
- Crisp Greek Salad: A refreshing combo of cucumbers, tomatoes, and olives provides a bright contrast to the rich meat pie.
- Creamy Tzatziki: This cooling yogurt dip infused with fresh cucumbers and garlic pairs wonderfully with each slice, boosting flavor!
- Warm Pita Bread: Soft, fluffy pita adds a lovely texture; perfect for scooping up any leftover filling or tzatziki.
- Roasted Vegetables: Sweet caramelized veggies like bell peppers and zucchini complement the savory pie’s flavors while adding vibrant color.
- Savory Rice Pilaf: A fragrant rice side with herbs encourages a full Mediterranean experience, balancing the richness of the Kreatopita.
- Red Wine: A glass of smooth Merlot or a bold Chianti elevates the meal, pairing seamlessly with the hearty flavors of the meat pie.
- Mini Baklava: For dessert, these sweet, nutty pastries provide a delightful end to your meal, embracing the delicious essence of Greece.
Make Ahead Options
These Kreatopita are perfect for meal prep enthusiasts! You can prepare the filling (ground beef and rice mixture) up to 3 days in advance and refrigerate it in an airtight container to maintain quality. Also, feel free to layer the phyllo dough in your baking dish, cover it with plastic wrap, and keep it in the fridge for 24 hours. When ready to bake, simply combine the prepared filling with the layered phyllo sheets and brush on the necessary butter before baking. This makes for an effortless dinner experience without sacrificing flavor; your Kreatopita will turn out just as delicious as if made fresh!
Kreatopita Recipe FAQs
What type of phyllo dough is best to use?
Using high-quality store-bought phyllo dough is the easiest option for this Kreatopita recipe. Look for a brand that’s fresh and pliable; it should be well-wrapped to prevent drying out. If you can find it, whole wheat phyllo is a nutritious alternative, adding an earthy flavor to the crust!
How long does leftover Kreatopita last in the refrigerator?
Leftovers can be stored in an airtight container in the refrigerator for up to 3 days. To maintain its delightful texture, I recommend reheating it in the oven so that it regains its crispiness.
Can I freeze leftovers of the Kreatopita?
Absolutely! You can freeze individual slices wrapped in plastic wrap and stored in a freezer-safe bag for up to 2 months. When you’re ready to enjoy, simply thaw them in the refrigerator overnight for best results. To reheat, pop the slices back in the oven at 180°C (350°F) for 20-25 minutes until heated through and crispy.
What should I do if my filling seems too wet?
If your filling appears too liquidy, don’t worry! Just allow it to simmer a little longer—adding 5 to 10 more minutes of simmering over low heat should help evaporate excess moisture. You want a thick, hearty filling that holds together beautifully when you slice into your Kreatopita.
Are there any dietary considerations for this recipe?
Yes, for those who need to be cautious about allergies, ensure that the phyllo dough you choose is free from allergens like nuts or soy. As for pets, take care that none of your Kreatopita filling contains any ingredients harmful to them, like onions or excessive salt.
Can I use other proteins or add vegetables to my Kreatopita?
Very much so! Feel free to substitute ground beef with ground turkey or lamb according to your preference. Adding finely chopped vegetables like spinach or zucchini can also enhance nutrition and flavor. Just remember, if you’re adding moisture-rich ingredients, try to balance it with your filling so it doesn’t get too wet!
Kreatopita Recipe: Irresistible Greek Meat Pie Delight
Ingredients
Equipment
Method
- Sauté Onions: In a large skillet, heat oil over medium heat. Add chopped onion and cook until soft and translucent, about 5 minutes.
- Cook Beef: Add ground beef, breaking it apart. Cook for 6-8 minutes until browned and no longer pink.
- Combine Filling: Stir rice, tomato sauce, oregano, salt, and pepper into the beef mixture. Add a splash of water and let simmer for 10 minutes.
- Prep Phyllo Layers: Preheat oven to 180°C (350°F). Layer 5 sheets of phyllo in a buttered baking dish, brushing each with melted butter.
- Assemble Pie: Spread the beef and rice mixture over the first layer of phyllo. Top with 5 more layers of phyllo, brushing each with butter.
- Bake: Bake for 40-45 minutes until the top is golden and crisp.
- Cool and Slice: Let the pie cool for 10 minutes before slicing.
Leave a Reply