As I stood in my kitchen, the warm, inviting scent of freshly made bread filled the air, instantly transporting me to the bustling streets of Southeast Asia. Let me take you on a delightful culinary journey with my Flaky Roti Canai Recipe, an irresistible layered flatbread perfect for accompanying rich curries or savoring on its own. This recipe elegantly marries tradition and modernity, bringing the age-old technique of creating flaky, fluffy layers right to your home. Not only is it a wonderful dish to share with family and friends, but it’s also surprisingly easy to make, transforming your cooking routine into a satisfying experience. With flexible variations like egg roti or sweet cinnamon roti, you’ll want to explore every delicious possibility. So, are you ready to roll up your sleeves and create a masterpiece that will have everyone asking for seconds?
Why is Flaky Roti Canai a Must-Try?
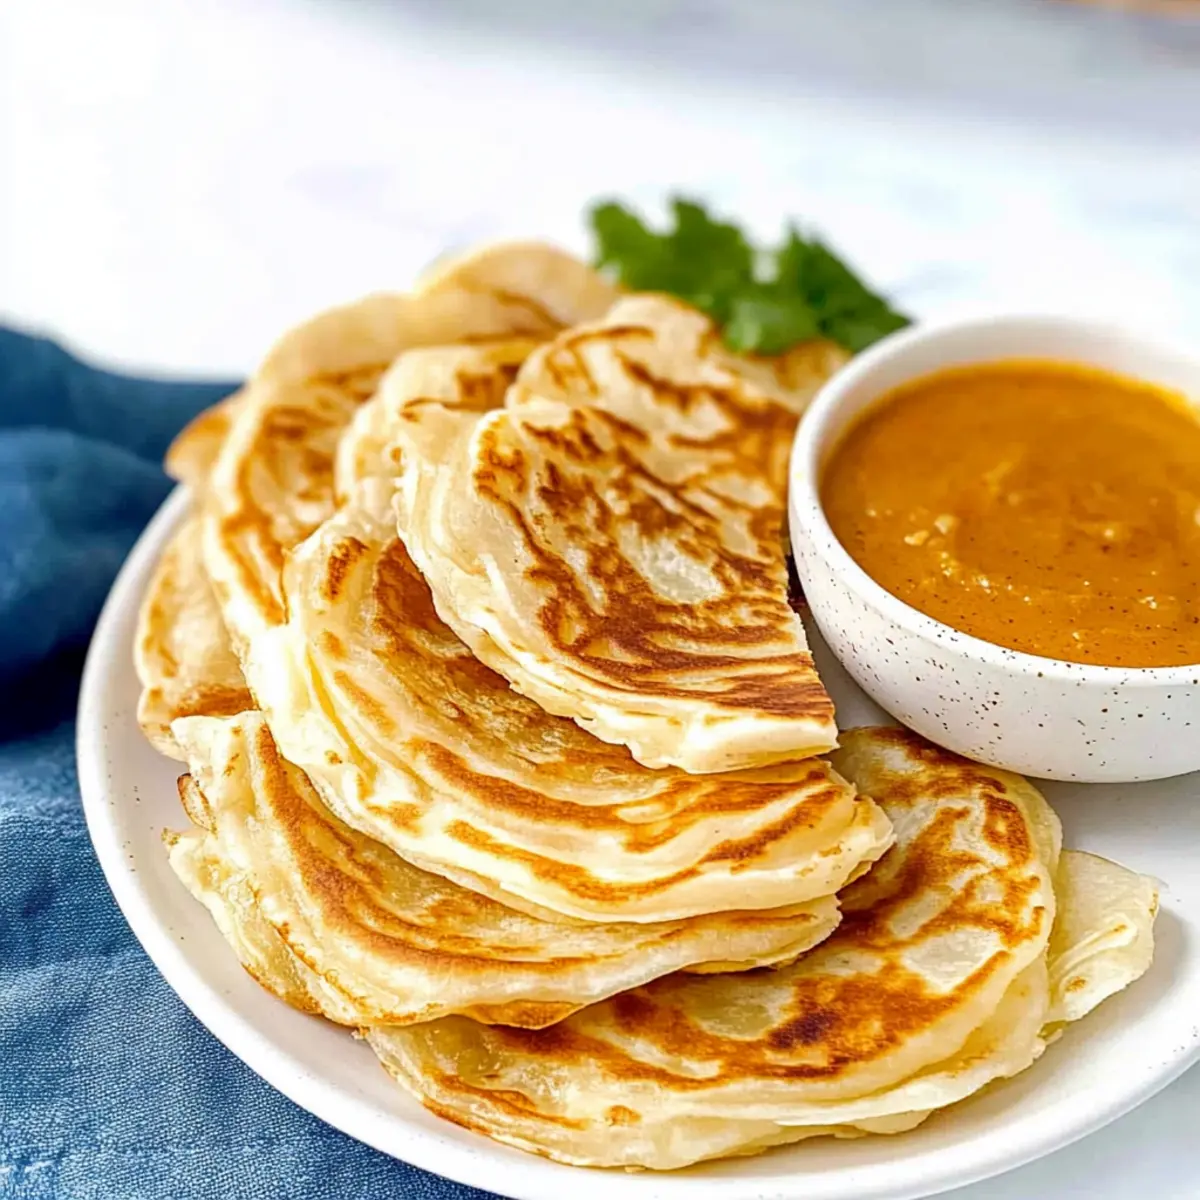
Unparalleled Layers: The true magic of Flaky Roti Canai lies in its mesmerizing layers, offering a delightful crunch and soft interior that makes every bite a joy.
Versatility Galore: Enjoy it with a rich curry or switch it up with a sweet cinnamon filling for breakfast—this recipe can do it all! Pair it with your favorite Beef Taco Soup for a culinary twist.
Cultural Experience: Each bite of this classic South Asian flatbread transports you to the vibrant streets of Malaysia and Singapore, providing a taste of tradition at home.
Time-Saving Delight: Prepare large batches and freeze for quick meals during busy days; simply thaw and cook whenever your cravings strike.
Simplicity in Technique: With just a few steps, you can master this intermediate-level recipe that will impress friends and family, just like the ones who gather for Pumpkin Pie Flaky during holidays!
Crowd-Pleaser: Whether you’re hosting a dinner or enjoying a casual snack, this flaky wonder is sure to wow your guests and leave them asking for your secrets!
Flaky Roti Canai Ingredients
• For the Dough
- All Purpose Flour – The base structure for the roti; for best results, weigh your flour accurately.
- Sea Salt – Enhances the flavor and improves dough performance; kosher salt works in a pinch.
- Boiling Water – Essential for hydrating the flour; swap with hot water for easier handling.
- Room Temperature Water – Adjusts the dough’s consistency; add gradually to reach the desired texture.
- Oil – Used for coating and layering; ghee or butter can enhance the flavor of your flaky roti canai.
• For Cooking
- Additional Oil – Needed for frying the roti; use a high smoke point oil to ensure a crispy finish.
With these simple yet essential ingredients, you’ll be well on your way to making a delicious Flaky Roti Canai that perfects those crispy layers right at home!
Step‑by‑Step Instructions for Flaky Roti Canai Recipe
Step 1: Dough Preparation
In a large mixing bowl, combine the all-purpose flour and sea salt. Gradually pour in the boiling water while stirring with a wooden spoon; continue until clumps begin to form. Next, add room temperature water a little at a time, mixing until you’ve created a scraggly dough. This dough is essential for achieving the perfect flaky Roti Canai.
Step 2: Resting Dough
Once your dough has come together, cover the bowl with a clean kitchen towel or plastic wrap. Allow the dough to rest for 30 minutes to 1 hour. This resting period is crucial as it helps the gluten develop, resulting in a softer texture that will create those wonderful layers in your Flaky Roti Canai.
Step 3: Kneading
After resting, turn the dough out onto a lightly floured surface. Knead the dough for about 2-3 minutes, until it becomes smooth and elastic. Next, divide the kneaded dough into 8 equal portions and shape each into a ball. This step establishes a good foundation for your flaky layers when you start shaping the roti.
Step 4: Coating and Resting
Roll each dough ball in a light coating of oil to prevent sticking, then place them on a plate, making sure there’s enough space between each ball. Cover them again with a towel and let them rest for at least 2 hours or up to 12 hours in the refrigerator. This lengthy resting allows the dough to relax, making it easier to stretch and shape into the perfect Roti Canai.
Step 5: Shaping
When ready to shape, take one dough ball and flatten it using your palms or a rolling pin. Gently stretch it out thinly, ensuring it’s even. Brush a thin layer of oil or melted fat on top before rolling it into a tube or folding it in layers. This technique creates the signature flaky texture of your Roti Canai.
Step 6: Cooking
Heat a non-stick skillet over medium heat and add a drizzle of oil. Cook each rolled roti for about 2 minutes on one side, until golden brown, then flip to cook the other side for another 2 minutes. To achieve that delightful flaky effect, use your hands to gently press down on the roti as it cooks, helping to separate the layers seamlessly.
Step 7: Serving
Once cooked to a crispy golden brown, remove your Flaky Roti Canai from the pan and keep it warm in a cloth. Serve immediately with your favorite curry or enjoy it on its own! This roti can easily become a staple at your dinner table, drawing family and friends for seconds.

How to Store and Freeze Flaky Roti Canai
Fridge: Store cooked Flaky Roti Canai in an airtight container, and it will stay fresh for up to 3 days. Reheat in a skillet to restore crispiness.
Freezer: Uncooked roti can be frozen between layers of parchment paper. They can last up to 3 months in the freezer; simply thaw and cook directly from frozen for a quick meal.
Room Temperature: If served the same day, keep your cooked roti covered with a clean kitchen towel to maintain warmth and prevent drying out.
Reheating: Always reheat cooked roti in a non-stick pan over medium heat, using a drizzle of oil to get that delightful crispy texture back.
Expert Tips for Flaky Roti Canai
-
Dough Consistency: Make sure your dough isn’t too sticky or dry. Adjust with water or flour as needed—you want a soft, pliable texture for the Flaky Roti Canai.
-
Resting is Key: Don’t skip the resting periods! Allowing the dough to rest helps in gluten development, leading to the wonderful layers you desire.
-
Even Thickness: When stretching the dough, aim for an even thickness to ensure uniform cooking. This prevents some parts from being undercooked or overly crispy.
-
Control the Heat: Cook on medium heat; too hot, and the outside will burn before the inside is done. This is vital for achieving that crispy, flaky exterior while keeping the inside soft.
-
Layering Technique: Remember to oil each layer before folding or rolling the dough. This technique is crucial in creating the signature flaky layers of your Roti Canai.
-
Reheat with Care: If you have leftovers, reheat in a dry pan or in the oven to maintain the crispy texture, instead of microwaving, which can make it soggy.
Flaky Roti Canai Recipe Variations
Customize your Flaky Roti Canai with these delightful twists that bring a new flavor to each bite.
-
Egg Roti: Crack an egg in the pan before adding the roti, allowing it to cook together for a hearty breakfast option. The egg intertwines with the layers, creating a protein-packed delight that jumpstarts your morning!
-
Cinnamon Roti: For a sweet treat, sprinkle cinnamon and sugar between the layers before shaping. This sweet twist makes it perfect for dessert or a cozy snack, just like enjoying a warm cinnamon roll with a cup of tea.
-
Vegetable Roti: Incorporate finely chopped veggies, like spinach or carrots, into the dough for a wholesome touch. This not only adds flavor but also makes for a colorful and nutritious representation of an everyday staple.
-
Cheesy Roti: Sprinkle shredded cheese in between the layers before rolling them up for a gooey, cheesy surprise. This mouthwatering option makes every bite a cheesy, comforting indulgence reminiscent of gooey quesadillas.
-
Spicy Roti: Add a dash of chili powder or finely chopped green chilies to the dough for an extra kick. This variation infuses the roti with flavor and heat, which pairs perfectly with cooling dips or yogurt.
-
Sweetened Coconut Roti: Before rolling the roti, layer in sweetened shredded coconut for a tropical flair. This variation lends a subtle sweetness, transforming your classic flatbread into a lovely treat that transports you to a sunny beachside.
-
Herb-Infused Roti: Mix fresh herbs like cilantro or mint into the dough for a fragrant twist. Each bite bursts with freshness, elevating your roti from an everyday dish to an aromatic experience that excites the taste buds.
-
Nutty Roti: Add finely chopped nuts like cashews or almonds between the layers for a crunchy finish. This option not only enhances texture but also brings a delightful nutty flavor that complements the traditional roti beautifully.
These variations invite you to explore new flavors and make each roti unique, making it an exciting project for the whole family! Enjoy it with a side of savory Stuffing Holiday Comfort or pair it with a delicious Wild Rice Pilaf to create a feast!
Make Ahead Options
These Flaky Roti Canai are perfect for meal prep enthusiasts! You can prepare the dough up to 12 hours in advance and refrigerate it, allowing the gluten to relax and making it easier to shape later. Simply follow the dough preparation and resting steps, then cover and store it in the fridge. To maintain the roti’s flakiness, coat each dough ball in oil before storing. When you’re ready to enjoy, just take the dough out, shape your roti, and cook them fresh! This way, you’ll have warm, restaurant-quality Flaky Roti Canai ready to serve with your favorite curries, saving you time on busy weeknights.
What to Serve with Flaky Roti Canai
Imagine sinking your teeth into a warm, flaky piece of roti while savoring the vibrant flavors of delectable side dishes.
-
Rich Coconut Curry: The creamy texture of coconut curry perfectly complements the crispy layers of roti, creating a comforting, harmonious flavor combination.
-
Spicy Chicken Rendang: The succulent, spicy rendang sauce pairs beautifully with the flaky roti, enhancing its delightful crunch with rich, aromatic spices.
-
Refreshing Cucumber Salad: This cool and fresh salad offers a crisp contrast, balancing out the richness of curries while adding vibrant colors to your meal.
-
Sweet Cinnamon Roti: For a delightful twist, try a sweet version by adding cinnamon sugar between layers; it makes for a unique breakfast or dessert option.
-
Egg Roti Roll: Create a satisfying breakfast by layering scrambled eggs with roti, bringing a protein boost that keeps you full and invigorated.
-
Masoor Dal: The hearty lentil soup adds nutritious elements and flavors, allowing for delightful scooping with your flaky roti, making it an ideal pairing.
-
Cardamom Chai: Pair your roti with a steaming cup of cardamom-infused chai; the spices enhance the overall culinary experience beautifully.
-
Lemonade or Lime Soda: A refreshing citrus drink cleanses the palate, enhancing every mouthful and making for an uplifting meal.
Enjoy exploring these combinations with your Flaky Roti Canai!

Flaky Roti Canai Recipe FAQs
How do I know when my ingredients are ripe or ready for use?
Absolutely! When it comes to your dough, ensure your all-purpose flour is fresh and has no discoloration or unusual odor. The boiling water should be at a rolling boil when added to the flour to aid proper hydration. As for oils, always use fresh ghee or butter, as rancid fats can spoil the delicious flavor of your roti canai!
What is the best way to store my cooked Flaky Roti Canai?
Very! Store your cooked roti in an airtight container for up to 3 days in the fridge. To keep them crispy, reheat in a non-stick skillet with a light drizzle of oil until golden again. If serving the same day, just cover them with a clean kitchen towel to keep warm and prevent drying out.
Can I freeze Flaky Roti Canai for later use?
Absolutely! Uncooked roti can be frozen for up to 3 months. Layer uncooked roti between parchment paper to prevent them from sticking together. When you’re ready to enjoy them, simply thaw and cook right from frozen; no need to defrost, just add a couple of extra minutes to the cooking time.
What should I do if my dough is too sticky or dry?
If your dough feels sticky, try adding a bit more flour during kneading to reach the right consistency. Conversely, if it’s too dry, incorporate water gradually until it’s soft and pliable. Aim for a texture that feels smooth without stickiness—this balance is key for perfect flaky layers!
Are there any dietary considerations for Flaky Roti Canai?
Very! If you’re cooking for those with allergies, ensure to use gluten-free flour for a gluten-free version, although the texture will differ. Additionally, avoid milk in the dough for a vegan-friendly option, replacing ghee with a plant-based oil. Always double-check with your guests for any specific dietary restrictions.
How can I achieve the best flaky texture in my Roti Canai?
To achieve flaky layers, it’s crucial to oil each layer before rolling or folding the dough. This technique ensures that the layers separate during cooking. Additionally, don’t skip resting the dough; allowing it to relax for an adequate amount of time is vital for getting those perfect, tender layers. Ensure you also control the cooking temperature, as even heat encourages the puffing and flakiness you’re aiming for!

Flaky Roti Canai Recipe – Master the Crispy Layers at Home
Ingredients
Equipment
Method
- In a large mixing bowl, combine the all-purpose flour and sea salt. Gradually pour in the boiling water while stirring; continue until clumps form.
- Cover the bowl and allow the dough to rest for 30 minutes to 1 hour.
- Turn the dough onto a lightly floured surface and knead for 2-3 minutes until smooth. Divide into 8 portions and shape into balls.
- Roll each ball in oil to prevent sticking, and let them rest for at least 2 hours.
- Flatten a dough ball and stretch it thinly. Brush with oil or melted fat, then roll into a tube or fold layers.
- Heat a non-stick skillet and cook each rolled roti for 2 minutes on each side until golden brown.
- Remove from the pan and keep warm. Serve immediately or enjoy on its own.
Leave a Reply