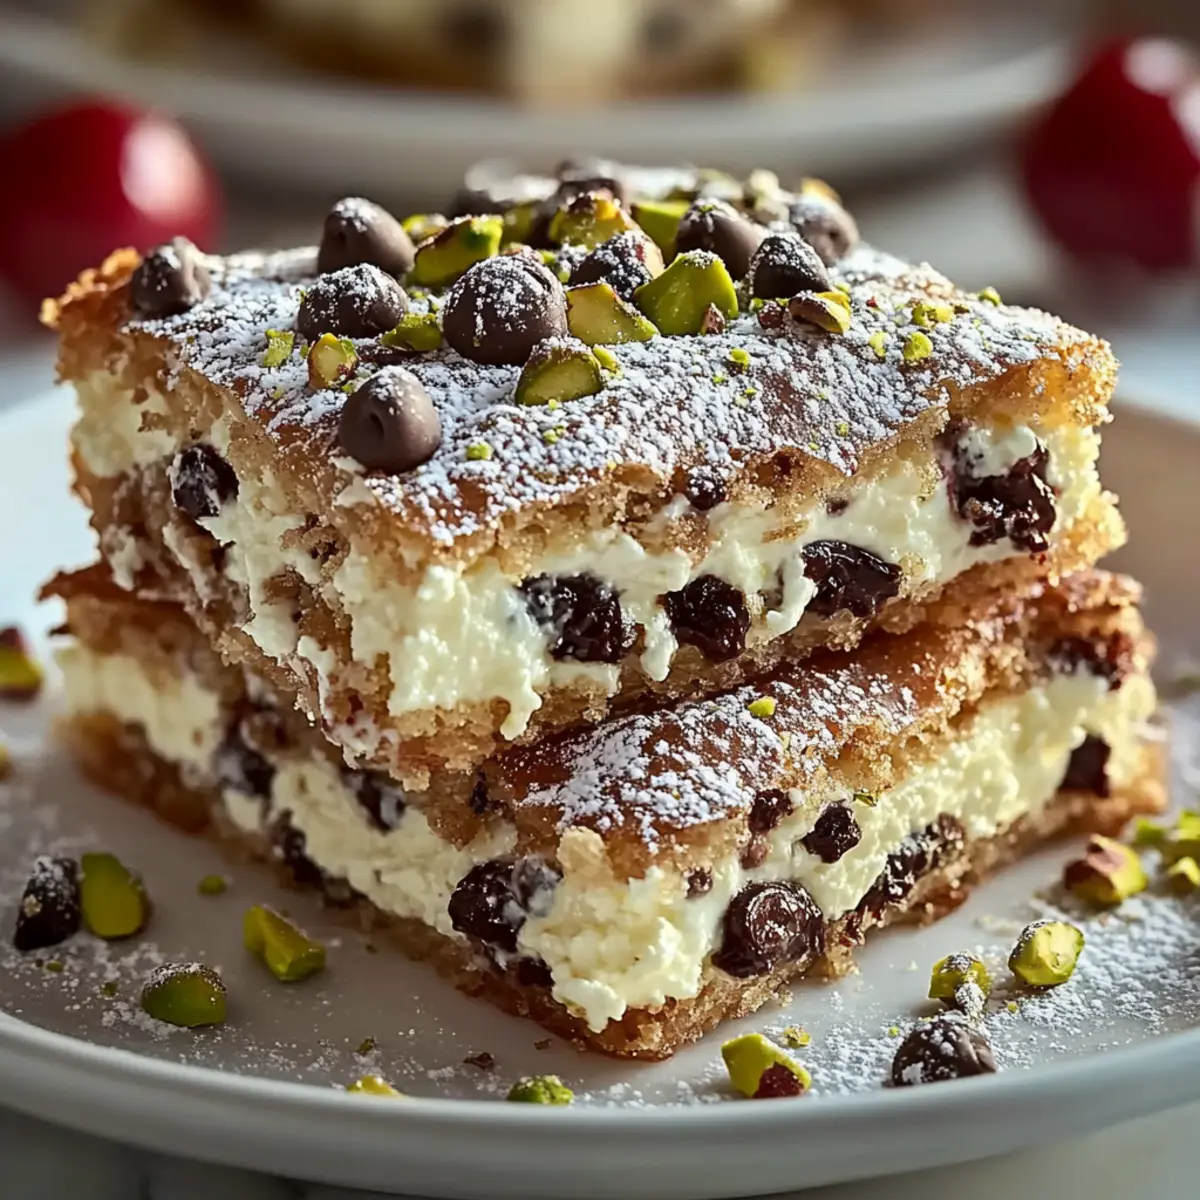
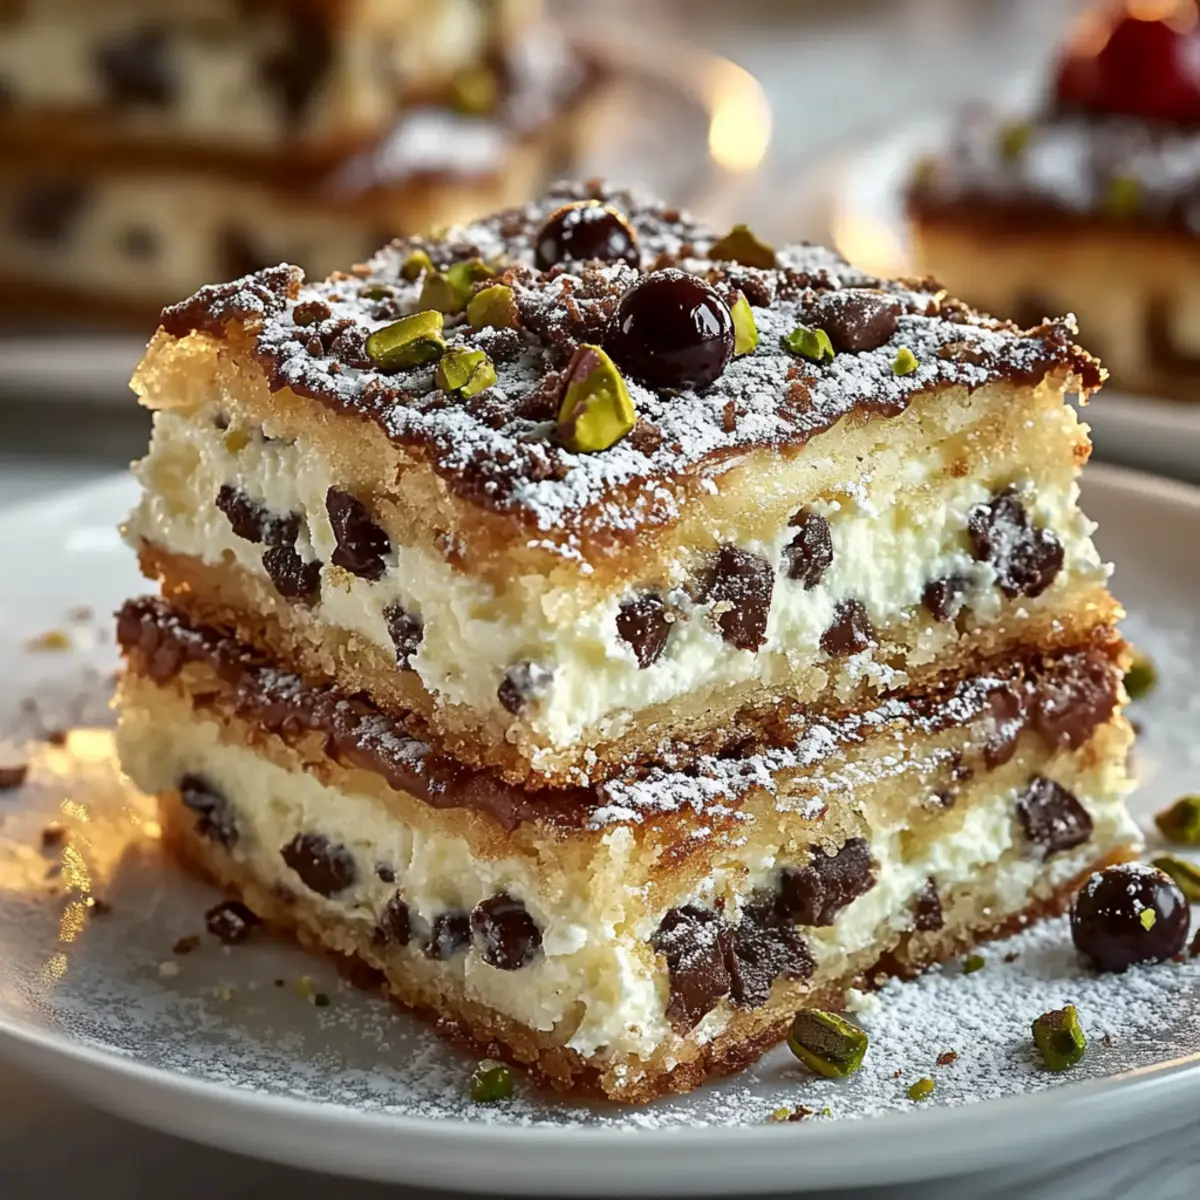
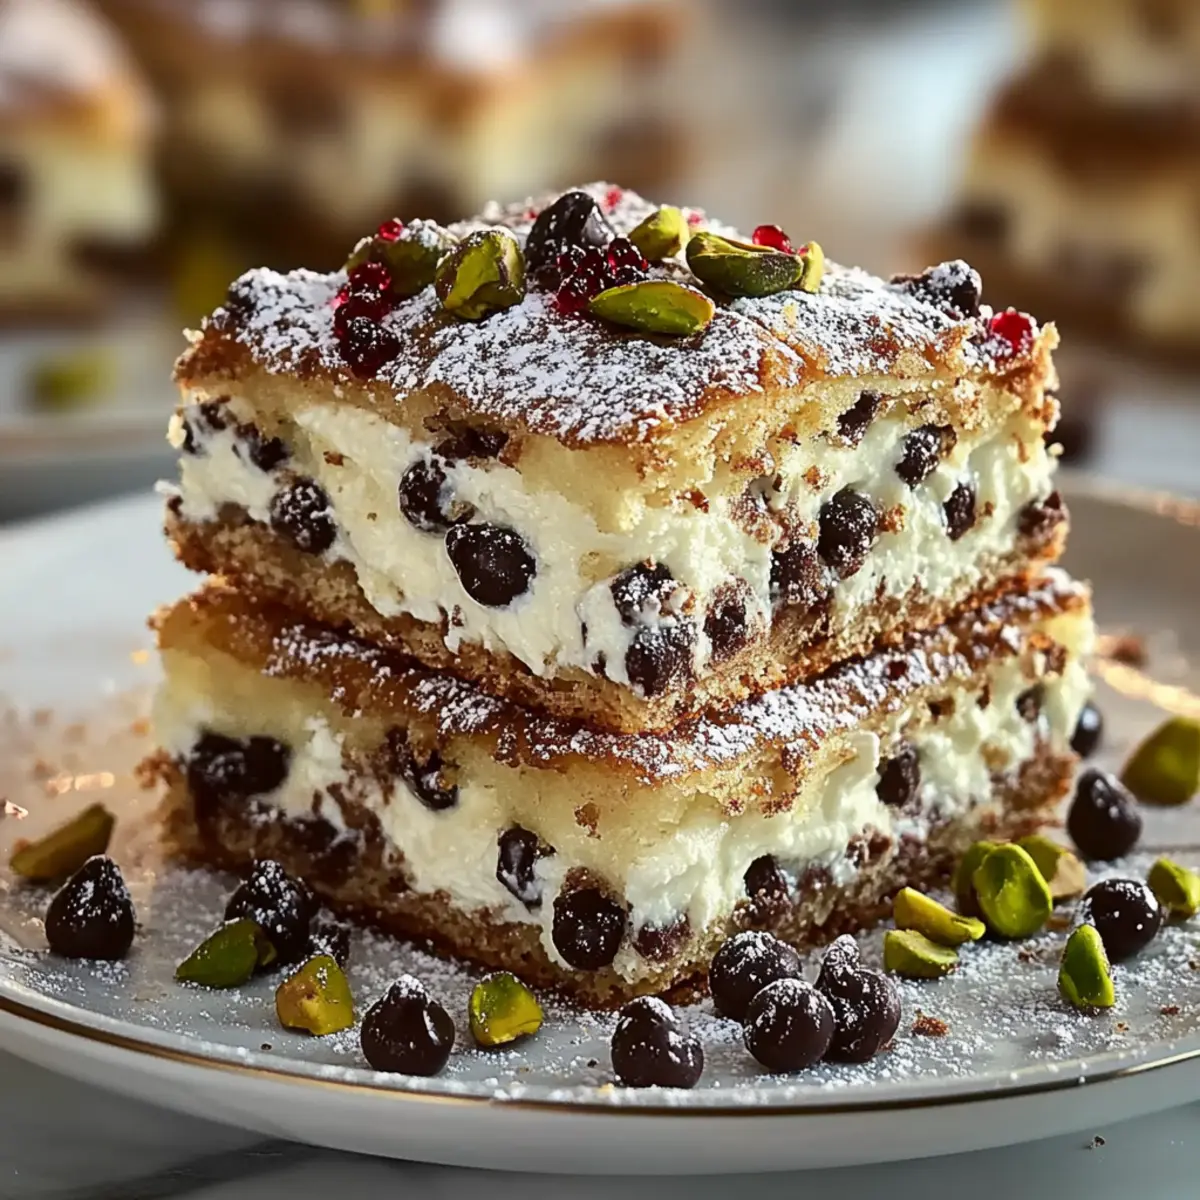
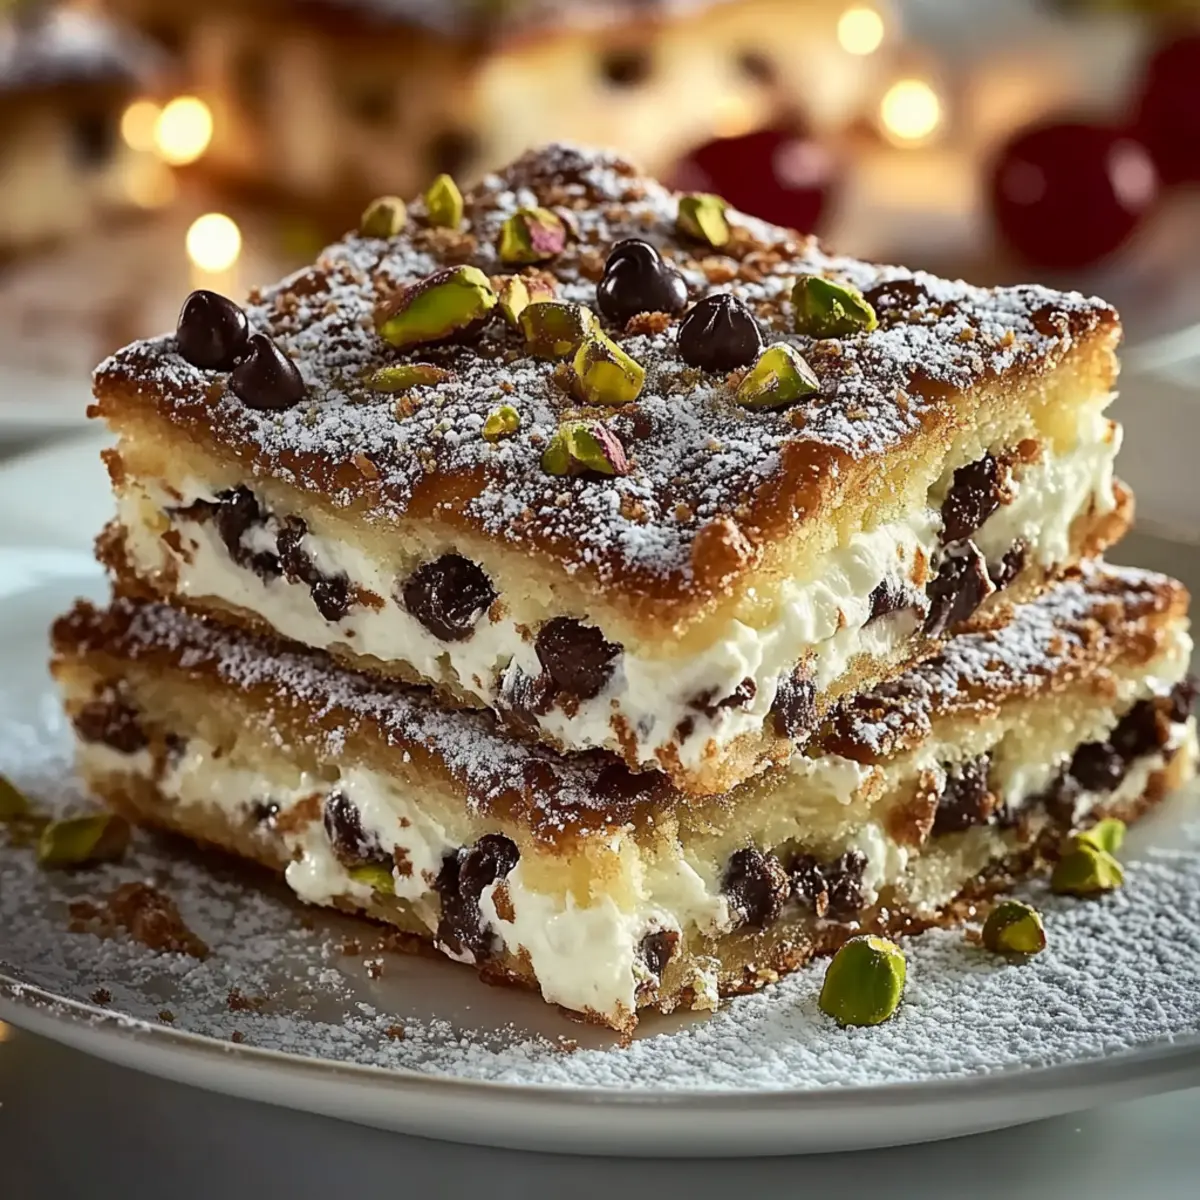
With the aroma of freshly baked pastries wafting through the kitchen, I couldn’t help but feel a wave of nostalgia for the classic cannoli I grew up loving. Enter my latest creation: Classic Cannoli Squares! This delightful twist on the traditional Italian dessert combines rich ricotta and mini chocolate chips nestled in a flaky pie crust, offering not just a taste of home, but also a quick dessert that’s easy to whip up. You’ll appreciate how these squares deliver all the beloved flavors of cannoli while making serving and sharing a breeze. Perfect for a cozy gathering or a spontaneous treat at the end of the day, these bars invite everyone to indulge without the fuss of filling individual shells. Curious about how to recreate this sweet nostalgia? Let’s dive in!
Why You’ll Adore Classic Cannoli Squares
Nostalgic Flavors: Each bite takes you back to cherished family gatherings, celebrating the essence of traditional Italian desserts.
Quick and Easy: This recipe simplifies the cannoli experience, making it accessible for everyone—just mix, bake, and enjoy!
Rich Texture: The fluffy ricotta filling combined with mini chocolate chips creates a delightful contrast to the flaky crust, pleasing every palate.
Versatile Appeal: Fantastic as a dessert for gatherings, or simply enjoyed with a cup of coffee! Consider serving alongside Cranberry Apple Stuffing for a delightful flavor contrast.
Make-Ahead Option: Perfect for busy days, prep these squares in advance and simply refrigerate until ready to serve—easy peasy!
Dive into making these delicious squares and elevate your dessert game!
Classic Cannoli Squares Ingredients
For the Filling
- Ricotta Cheese – Provides creamy texture and richness; use whole milk for creaminess or low-fat for a lighter option.
- Powdered Sugar – Adds sweetness to the ricotta filling; coconut sugar can be used for a healthier alternative.
- Vanilla Extract – Enhances the flavor profile for a delightful taste.
- Cinnamon – Adds warmth and depth, complementing the other flavors.
- Mini Chocolate Chips – Provides bursts of sweetness and texture; dark chocolate enhances the richness.
For the Crust
- Pre-made Pie Crusts – Simplifies the preparation; homemade crust can also be utilized for a personal touch.
- Egg (beaten) – Used for the egg wash to achieve a golden-brown finish on the top crust.
- Sugar – Sprinkled on top for added sweetness and visual appeal.
Optional Garnishes
- Chopped Pistachios – Adds a crunchy element and can enhance flavor.
- Maraschino Cherries – For a pop of color and an elegant touch on top.
- Extra Chocolate Chips – For those who crave additional chocolate flavor in their dessert.
Each of these ingredients comes together to create the ultimate Classic Cannoli Squares, making your kitchen feel like a cozy Italian pastry shop!
Step‑by‑Step Instructions for Classic Cannoli Squares
Step 1: Prepare the Filling
In a mixing bowl, combine 15 ounces of ricotta cheese, ¾ cup of powdered sugar, 1 teaspoon of vanilla extract, ½ teaspoon of cinnamon, and ½ cup of mini chocolate chips. Use a spatula or whisk to mix the ingredients until the mixture is smooth and well combined, taking about 2-3 minutes. This mixture will transform into a creamy filling for your Classic Cannoli Squares.
Step 2: Preheat the Oven
Set your oven to 375°F (190°C) to ensure it reaches the perfect temperature for baking the Classic Cannoli Squares. Allow it to preheat while you prepare the crust, which will create a lovely golden-brown exterior once baked. This step is crucial for achieving that delightful flaky texture.
Step 3: Roll Out the Pie Crust
Take one pre-made pie crust and gently lay it in a 9×9-inch baking dish, pressing it evenly along the bottom and up the sides. Make sure there are no air pockets, and trim any excess dough hanging over the edges. This will serve as the base and help contain the luscious filling of your Classic Cannoli Squares.
Step 4: Add the Filling
Carefully spoon the ricotta mixture into the crust-lined baking dish, spreading it evenly with a spatula. Ensure the filling reaches all corners and is smooth on top, creating a nice canvas for the top crust. This step highlights the creamy goodness of your Classic Cannoli Squares before sealing them up for baking.
Step 5: Prepare the Top Crust
Roll out the second pie crust and gently place it over the filled baking dish. Seal the edges by crimping with your fingers or a fork to create a beautiful border. Brush the top with a beaten egg wash to achieve a golden hue, and sprinkle sugar over the crust for added sweetness and crunch—this will complete your Classic Cannoli Squares just right!
Step 6: Bake
Place the prepared baking dish in the preheated oven and let it bake for 30-35 minutes. Keep an eye on the squares as they turn a rich golden brown, indicating they are cooked through and the crust is crisp. The aroma wafting through your kitchen will be irresistible by the time they’re done!
Step 7: Cool and Serve
Once baked, carefully remove the Classic Cannoli Squares from the oven and allow them to cool in the pan for at least 30 minutes. This cooling period helps the filling set for clean cutting. When ready, slice into squares and serve them on a platter, optionally garnished with chopped pistachios or maraschino cherries for a finishing touch.
What to Serve with Classic Cannoli Squares
Indulging in delightful dessert squares opens up a world of pairing possibilities to create the perfect meal experience.
-
Espresso or Coffee: A rich cup complements the sweetness of the cannoli squares, offering a perfect after-dinner treat.
-
Fresh Berries: Juicy strawberries or raspberries provide a refreshing contrast, cutting through the creamy richness of the dessert.
-
Vanilla Ice Cream: Creamy vanilla ice cream adds a cool, dreamy texture, perfectly balancing the warm, flaky crust of the squares.
-
Chocolate Ganache: Drizzling warm ganache over your squares intensifies the chocolate flavor, elevating each bite to pure bliss.
-
Whipped Cream: A dollop of fresh whipped cream adds lightness, harmonizing beautifully with the dense ricotta filling.
-
Pistachio Crumble: A sprinkle of crushed pistachios not only enhances the visual appeal but also adds delightful crunch with every bite.
-
Limoncello Spritz: For a touch of Italian flair, a light spritz of limoncello is refreshing and pairs wonderfully with the dessert’s flavors.
These pairings will create a symphony of flavors that amplifies the joy of enjoying Classic Cannoli Squares!
Classic Cannoli Squares Variations & Substitutions
Feel free to get creative with these Classic Cannoli Squares, inviting all your tastebuds on a delightful journey!
-
Dairy-Free: Substitute ricotta with a blend of silken tofu and coconut cream for a unique, creamy filling.
This twist offers a similar texture while keeping it dairy-free, ensuring everyone can indulge!
-
Health-Conscious: Use low-fat ricotta and coconut sugar instead of powdered sugar for a lighter, guilt-free option.
Not only does this make it suitable for those watching their sugar, but it keeps the delicious flavor intact!
-
Nutty Flavor: Incorporate a tablespoon of almond extract into the filling for a delightful nutty twist.
The almond flavor echoes classic Italian pastries and will add depth to every bite of your squares.
-
Extra Crunch: Fold in chopped walnuts or almonds to the filling for an unexpected crunch.
Each bite will surprise and add a wonderful textural contrast to your enjoyable treat!
-
Chocolate Love: Use a mix of dark chocolate and white chocolate chips for two layers of sweetness that really pop in flavor.
This variation speaks to every chocolate lover while enhancing the dessert’s appeal with visual contrast!
-
Zesty Kick: Add lemon zest or orange zest to the filling for a refreshing citrus note.
The brightness of the citrus will balance the richness of the ricotta, making each bite feel like springtime.
-
Garnish Galore: Top with various garnishes like fresh berries or a drizzle of caramel sauce for a sophisticated touch.
These simple additions elevate the presentation and add layers of flavor, perfect for impressing guests!
For even more delicious inspirations, consider complementing your meal with classic dishes like Beef Liver Caramelized or pairing them with an elegant side of Cranberry Apple Stuffing. Each suggestion brings something wonderful to your table!
Make Ahead Options
These Classic Cannoli Squares are perfect for home cooks busy with meal planning! You can prepare the filling (ricotta, powdered sugar, vanilla, cinnamon, and chocolate chips) up to 24 hours in advance. Store it in an airtight container in the refrigerator to maintain its creamy texture. Additionally, you can line your baking dish with the bottom crust and refrigerate it until you’re ready to bake. When it’s time to enjoy your dessert, simply spread the filling over the crust, place the top crust on, brush with the egg wash, and sprinkle sugar before baking. This way, you’ll have a delicious treat ready to impress with minimal last-minute effort!
Expert Tips for Classic Cannoli Squares
-
Strain Ricotta: Ensure creamy texture by straining the ricotta with a fine-mesh sieve to remove excess moisture before mixing.
-
Watch the Bake Time: Stay vigilant while baking to prevent over-browning; check at the 25-minute mark for color and doneness.
-
Flavor Variations: For an interesting twist, experiment with lemon zest or almond extract to enhance the flavor of your Classic Cannoli Squares.
-
Serve with Style: Elevate presentation by serving with a drizzle of chocolate sauce or a dollop of whipped cream.
-
Cool Before Cutting: Allow the squares to cool for at least 30 minutes before slicing to help maintain their shape and texture.
Storage Tips for Classic Cannoli Squares
Fridge: Store your Classic Cannoli Squares in an airtight container for up to 3 days to maintain freshness and flavor.
Freezer: For longer storage, wrap individual squares in plastic wrap and place them in a freezer-safe bag. They can be frozen for up to 2 months.
Reheating: To enjoy a warm square, simply thaw overnight in the refrigerator and reheat in the microwave for about 15-20 seconds or until warm.
Make-Ahead: Consider preparing these squares a day in advance. After cooling completely, refrigerate, making them a perfect treat ready to serve at any time!
Classic Cannoli Squares Recipe FAQs
How do I choose the best ricotta cheese for the filling?
For the creamiest texture, I recommend using whole milk ricotta, which offers the richest flavor. Low-fat variations can be used, but they may yield a less decadent filling. Look for a vibrant white color and avoid any brands that appear overly watery or grainy, as this can affect the smoothness of your Classic Cannoli Squares.
What are the best storage methods for Classic Cannoli Squares?
To keep your Classic Cannoli Squares fresh, store them in an airtight container in the refrigerator for up to 3 days. This helps maintain the creamy texture and prevents the crust from becoming soggy. If you wish to enjoy them later, they freeze beautifully! Just wrap each square in plastic wrap and place them in a freezer-safe bag. They will maintain their quality for up to 2 months.
Can I freeze Classic Cannoli Squares?
Absolutely! To freeze, let the squares cool completely, then wrap each square tightly in plastic wrap. Place them in a freezer-safe bag, ensuring to remove as much air as possible before sealing. When you’re ready to enjoy them, simply thaw the squares in the refrigerator overnight and warm them in the microwave for about 15-20 seconds.
What if my ricotta mixture is too wet?
Great question! If your mixture seems too wet, it could lead to a soggy crust. I suggest straining the ricotta cheese through a fine-mesh sieve before mixing it with the other ingredients. This will help remove excess moisture and create a thicker filling, ensuring your Classic Cannoli Squares hold their shape and flavor beautifully after baking.
Are Classic Cannoli Squares suitable for dietary restrictions?
If you need to accommodate dietary restrictions, it’s simple to modify this recipe! For those allergic to dairy, you might substitute ricotta with a plant-based cream cheese. Also, be cautious with powdered sugar if you have specific allergies. Always check labels when using pre-made pie crusts for allergens like gluten, and consider gluten-free options if needed!
How can I make Classic Cannoli Squares ahead of time?
You can definitely prepare Classic Cannoli Squares in advance! I often make them a day prior to serving. Simply follow all the steps, allow the squares to cool completely, and then refrigerate them in an airtight container. This not only saves time but also allows the flavors to meld beautifully, enhancing the overall taste!
Classic Cannoli Squares That Will Wow Your Taste Buds
Ingredients
Equipment
Method
- In a mixing bowl, combine ricotta cheese, powdered sugar, vanilla extract, cinnamon, and mini chocolate chips. Mix until smooth.
- Preheat the oven to 375°F (190°C).
- Roll out one pie crust and lay it in a 9x9-inch baking dish.
- Spoon the ricotta mixture into the crust and spread evenly.
- Roll out the second pie crust and place it over the filling. Seal the edges and brush with the beaten egg. Sprinkle sugar on top.
- Bake in the preheated oven for 30-35 minutes until golden brown.
- Allow to cool for at least 30 minutes before slicing and serving.
Leave a Reply