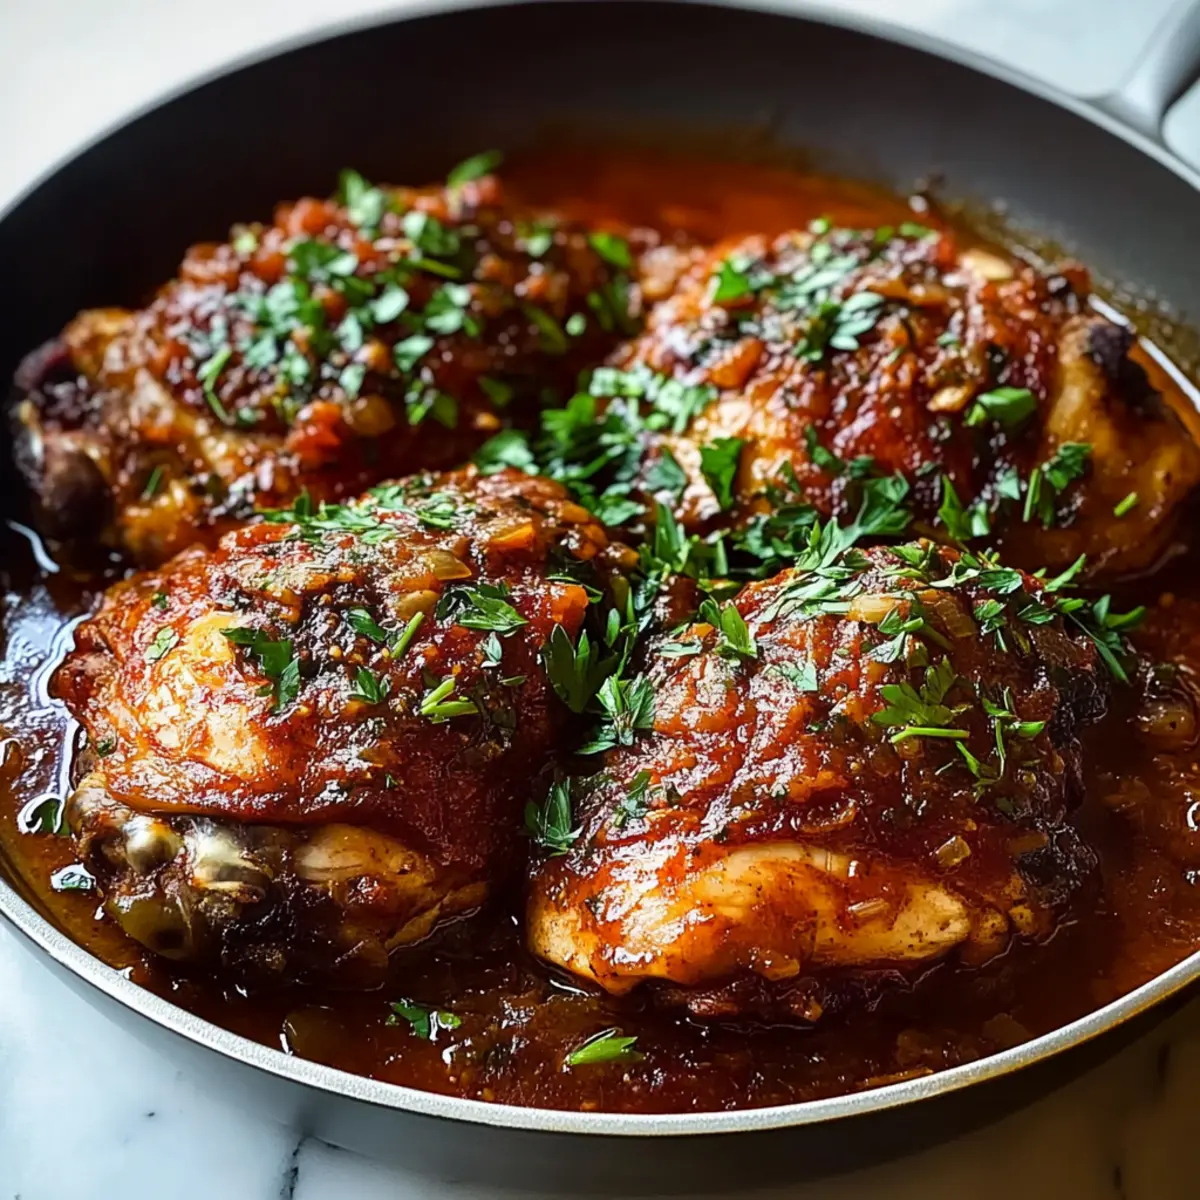
As the aroma of Braised Catalina Chicken fills my kitchen, I’m instantly transported to cozy family dinners filled with laughter and nostalgia. This dish, featuring juicy chicken thighs braised in a tangy-sweet homemade sauce, is a tribute to the comforting meals that graced our tables back in the 70s and 80s. Crafting this dish is a breeze, making it perfect for those busy weeknights when you crave something special without the fuss. With its rich and warm flavors, it’s sure to become a favorite not only for you but for anyone gathered around the table. So, are you ready to create this heartwarming classic that’s as delightful to make as it is to enjoy?
Why is Braised Catalina Chicken So Special?
Nostalgic Flavor: This dish brings back cherished memories, combining tangy notes with a hint of sweetness akin to grandmother’s best recipes.
Easy Preparation: With simple steps, you’ll have a comforting meal ready in no time, perfect for busy weeknights.
Versatile Customization: Adjust the spice levels to suit your taste—whether you prefer mild or fiery, the choice is yours.
Crowd-Pleasing Delight: Serve this dish at gatherings or casual dinners, and watch as everyone races to the table. Pair it with sides like roasted vegetables or even a fresh green salad for a complete meal! If you’re in the mood for more comforting options, check out my White Chicken Chili or Teriyaki Chicken Wrap.
Braised Catalina Chicken Ingredients
• Everything you need for a comforting classic.
For the Chicken
- Chicken Thighs – Juicy and rich in flavor, perfect for braising.
- Olive Oil – Essential for searing, adding depth to the dish.
- Salt and Pepper – Basic seasonings that enhance the chicken’s natural taste.
For the Catalina Sauce
- Ketchup – Provides the signature sweetness and tang of your homemade sauce.
- Vinegar – Adds a zesty acidity that balances the flavors beautifully.
- Honey or Brown Sugar – To enhance the sauce’s sweetness for that comforting touch.
- Cayenne Pepper – Optional for those who might want to give their Braised Catalina Chicken a spicy kick.
For Garnish
- Fresh Parsley (optional) – Adds a pop of color and a hint of freshness to finish your dish beautifully.
Step‑by‑Step Instructions for Braised Catalina Chicken
Step 1: Preheat the Oven
Begin by preheating your oven to 350°F (175°C). This initial step ensures that your Braised Catalina Chicken cooks evenly throughout. As the oven heats up, gather your ingredients and prepare your workspace for an efficient cooking experience.
Step 2: Prepare the Chicken
Pat your chicken thighs dry with paper towels, then season generously with salt and pepper on both sides. This will enhance the chicken’s flavor. Take a moment to appreciate the rich, juicy texture of the thighs, which are perfect for braising, and let them sit at room temperature while you prepare the next step.
Step 3: Sear the Chicken
In a Dutch oven, heat 2 tablespoons of olive oil over medium heat until shimmering. Carefully place the seasoned chicken thighs into the pot, skin-side down. Sear them for 4-5 minutes until the skin is golden brown and crispy. Flip the thighs and continue searing for an additional 2 minutes. Once done, transfer the chicken to a plate and set aside.
Step 4: Make the Catalina Sauce
In a mixing bowl, whisk together the ingredients for the Catalina sauce: ketchup, vinegar, honey or brown sugar, and cayenne pepper if you desire some heat. Blend until smooth, making adjustments to taste for sweetness or acidity. The sauce should be vibrant and fragrant, capturing the nostalgic flavors of Braised Catalina Chicken.
Step 5: Combine Chicken and Sauce
Pour half of the Catalina sauce into the Dutch oven, spreading it evenly across the bottom. Nestle the seared chicken thighs back into the pot, skin-side up, ensuring they are well-coated. Drizzle the remaining sauce over the chicken, creating layers of flavor that will meld together during cooking.
Step 6: Bake the Chicken
Cover the Dutch oven with a lid or tightly wrap it in foil, then place it in the preheated oven. Allow the Braised Catalina Chicken to bake for 45 minutes, where it will absorb the flavors of the sauce and become tender. Aim for the chicken to be cooked through, with internal temperatures reaching 165°F (75°C).
Step 7: Final Cooking Phase
After 45 minutes, carefully remove the lid or foil and return the pot to the oven. Bake uncovered for an additional 20-25 minutes, letting the sauce thicken and caramelize. Keep an eye on it; the sauce will turn glossy and deeper in color, complementing the chicken beautifully.
Step 8: Serve and Enjoy
Once the Braised Catalina Chicken is done, remove it from the oven and let it rest for a few minutes. Spoon the rich sauce over the chicken thighs, garnishing with fresh parsley if desired. The dish should look inviting and warm, ready to be shared around the dinner table for a comforting meal.
Expert Tips for Braised Catalina Chicken
-
Choose Quality Chicken: Opt for bone-in, skin-on chicken thighs for the best flavor and moisture during braising. This will ensure a tender result with juicy bites.
-
Sauce Adjustment: Don’t be afraid to tweak the sauce by adding more ketchup or honey based on your taste preference—it’s the heart of the Braised Catalina Chicken!
-
Avoid Overcrowding: If you double the recipe, use two separate Dutch ovens instead of overcrowding one; it ensures even cooking and browning.
-
Check Doneness: Always confirm the chicken has reached an internal temperature of 165°F (75°C) to guarantee it’s safely cooked through.
-
Flavor Depth: Let the dish rest for about 10 minutes after baking. This allows the sauce to settle into the chicken, enhancing the flavors before serving.
Braised Catalina Chicken Variations
Feel free to get creative with this recipe to suit your tastes and dietary needs, and let your kitchen be filled with delightful aromas.
-
Boneless Option: Use boneless chicken breasts for a lighter choice. Reduce cooking time by 15-20 minutes for succulent results.
-
Spicy Twist: Increase cayenne pepper or add a splash of your favorite hot sauce to the Catalina sauce for a fiery kick. Feel the heat as it tantalizes your taste buds!
-
Switch the Chicken: Experiment with chicken drumsticks for a fun, juicy alternative. Their rich flavor adds a delightful depth to the sauce.
-
Sweeten the Deal: Replace brown sugar with maple syrup for a unique twist that adds a rich, earthy sweetness to the sauce.
-
Herb Infusion: Toss in some fresh thyme or rosemary when braising for an aromatic touch that elevates the flavor profile.
-
Vegetable Boost: Add chopped bell peppers or carrots to the pot for extra nutrition and a pop of color. These veggies will soak up the delicious sauce as they soften.
-
Serve It Differently: Try serving the Braised Catalina Chicken over a bed of creamy polenta or alongside fluffy couscous for a delightful change in texture.
-
Sauce Variations: Swap ketchup for a homemade BBQ sauce or use salsa for a zesty, fresh approach. Your dish can change flavor profiles, delighting guests with every bite.
If you love hearty meals as much as I do, consider trying my delicious Chicken Taco Soup or indulging in the comforting flavors of Lobster Biscuit Chicken for more joyful experiences in your kitchen!
What to Serve with Braised Catalina Chicken
As you savor the rich, tangy flavors of Braised Catalina Chicken, it’s time to consider the perfect accompaniments to elevate your meal experience.
-
Creamy Mashed Potatoes: Their butteriness pairs perfectly with the savory sauce, creating a comforting blend of flavors on your plate.
-
Garlic Roasted Vegetables: The caramelized edges of seasonal veggies add a sweet and earthy contrast, enhancing the dish’s overall warmth.
-
Steamed Green Beans: Their crisp freshness brightens up the plate while providing a delightful texture that balances the dish’s richness.
-
Coconut Rice: Infused with creamy coconut milk, this subtly sweet side beautifully complements the tangy elements of the chicken sauce.
-
Fresh Garden Salad: A mix of greens with a light vinaigrette adds a refreshing crunch, cleansing the palate between bites.
-
Cornbread Muffins: Their slightly sweet, moist texture is the perfect vehicle for soaking up extra sauce, ensuring no flavor goes to waste!
-
Sparkling Lemonade: A fizzy, citrusy drink brightens the meal, offering a refreshing sip to contrast the warm, hearty chicken.
-
Chocolate Mousse: End on a sweet note with this rich dessert, providing a luscious finale to your comforting meal.
Make Ahead Options
Braised Catalina Chicken is ideal for meal prep, saving you precious time during your busy week! You can prepare the Catalina sauce up to 3 days in advance, storing it in an airtight container in the refrigerator to maintain its rich flavor. Additionally, you can season and sear the chicken thighs up to 24 hours ahead of time; just keep them covered and refrigerated to ensure freshness. When you’re ready to serve, simply combine the chicken with the prepared sauce in a Dutch oven, cover, and bake according to the recipe instructions. This approach ensures your comforting Braised Catalina Chicken is just as delicious with maximum convenience, leaving you free to enjoy time with your loved ones!
Storage Tips for Braised Catalina Chicken
-
Fridge: Store your Braised Catalina Chicken in an airtight container for up to 4 days. Allow it to cool completely before refrigerating to maintain optimal flavor and texture.
-
Freezer: Freeze the cooked chicken in the sauce for up to 2 months. Ensure it’s in an airtight container or freezer bag to prevent freezer burn.
-
Reheating: Reheat gently on the stovetop or in the oven at 325°F until warmed through, ensuring the chicken stays juicy and the sauce retains its vibrant flavor.
Braised Catalina Chicken Recipe FAQs
What type of chicken is best for Braised Catalina Chicken?
Absolutely! I recommend using bone-in, skin-on chicken thighs for the best results. These cuts are packed with flavor and moisture that will help your dish remain tender and juicy during the braising process.
How should I store Braised Catalina Chicken?
You can store your Braised Catalina Chicken in an airtight container in the refrigerator for up to 4 days. Make sure to let it cool completely before refrigerating to preserve its delightful flavors and textures.
Can I freeze Braised Catalina Chicken?
Yes, you can! Freeze the cooked chicken in sauce for up to 2 months. To do this, place it in an airtight container or a freezer bag, ensuring it’s sealed tightly to avoid freezer burn. When you’re ready to enjoy it, simply reheat gently on the stovetop or in the oven at 325°F until warm.
What if my sauce is too thick?
If your sauce turns out too thick for your liking, don’t worry! Simply add a splash of chicken broth or water to the sauce and stir it gently until you reach your desired consistency. Keep it warm over low heat while you stir to incorporate the liquid evenly.
How can I adjust the spice level in the sauce?
To increase the heat in your Braised Catalina Chicken, you can simply add more cayenne pepper to the Catalina sauce or include some hot sauce. Start with a small amount and taste as you go; you can always add more to achieve your preferred spice level!
Is this recipe safe for pets?
Generally, no; it’s best to avoid sharing this dish with pets, as ingredients like onion and garlic are common in many sauces and can be harmful to them. If you’re looking for a pet-friendly treat, consider cooking plain, unseasoned chicken for your furry friends!
Savory Braised Catalina Chicken: A Comforting Classic
Ingredients
Equipment
Method
- Preheat your oven to 350°F (175°C). Gather your ingredients.
- Pat chicken thighs dry with paper towels, then season generously with salt and pepper.
- In a Dutch oven, heat olive oil over medium heat. Sear chicken thighs until golden brown, about 4-5 minutes on each side.
- Whisk together ketchup, vinegar, honey or brown sugar, and cayenne pepper in a mixing bowl.
- Pour half the Catalina sauce into the Dutch oven. Nestle seared chicken thighs skin-side up, and drizzle remaining sauce over them.
- Cover the Dutch oven and bake in the preheated oven for 45 minutes.
- After 45 minutes, remove the lid and bake uncovered for an additional 20-25 minutes.
- Once done, let the dish rest for 10 minutes before serving, garnishing with fresh parsley.
Leave a Reply