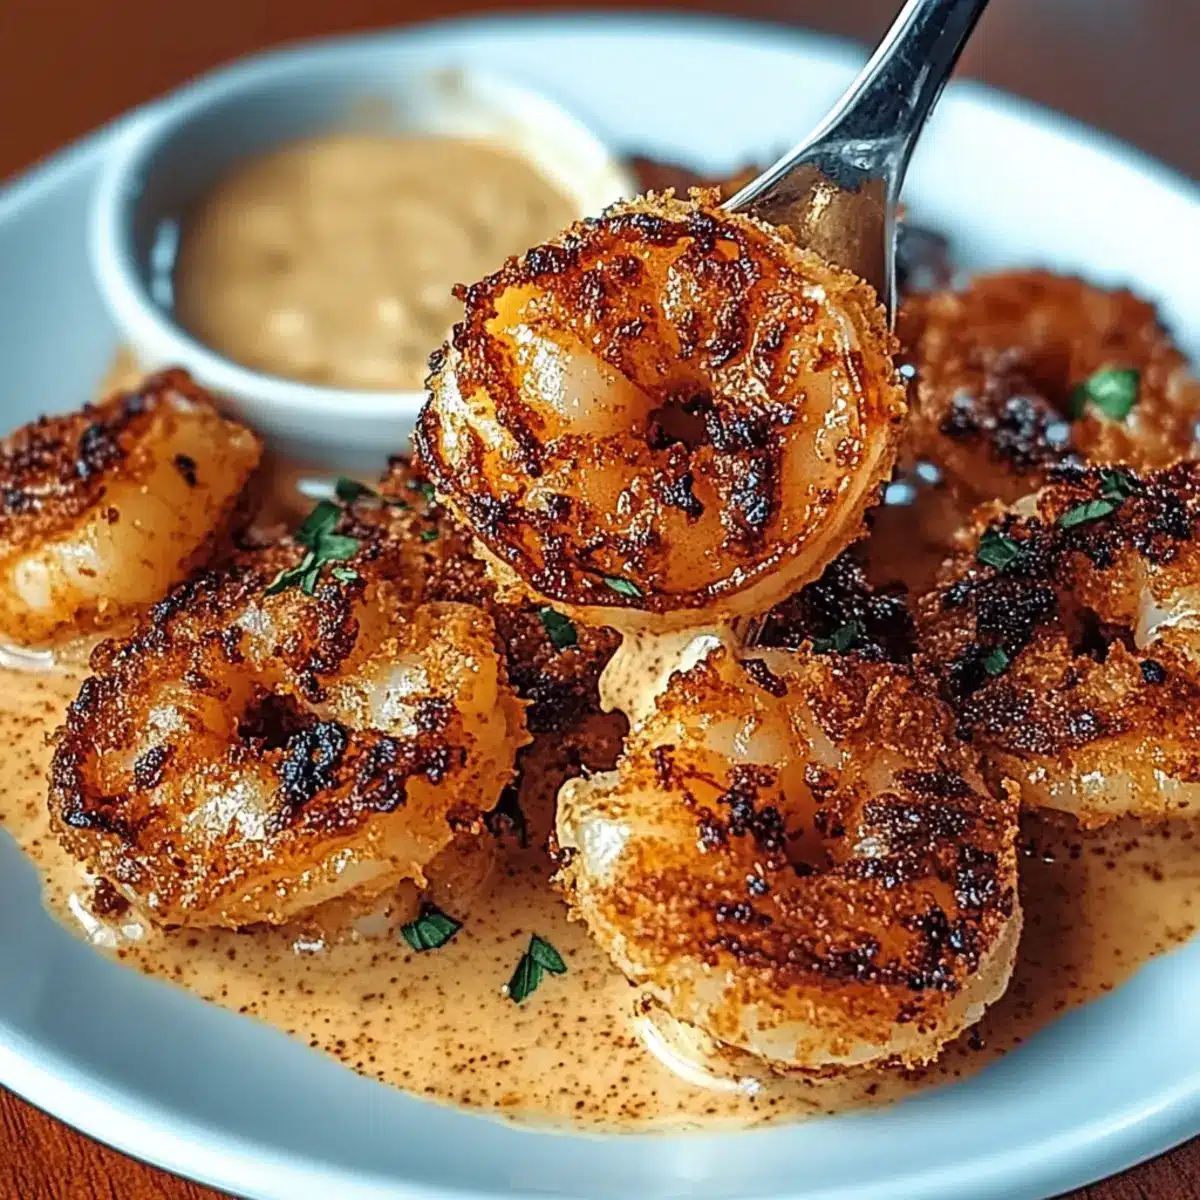
As I arranged a tropical-themed dinner for friends last summer, I overheard one of them exclaim, “These coconut shrimp taste like a beach vacation!” That moment sparked my passion for crafting this Baked Coconut Shrimp recipe, which pairs perfectly with a tangy Sweet Chili Mayo. Not only is it a delightful appetizer that sets the mood for any gathering, but it’s also surprisingly easy to whip up after a long day. With a crispy golden exterior and juicy shrimp inside, it’s sure to become a go-to favorite, especially with its gluten-free option for those who need it. Ready to dive into a taste of the tropics right at home? Let’s get cooking!
Why is this Baked Coconut Shrimp special?
Unforgettable Flavor: The tropical combination of coconut and shrimp creates a mouthwatering experience that transports your taste buds to a sunny beach.
Effortless Preparation: With just a few simple steps, you can have this dish on the table in no time, making it perfect for any gathering or family dinner.
Gluten-Free Friendly: Use almond flour and gluten-free breadcrumbs to cater to dietary needs without sacrificing taste or texture.
Crowd-Pleasing Appeal: Ideal as an appetizer or a main dish, this recipe is bound to impress friends and family. Pair it with a zesty side, like a fresh salad or even Garlic Butter Shrimp for more coastal delight!
Quick Cleanup: Baking means easy cleanup—no messy frying required, so you can spend more time enjoying the meal with loved ones instead of washing dishes.
Baked Coconut Shrimp Ingredients
Delightful ingredients for your tropical dish!
For the Shrimp
• Large Shrimp – Use peeled and deveined for ease in preparation.
• Shredded Coconut (unsweetened) – Adds a wonderful crunch and tropical flavor; avoid sweetened varieties for the best results.
• All-Purpose Flour or Almond Flour – Acts as a coating that helps the batter adhere; almond flour is perfect for a gluten-free version.
• Eggs (beaten) – Binds the coating to the shrimp; no substitutions are recommended for this purpose.
• Salt and Black Pepper – Enhances flavor; adjust to taste, and fresh ground pepper adds a lovely aroma.
• Paprika – Adds vibrant color and subtle smokiness; smoked paprika can enhance the dish’s flavor.
• Breadcrumbs (Panko recommended) – Provides extra crunch; opt for gluten-free breadcrumbs if needed.
For the Sweet Chili Mayo
• Mayonnaise – Forms the base of the dipping sauce for your Baked Coconut Shrimp; Greek yogurt can be used for a lighter option.
• Sweet Chili Sauce – Contributes sweetness and a hint of heat; homemade or store-bought works beautifully.
• Lime Juice – Brightens the mayo’s flavors; fresh lime juice is recommended for the best taste.
• Garlic Powder – Adds depth to the sauce; fresh minced garlic can be substituted, but adjust quantity to taste.
Step‑by‑Step Instructions for Baked Coconut Shrimp
Step 1: Preheat the Oven
Begin by preheating your oven to 400°F (200°C). This temperature ensures a crispy and golden exterior for your Baked Coconut Shrimp. While the oven warms up, you can prepare your shrimp and breading station, setting the stage for a delightful cooking experience.
Step 2: Prepare the Shrimp
Pat the large, peeled, and deveined shrimp dry using paper towels. This step is crucial, as moisture can prevent the coating from becoming crispy. Once dried, set the shrimp aside and gather the necessary ingredients for the breading process to keep everything organized.
Step 3: Set Up the Breading Station
Create your breading station by arranging three bowls. In the first bowl, mix together all-purpose or almond flour with a pinch of salt and black pepper. In the second bowl, whisk the beaten eggs. Finally, combine shredded coconut and Panko breadcrumbs with paprika in the third bowl to create a flavorful coating for your Baked Coconut Shrimp.
Step 4: Bread the Shrimp
Take each shrimp and first dip it into the flour mixture, ensuring it is well-coated. Next, immerse it in the beaten egg to bind the coating, then finish by pressing it into the coconut-breadcrumb mixture. Make sure each shrimp is thoroughly covered with the crunchy coating to achieve that perfect texture.
Step 5: Bake the Shrimp
Place your breaded shrimp on a parchment-lined baking sheet, ensuring they are spaced apart for even cooking. Bake in the preheated oven for 12 to 15 minutes, flipping them halfway through. You’ll know the Baked Coconut Shrimp are ready when they are golden brown and crispy, enticingly aromatic, and firm to the touch.
Step 6: Prepare the Sweet Chili Mayo
While the shrimp bakes, prepare the Sweet Chili Mayo. In a small mixing bowl, whisk together mayonnaise, sweet chili sauce, freshly squeezed lime juice, and garlic powder. Taste your sauce and adjust the seasoning as needed for the perfect balance of sweetness and tanginess to complement your Baked Coconut Shrimp.
Step 7: Serve and Enjoy
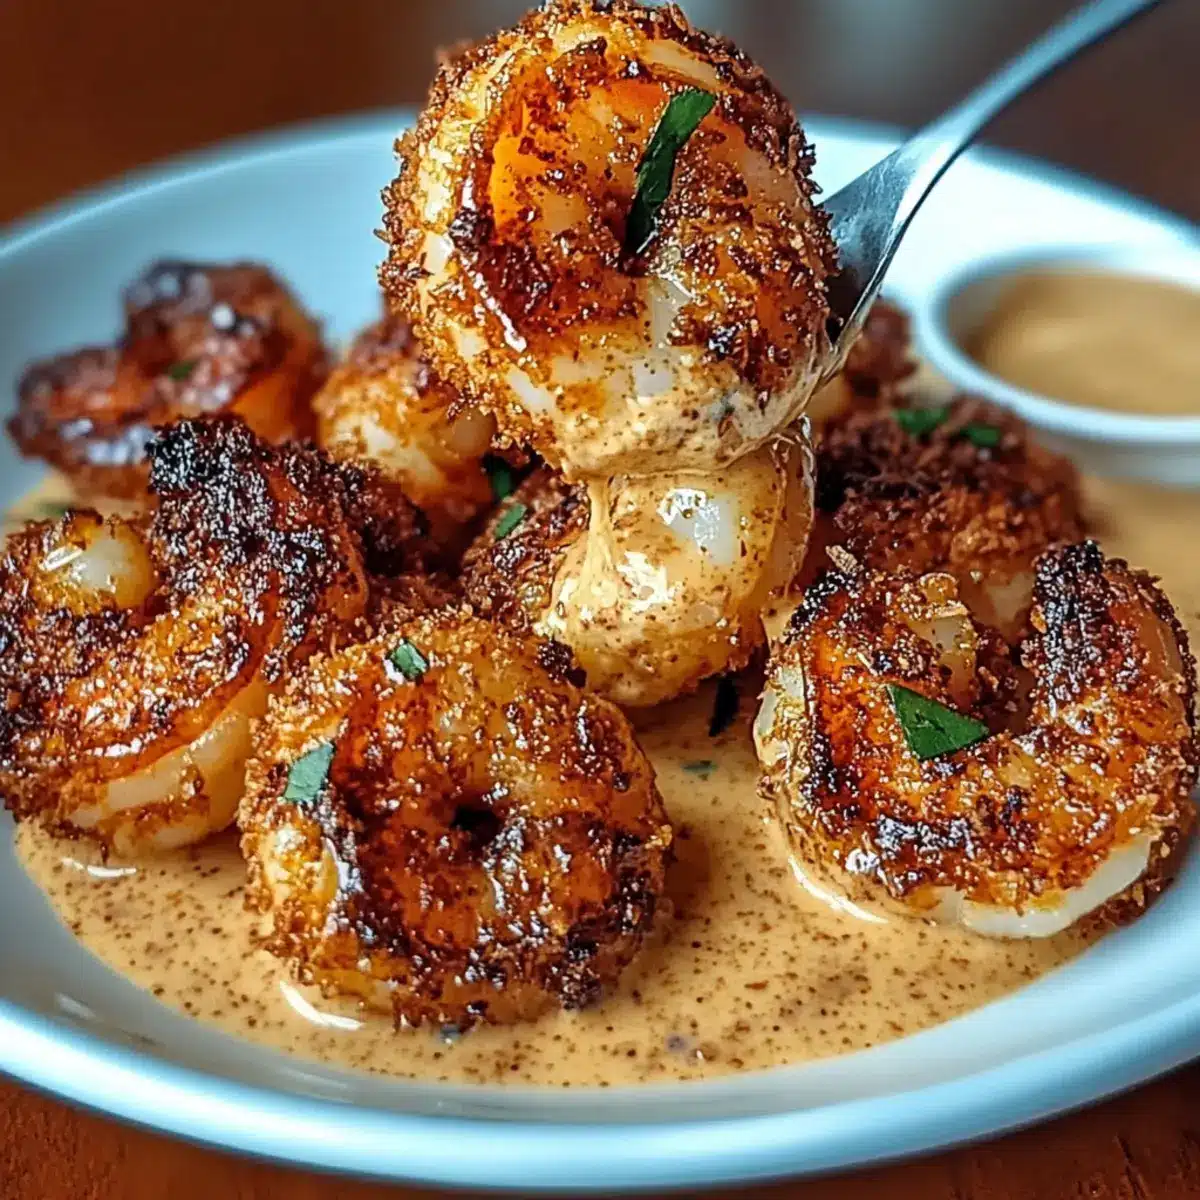
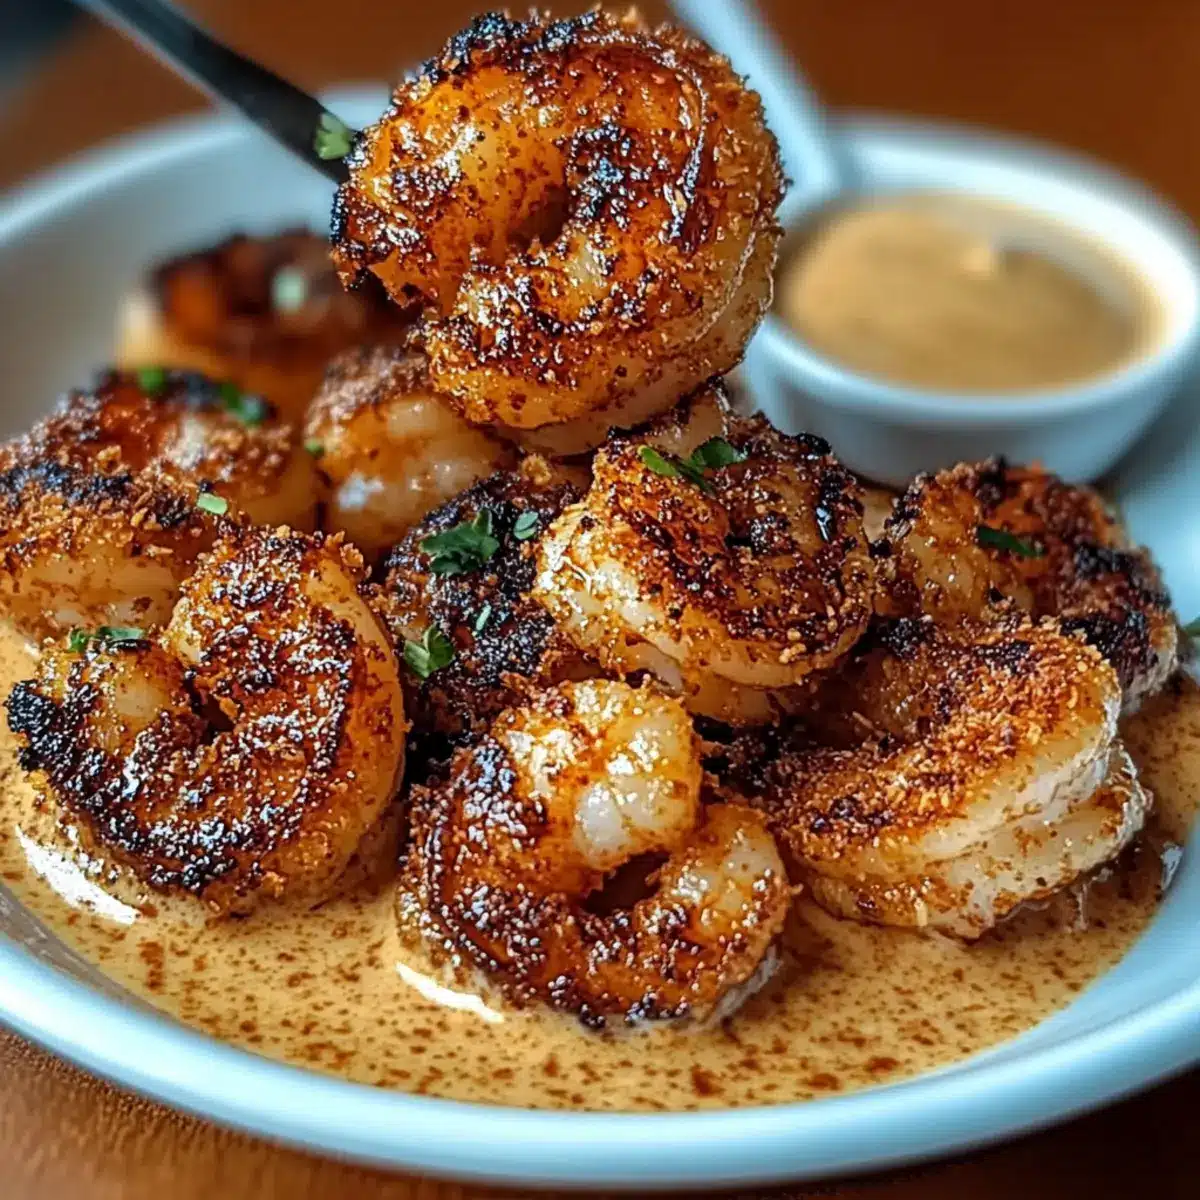
Once your shrimp are perfectly baked, remove them from the oven and allow them to cool slightly. Serve your Baked Coconut Shrimp warm alongside the creamy Sweet Chili Mayo. This pairing enhances the tropical flavors and makes for a delightful and satisfying appetizer or main dish for any gathering.
Baked Coconut Shrimp Variations & Substitutions
There’s nothing like making this Baked Coconut Shrimp your own with delicious twists! Get creative and elevate your dish with these fun variations.
- Gluten-Free: Use almond flour and gluten-free breadcrumbs to maintain crunch while catering to dietary needs without sacrificing flavor.
- Protein Swap: Replace shrimp with chicken tenders or firm tofu for an alternative protein option that works wonderfully with the coconut coating.
- Flavor Boost: Incorporate spices like garlic or onion powder into your breadcrumb mixture to take the flavor profile up a notch. Think of it as an invitation to customize your experience!
- Tropical Twist: Add finely chopped herbs like cilantro or basil to the coconut coating for an aromatic surprise that brightens each bite.
- Spicy Kick: Mix a teaspoon of Sriracha or cayenne pepper into the sweet chili mayo for those who crave a little extra heat! Perfect for spice lovers.
- Crunchy Texture: Toss some crushed nuts like almonds or cashews into the breadcrumb mixture for a delightful crunch that complements the coconut.
- Fruit Fusion: Serve alongside a fresh mango salsa or tropical fruit salad for a refreshing contrast to the savory shrimp and a burst of color on the plate.
- Dipping Sauce Variation: Swap mayonnaise for Greek yogurt in the sweet chili mayo to create a lighter, tangy sauce that pairs perfectly with the shrimp.
As you experiment with these variations, consider pairing your Baked Coconut Shrimp with dishes like Baked Hot Honey for a touch of heat or serve an indulgent side of Garlic Butter Shrimp for a coastal delight. Embrace the joy of cooking and let your creativity shine!
How to Store and Freeze Baked Coconut Shrimp
Fridge: Store leftovers in an airtight container for up to 2 days, ensuring they remain fresh and flavorful.
Freezer: For longer storage, freeze the cooked Baked Coconut Shrimp in a single layer on a baking sheet, then transfer to a freezer-safe bag for up to 2 months.
Reheating: Reheat in the oven at 350°F (175°C) for 10-15 minutes to regain crispiness. Avoid microwaving, as it may make the shrimp soggy.
Thawing: For frozen shrimp, thaw in the refrigerator overnight before reheating to keep the texture enjoyable.
Make Ahead Options
These Baked Coconut Shrimp are a fantastic choice for meal prep, enabling you to enjoy a delicious tropical dish with minimal effort. You can prepare the breaded shrimp up to 24 hours in advance by following the breading steps and placing them in a single layer on a parchment-lined baking sheet. Cover the tray tightly with plastic wrap and refrigerate. This keeps the shrimp fresh and helps maintain their crunch. When you’re ready to serve, simply pop them in a preheated oven at 400°F (200°C) and bake for 12-15 minutes until golden brown. This means you can enjoy restaurant-quality Baked Coconut Shrimp without the hassle on busy weeknights!
What to Serve with Baked Coconut Shrimp
The perfect accompaniment can elevate your tropical coconut shrimp experience, transforming a simple snack into a delightful feast.
-
Zesty Tropical Fruit Salsa: Fresh mango, pineapple, and lime create a refreshing contrast to the crispy shrimp, enhancing the tropical vibe of your meal.
-
Coconut Rice: Fluffy rice cooked with coconut milk adds a rich, creamy base that pairs beautifully with the shrimp’s crunch and sweetness.
-
Crispy Asian Salad: A mix of crunchy veggies and a tangy dressing provides color and freshness, balancing the richness of the shrimp and mayo.
-
Sweet Potato Fries: Their natural sweetness and soft texture complement the coconut shrimp’s crunch, making for a delightful pairing.
-
Garlic Butter Noodles: Savory noodles tossed in garlic butter create a comforting side that balances the flavors of the shrimp and dipping sauce.
-
Crisp Green Salad: A simple salad with mixed greens and citrus dressing brightens the palate, making it a refreshing addition to your shrimp.
-
Chilled Sparkling Water: Serve with a splash of lime for a refreshing drink; the fizz cleanses the palate, making every bite of shrimp feel exciting.
-
Chocolate Lava Cake: A decadent end to your meal, the rich chocolate pairs surprisingly well with the tropical flavors, leaving guests with lingering smiles.
Helpful Tricks for Baked Coconut Shrimp
-
Dry Shrimp First: Making sure your shrimp are completely dried before breading helps achieve that irresistible crispy coating.
-
Choose Panko Breadcrumbs: Using Panko breadcrumbs rather than standard breadcrumbs adds an extra layer of crunch that enhances your Baked Coconut Shrimp.
-
Flip for Evenness: Be sure to flip the shrimp halfway through baking to ensure they crisp up uniformly on all sides.
-
Watch the Bake Time: Keep a close eye on your shrimp; over-baking can make them tough. Aim for a golden brown finish for the perfect texture.
-
Customize the Flavor: Don’t hesitate to experiment with spices in the breadcrumb mixture or the dipping sauce to create your signature twist!
Baked Coconut Shrimp Recipe FAQs
What type of shrimp should I use for this recipe?
Absolutely! For the best results, select large peeled and deveined shrimp to ensure they cook evenly and allow for easy breading. Fresh shrimp is ideal, but frozen shrimp can work perfectly too; just make sure to thaw them completely and pat them dry before use.
How should I store leftover Baked Coconut Shrimp?
You can store any leftovers in an airtight container in the refrigerator for up to 2 days. When you’re ready to enjoy them again, I recommend reheating them in the oven at 350°F (175°C) for about 10-15 minutes to help maintain their crispy texture.
Can I freeze Baked Coconut Shrimp?
Yes, indeed! To freeze your shrimp, lay them in a single layer on a baking sheet and flash freeze until solid. Then, transfer them to a freezer-safe bag for up to 2 months. When you’re ready to enjoy them again, simply thaw in the refrigerator overnight and reheat in the oven.
What if my shrimp aren’t crispy after baking?
No worries! If your Baked Coconut Shrimp aren’t crispy, it could be due to moisture. Make sure to thoroughly dry the shrimp before baking and ensure your oven is fully preheated. If you over-bake them, they may become tough, so keeping an eye on them in the oven is essential for that ideal golden crunch!
Is this recipe suitable for gluten-free diets?
Very much so! For a gluten-free version of Baked Coconut Shrimp, simply substitute all-purpose flour with almond flour and use gluten-free breadcrumbs. It’s a fantastic option that doesn’t compromise on taste or texture, so everyone can enjoy a tropical delight!

Baked Coconut Shrimp: Crispy Tropical Delight at Home
Ingredients
Equipment
Method
- Preheat your oven to 400°F (200°C).
- Pat the shrimp dry using paper towels and set aside.
- Set up your breading station with separate bowls for flour mixture, beaten eggs, and coconut-breadcrumb mixture.
- Bread each shrimp by dipping in flour, then egg, and finally in the coconut-breadcrumb mixture.
- Place breaded shrimp on a parchment-lined baking sheet and bake for 12 to 15 minutes, flipping halfway.
- Whisk together mayonnaise, sweet chili sauce, lime juice, and garlic powder for the Sweet Chili Mayo.
- Serve warm with the Sweet Chili Mayo.
Leave a Reply