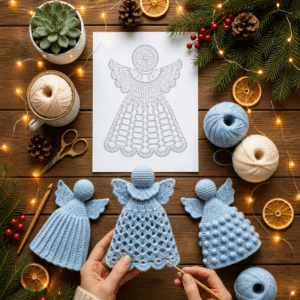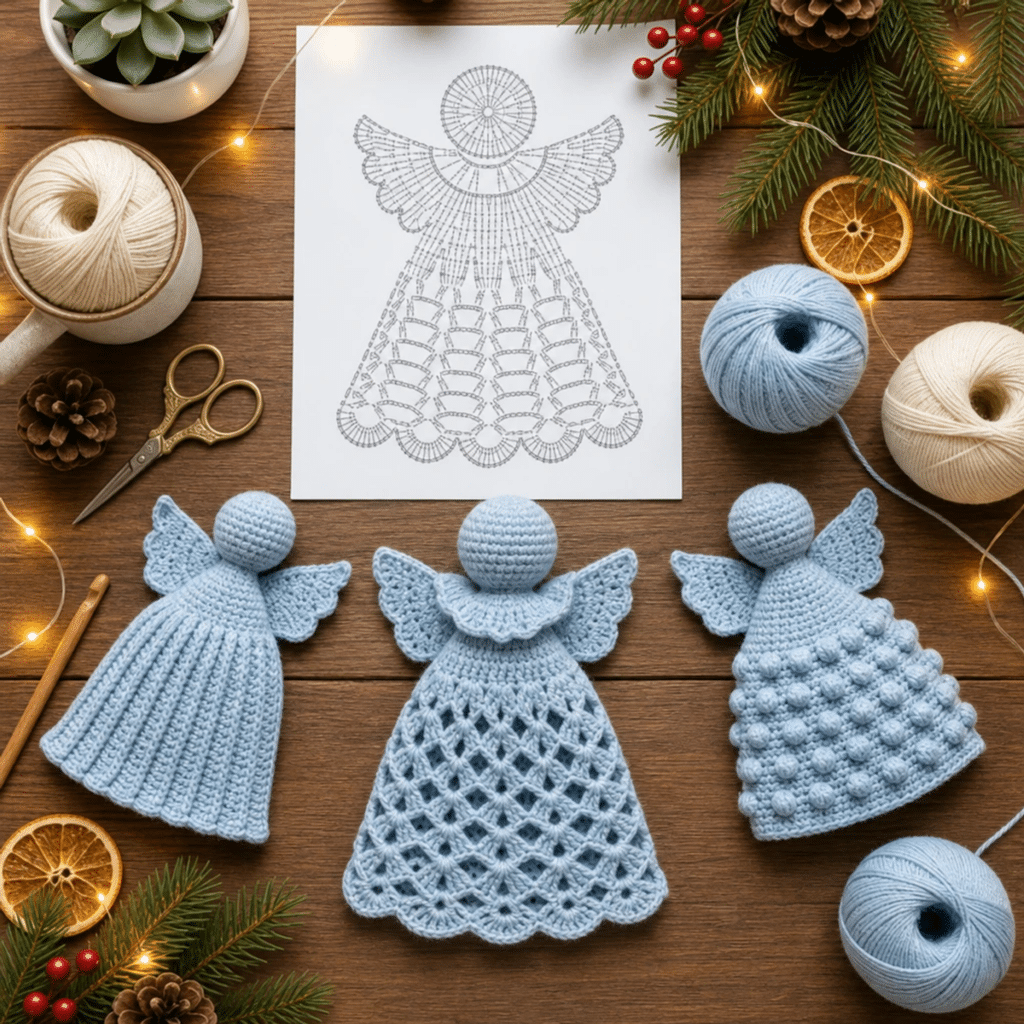
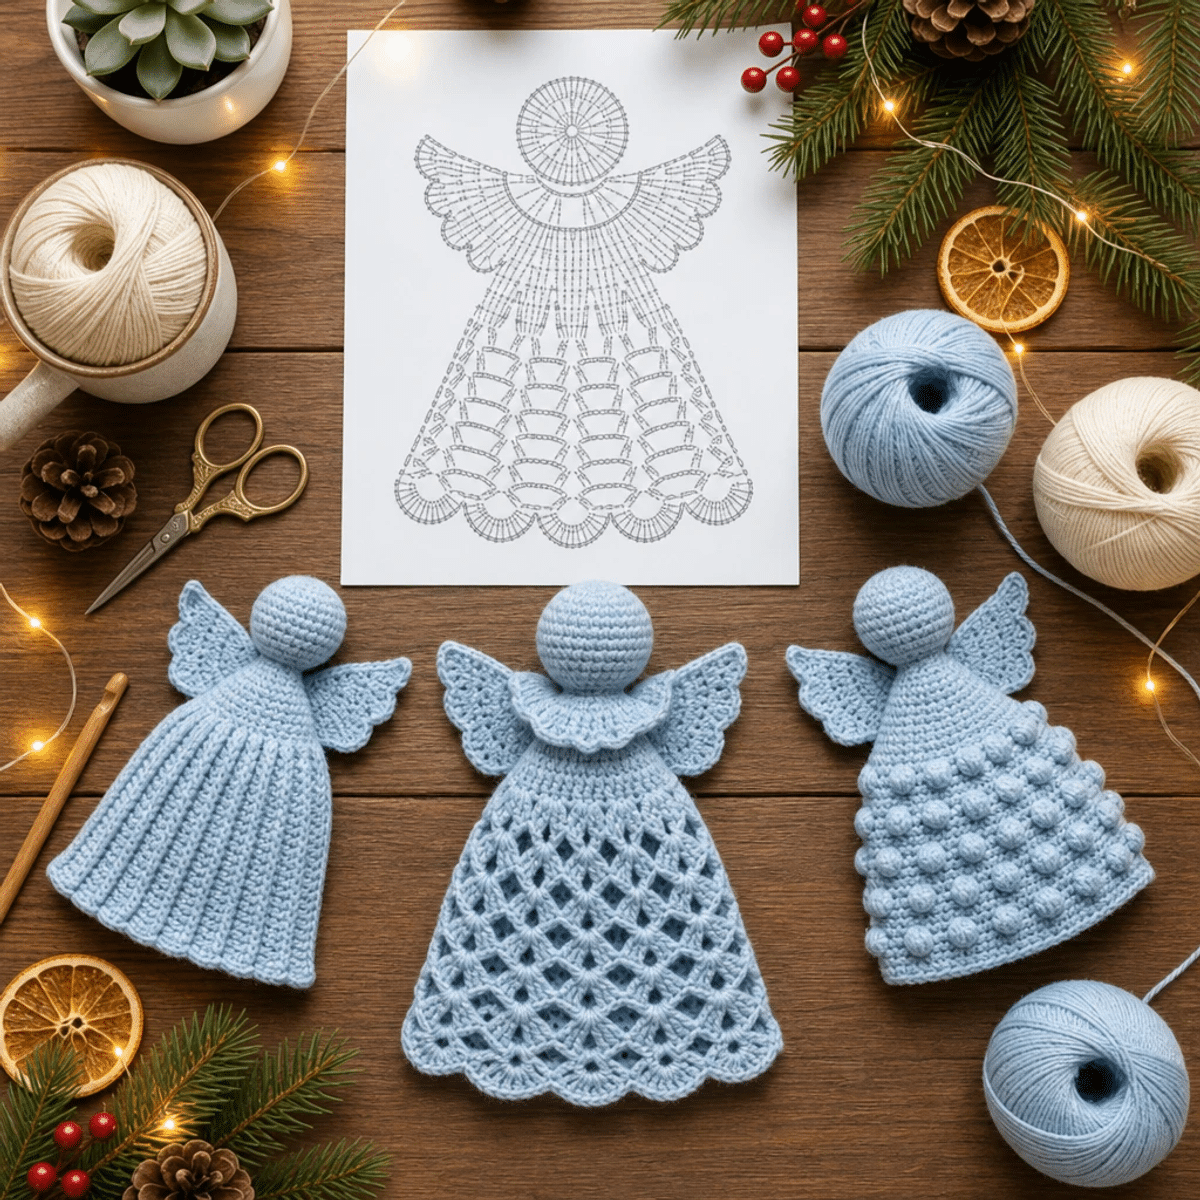
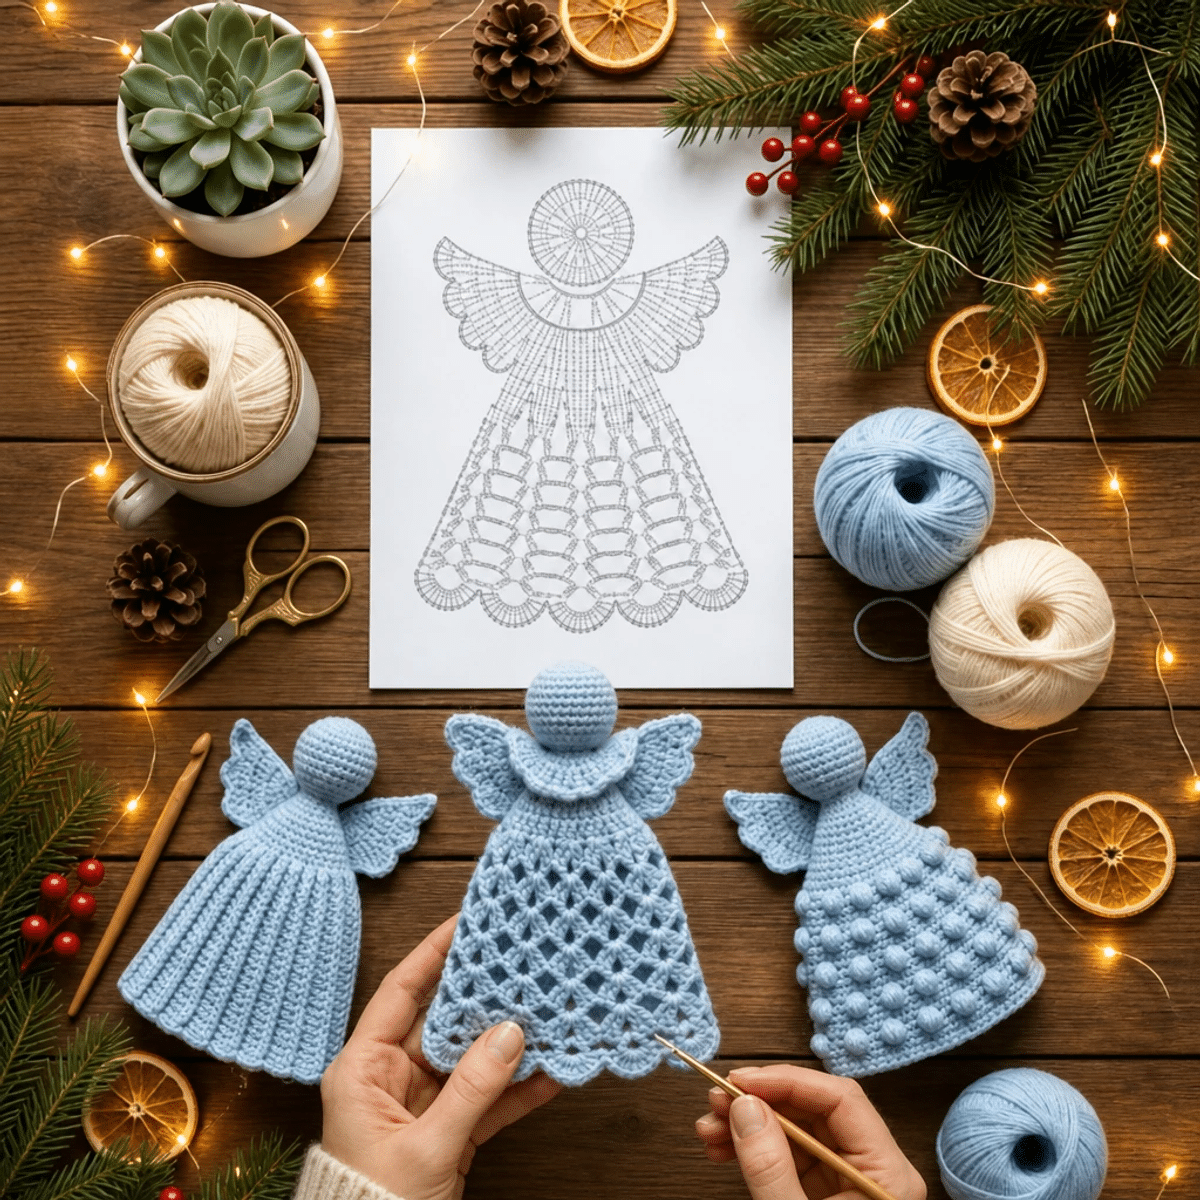
As I cradled the soft, powder blue yarn in my hands, I couldn't help but think of all the joyful moments that handmade gifts bring during the festive season. Today, I’m thrilled to share with you the pattern for Angioletti di Natale all’Uncinetto—a charming little Christmas angel that’s perfect for sprucing up your holiday decor. This sweet project works up quickly and is a delightful stash-buster, making it an ideal choice whether you’re a seasoned pro or just starting your crochet journey. As you stitch together the angel’s delicate wings and rounded form, you’ll not only create a beautiful ornament but also infuse every loop with love and warmth. Are you ready to let your creativity take flight? Let’s get started!
Angioletti di Natale all’Uncinetto Materials & Tools
Pro Tip: Gather your supplies for a seamless crafting experience to create your charming angel!
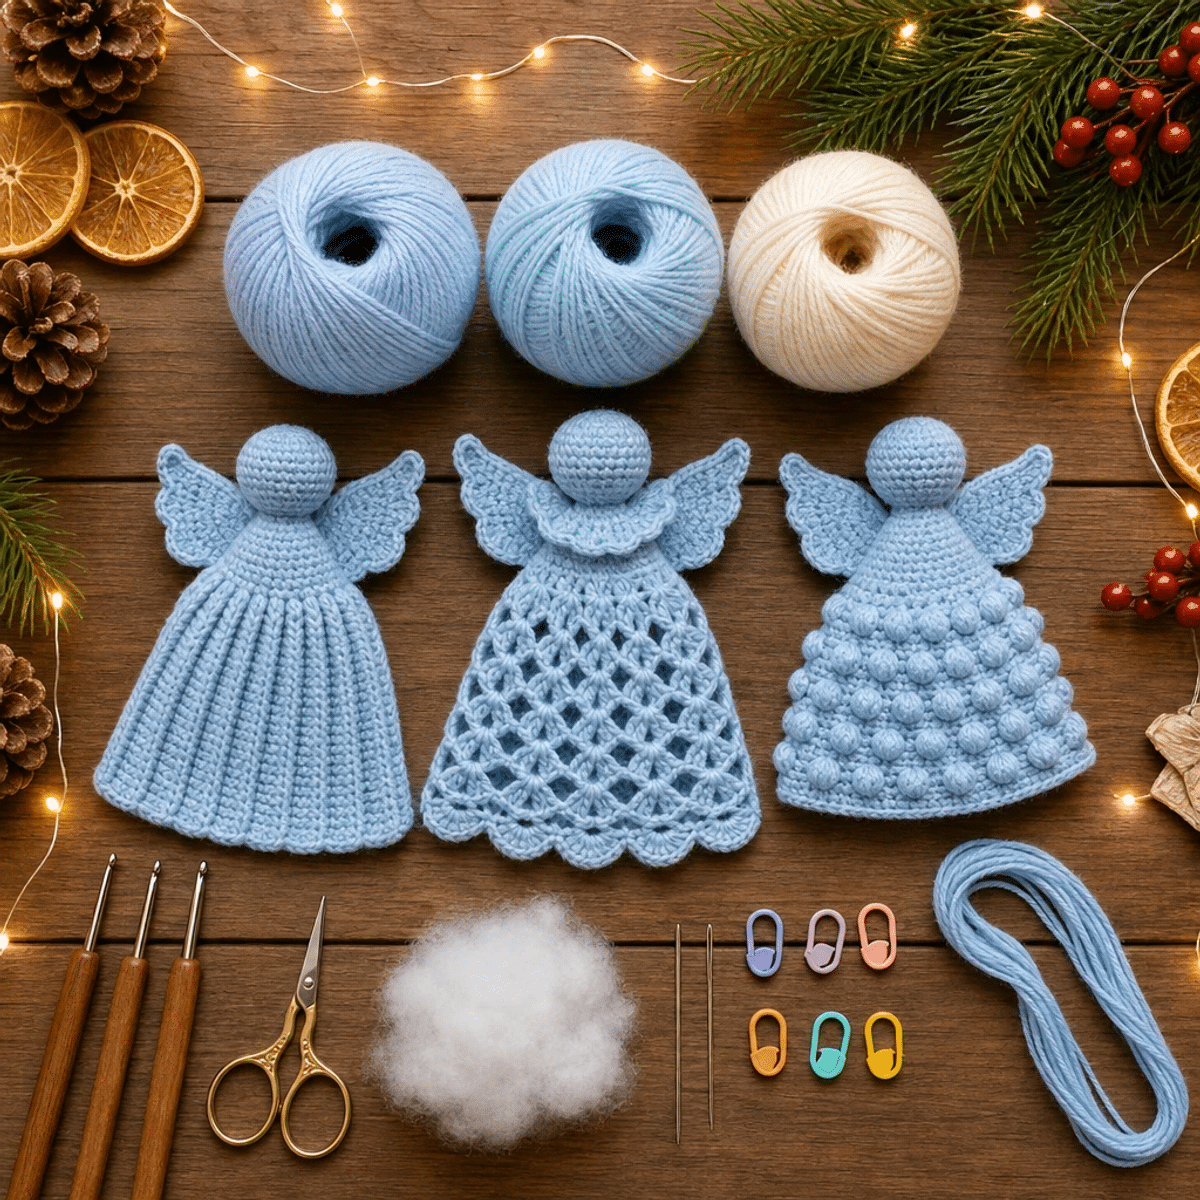
- Medium Cotton Yarn – Approximately 50g in powder blue (azzurro polvere) for a soft finish.
- 3.0mm (D) Hook – Perfect size for achieving the right tension in your stitches.
- Yarn Needle – Essential for sewing pieces together and weaving in ends.
- Scissors – Keep them handy for snipping yarn and finishing your project.
- Stuffing – A small amount to give your angel’s head a lovely rounded shape.
- Stitch Markers – Useful for tracking rounds, especially in continuous sections.
Why Will You Adore This Angel?
Charming Design: The Angioletti di Natale all’Uncinetto features a lovely rounded head and droplet body, making it an enchanting addition to your festive decor.
Quick & Easy: Perfect for beginners, this pattern combines basic stitches with straightforward construction, allowing you to craft your angel in about an hour!
Textured Elegance: With layers of soft cotton yarn in a stunning powder blue, the texture and color create an inviting look for any holiday setting.
Versatile Decor: Whether hanging on your tree or adorning a festive table, this little angel fits seamlessly into various decor styles.
Creative Joy: Each stitch allows for personal touch and warmth, making it a cherished project that encapsulates the spirit of giving.
Perfect Gift Idea: Handmade ornaments like these are thoughtful gifts, adding a personal flair to your loved ones' holiday traditions.
Gauge & Sizing Notes
Don't skip the gauge swatch! Ensuring the right tension is crucial for your Angioletti di Natale all’Uncinetto to come out perfectly sized at approximately 12–14 cm tall. While a specific gauge measurement isn't provided, a general guideline is to aim for a tension swatch that feels comfortable, allowing you to create a soft, fluffy texture. If you wish to adjust the size, for example, to make your angel taller or wider, increase your starting chain in multiples of 24. If your swatch is smaller than expected, try going up a hook size to achieve that cozy, festive look you're aiming for!
Step-by-Step Pattern for Angioletti di Natale all’Uncinetto
Row 1: Start the Head
Inizia con un anello magico (AM) e lavora 6 mb (maglie basse) nell'anello. Stringi l'anello per chiudere. Questo primo giro crea la base per la testa della tua angioletta, e alla fine dovresti avere 6 mb (6 sts).
Row 2: Increases in the Head
Nel secondo giro, lavora 2 mb in ogni m (maglia) del giro precedente. Quando completi questo passo, la testa della tua Angioletti di Natale all’Uncinetto inizierà a prendere forma, con un totale di 12 mb (12 sts).
Row 3: Continue Increasing
Nel terzo giro, ripeti 1 mb e poi 2 mb nella m seguente per 6 volte. Questo modello di aumenti ti darà una testa più arrotondata e completa, contribuendo a un totale di 18 mb (18 sts).
Row 4: More Increases
Per il quarto giro, ripeti 2 mb nella stessa m, seguiti da 2 mb nella m seguente per 6 volte. Dovresti sentirti soddisfatta mentre il tuo lavoro si espande, portandoti a 24 mb (24 sts).
Row 5-8: Body of the Head
Nei giri da 5 a 8, lavora 1 mb in ogni m. Continua a mantenere una tensione regolare; alla fine del giro 8, la tua testa dovrebbe apparire liscia e uniforme con 24 mb in ogni giro (24 sts).
Row 9: Decrease in the Head
Nel nono giro, ripeti 2 mb e 2 mb chiuse insieme per 6 volte per iniziare a restringere la testa. Alla fine, dovresti avere 18 mb (18 sts), e il tuo lavoro inizierà a chiudersi.
Row 10: Further Decrease
Per il decimo giro, lavora 1 mb e poi 2 mb chiuse insieme per 6 volte. Questo passaggio permette alla testa dell’angioletta di stringersi ulteriormente, portandoti a 12 mb (12 sts).
Row 11: Finish the Head
Inserisci una piccola quantità di imbottitura nella testa per darle forma. Esegui poi 6 diminuzioni di mb per chiudere la testa, e alla fine avrai 6 mb (6 sts). Chiudi e lascia un filo lungo per cucire.
Row 1: Start the Collar and Body
Avvia 24 cat (catenelle) e chiudi ad anello con 1 mbss (maglia bassissima) per iniziare a formare il colletto della tua Angioletti di Natale all’Uncinetto. Dovresti avere 24 m (24 sts) all'inizio di questo giro.
Row 2: Body Foundation
Nel secondo giro, lavora 1 mb in ogni cat e chiudi con 1 mbss. Il corpo della tua angioletta inizierà a risultare più definito, con una base di 24 mb (24 sts).
Row 3: Shaping the Body
Lavora 3 cat, poi 1 ma (maglia alta) nella stessa m, e successivamente 2 ma in ogni m del giro. Al termine, la base del corpo si allargherà con un totale di 48 m (48 sts).
Row 4: Continue the Body
Ripeti 3 cat, poi 1 ma in ogni m e chiudi con 1 mbss. Questo giro crea una forma bella e piena, mantenendo il totale a 48 m (48 sts).
Row 5: Create Spaces
Ripeti 1 ma e 1 cat, saltando 1 m per 24 volte. Le aperture cominceranno a formarsi, risultando in 24 ma e 24 spazi (24 ma e 24 sp).
Row 6: Build upon the Spaces
In ogni spazio, lavora 2 ma e 1 cat. Dovresti avere una produzione ricca di 48 ma e 24 spazi (48 ma e 24 sp).
Row 7: Expand the Body
Ripeti 3 ma e 1 cat in ogni spazio, aumentando a 72 m nel totale (72 ma e 24 sp).
Row 8: Complex Stitching
In ogni spazio, lavora 3 ma, 2 cat e 3 ma; questo passaggio arricchisce il vestito, portando a 144 ma e 24 sp (144 ma e 24 sp).
Row 9: Repeat the Dress Pattern
Ripeti il passo precedente per un altro giro, mantenendo il totale a 144 ma e 24 sp. È affascinante vedere la tua angioletta prendere forma!
Row 10: Finalize the Body Shape
In ogni spazio, lavorare 5 ma, creando una struttura solida per il corpo con 120 ma (120 ma).
Row 11: Final Detailing
Ripeti 1 mb, salta 1 m e lavora 5 ma nella m successiva per 40 volte. Questo creerà 40 ventagli che abbelliranno il vestito. Chiudi e nascondi il filo.
Row 1: Create Wings
Avvia 7 cat e lavora 6 mb dalla seconda cat per formare la prima ala. Dovresti notare la forma della ala cominciare a prendere vita con 6 mb (6 sts).
Row 2: Shape the Wings
Fai 1 cat, volta e lavora 2 mb nella prima m, 4 mb e 2 mb nell’ultima m. Questo darà alla tua ala una forma affascinante e traforata con 8 mb (8 sts).
Row 3: Expanding the Wings
Fai 1 cat, volta e lavora 2 mb nella prima m, 6 mb e 2 mb nell’ultima m. Ora la tua ala dovrebbe mostrare 10 mb (10 sts).
Row 4: Further Wing Expansion
Fai 1 cat, volta, e procedi come nel passo precedente per ottenere 12 mb (12 sts). Continua ad espandere la tua ala gradualmente.
Row 5: Finalizing Wing Shape
Fai 1 cat, volta e lavora 1 ma in ogni m (12 sts). La tua ala inizierà a sembrare più finita.
Row 6: Adding Texture
Fai 1 cat, volta e crea una combinazione di mb e ma per dare alla tua ala una finitura bellissima. Chiudi lasciando un filo lungo.
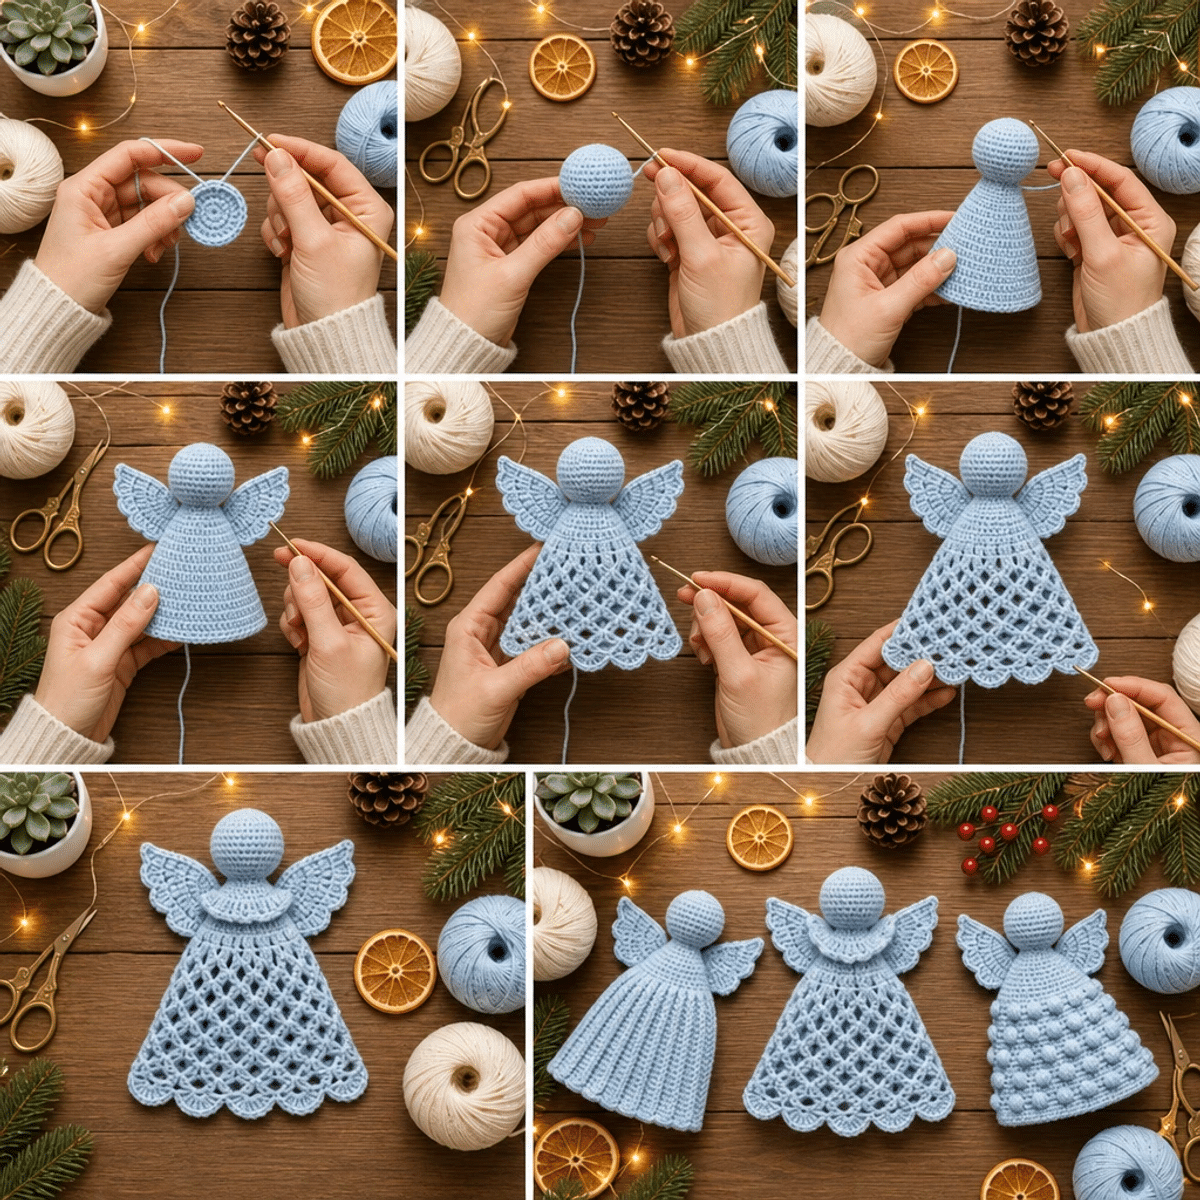
Step 1: Assemble the Angel
Cucire la testa al centro dell'apertura superiore del corpo, prestando attenzione a posizionarla centralmente. Assicurati che sia ben fissata per un aspetto ordinato e proporzionato.
Step 2: Attach Wings
Posiziona le ali simmetricamente dietro la testa e cucile saldamente alla parte superiore del corpo. Questo darà stabilità e un aspetto bilanciato all'intera angioletta.
Step 3: Secure All Threads
Fissa bene tutti i fili sul rovescio del tuo lavoro per evitare che si slaccino. La cura nei dettagli renderà il tuo Angioletti di Natale all’Uncinetto ancora più bello.
Step 4: Final Touches
Modella delicatamente le ali con le dita e stendi il vestito. Inumidisci leggermente il lavoro e lascialo asciugare in forma per mantenere la sua bellezza.
Step 5: Add a Hanging Loop
Aggiungi un piccolo cappietto di cat dietro la testa per appenderla. Ora la tua angioletta è pronta per abbellire il tuo albero di Natale o il tuo ambiente festivo!
Expert Tips for Angioletti di Natale
-
Maintain Tension: Consistent tension ensures that your stitches look neat and even. Use a stitch marker to track your rounds easily.
-
Count Carefully: Keep a stitch count as you work to avoid losing track. It’s easy to miscount, especially in increasing or decreasing rows.
-
Secure Ends: Weave in all ends securely after finishing. This helps maintain the integrity of your Angioletti di Natale all’Uncinetto and keeps it looking polished.
-
Stuff Evenly: When adding stuffing, do so evenly to avoid lumps. This gives your angel a lovely, rounded shape.
-
Final Adjustments: Don’t forget to lightly shape the wings and body before it dries. This will enhance the angel’s overall appearance.
What to Pair with Angioletti di Natale all’Uncinetto?
Create a whimsical holiday ensemble that brings warmth and enchantment to your festive décor.
-
Festive Ornaments: Add a collection of ornament balls in coordinating colors to make your tree shine brighter.
The rich blue of the Angioletti di Natale will beautifully contrast against shimmering reds and golds. -
Crochet Stars: Craft delicate star shapes to hang alongside your angel, creating a celestial theme.
These stars can be made with the same yarn, echoing the soft textures of your holiday angel. -
Mini Stockings: Stitch tiny stockings in powder blue for a charming addition to your holiday mantle.
These can be filled with treats or hung as fun identifiers for guests at seasonal gatherings. -
Cozy Tree Skirt: Create a small tree skirt in a matching blue shade to tie the whole look together.
The coordinated colors will provide a warm, inviting base for all the decorations above. -
Matching Gift Tags: Make crochet gift tags shaped like mittens or hearts for a personal touch to your gifts.
These tiny details will infuse love into each present, making your festivity unforgettable.
Angioletti di Natale all’Uncinetto Variations
Unleash your creativity and transform your angel into a unique masterpiece with these fun variations and substitutions!
-
Yarn Substitutions: Opt for a lighter yarn weight, like sport or DK, for a more delicate look. This change will yield a smaller angel, adding a touch of finesse to your decor.
-
Color Swaps: Try a warm gold or soft pink instead of powder blue. The change in color will give your angel a whole new vibe, making it a perfect fit for diverse festive themes.
-
Textured Elegance: Add a scalloped border around the angel's skirt with picots for a delicate finish. This simple twist can enhance the overall aesthetic and provide a charming, whimsical flair.
-
Fringe Detailing: Incorporate a small fringe to the bottom of the skirt for a playful touch. It will create delightful movement, bringing your angel to life as it catches the light.
-
Larger Size: Increase the number of starting chains for the collar and body to create a fuller angel. This larger stature will make a stunning statement piece in your holiday decorations.
-
Cotton vs. Acrylic: For added warmth and durability, use an acrylic blend instead. This will lend your angel a cozier feel, making her perfect for snuggling or outdoor displays.
-
Wing Variations: Experiment with different wing styles, like lace or scalloped edges. Each design choice enhances the angel’s individuality, allowing your creativity to shine.
-
Add a Halo: Create a simple chain and stitch circle for a celestial halo effect. This small detail will elevate your angel, giving her that ethereal touch and inviting a sense of joy to your decor.
How to Wash and Care for Your Angioletti di Natale
Machine Washing: Use cold water on a gentle cycle to avoid any agitation that could lead to felting or pilling.
Hand Washing: For best results, hand wash your angel in cold water with mild detergent, gently pressing without twisting to maintain its shape.
Drying/Blocking: Lay your Angioletti di Natale all’Uncinetto flat on a clean towel to dry. Avoid hanging it up, as this could distort its form.
Storage: Store your angel in a cool, dry place, ideally in a cloth bag or container to prevent dust accumulation and keep it looking beautiful year after year.
Angioletti di Natale all’Uncinetto FAQs
Can I substitute yarn for the Angioletti di Natale all’Uncinetto?
Absolutely! While medium cotton yarn is recommended for its softness and structure, you can swap it for an acrylic or cotton blend. Just keep an eye on your gauge, as substitutions may affect the finished size and texture.
How do I make my Angioletti di Natale all’Uncinetto bigger or smaller?
To adjust the size, simply increase or decrease the number of stitches in your foundation chain and subsequent rows. If you want a larger angel, consider using a thicker yarn and a larger hook. For a smaller version, just follow the pattern as is but use a lighter yarn and a smaller hook!
Why is my work curling during the Angioletti di Natale all’Uncinetto project?
Don’t panic! Curling often happens when the tension is too tight or if you've missed a stitch. Check your tension; using a looser grip can help. Also, ensure you’re working in the correct stitch count as outlined. If it persists, a gentle blocking can help flatten it out once you’re done.
What size hook should I use for the Angioletti di Natale all’Uncinetto?
A 3.0mm (D) hook is recommended to achieve the right tension for this pattern. If you're consistently having trouble with the gauge, consider adjusting to a hook size that allows your stitches to feel comfortable without being too loose or tight.
How do I fix dropped stitches in the Angioletti di Natale all’Uncinetto?
It's an easy fix! Simply locate the dropped stitch and use a crochet hook to bring it back up to the last completed row. You can also crochet it back into place, ensuring to maintain the stitch pattern. Practice will build your confidence!
What can I do if my angel’s head is uneven?
No worries! If your head isn’t round, it’s likely due to tension inconsistencies or irregular stitch counts. I recommend taking a moment to count your stitches after every few rows. If it's done, gently reshape it with your fingers, and don't hesitate to add some extra stuffing for support!
Crochet Angioletti di Natale: A Cozy, 1-Hour Project
Ingredienti
Method
- Materials and tools prepared for this project.
- Row 1: Start the Head
- Inizia con un anello magico (AM) e lavora 6 mb (maglie basse) nell'anello. Stringi l'anello per chiudere. Questo primo giro crea la base per la testa della tua angioletta, e alla fine dovresti avere 6 mb (6 sts).
- Row 2: Increases in the Head
- Nel secondo giro, lavora 2 mb in ogni m (maglia) del giro precedente. Quando completi questo passo, la testa della tua Angioletti di Natale all’Uncinetto inizierà a prendere forma, con un totale di 12 mb (12 sts).
- Row 3: Continue Increasing
- Nel terzo giro, ripeti 1 mb e poi 2 mb nella m seguente per 6 volte. Questo modello di aumenti ti darà una testa più arrotondata e completa, contribuendo a un totale di 18 mb (18 sts).
- Row 4: More Increases
- Per il quarto giro, ripeti 2 mb nella stessa m, seguiti da 2 mb nella m seguente per 6 volte. Dovresti sentirti soddisfatta mentre il tuo lavoro si espande, portandoti a 24 mb (24 sts).
- Row 5-8: Body of the Head
- Nei giri da 5 a 8, lavora 1 mb in ogni m. Continua a mantenere una tensione regolare; alla fine del giro 8, la tua testa dovrebbe apparire liscia e uniforme con 24 mb in ogni giro (24 sts).
- Row 9: Decrease in the Head
- Nel nono giro, ripeti 2 mb e 2 mb chiuse insieme per 6 volte per iniziare a restringere la testa. Alla fine, dovresti avere 18 mb (18 sts), e il tuo lavoro inizierà a chiudersi.
- Row 10: Further Decrease
- Per il decimo giro, lavora 1 mb e poi 2 mb chiuse insieme per 6 volte. Questo passaggio permette alla testa dell’angioletta di stringersi ulteriormente, portandoti a 12 mb (12 sts).
- Row 11: Finish the Head
- Inserisci una piccola quantità di imbottitura nella testa per darle forma. Esegui poi 6 diminuzioni di mb per chiudere la testa, e alla fine avrai 6 mb (6 sts). Chiudi e lascia un filo lungo per cucire.
- Row 1: Start the Collar and Body
- Avvia 24 cat (catenelle) e chiudi ad anello con 1 mbss (maglia bassissima) per iniziare a formare il colletto della tua Angioletti di Natale all’Uncinetto. Dovresti avere 24 m (24 sts) all'inizio di questo giro.
- Row 2: Body Foundation
- Nel secondo giro, lavora 1 mb in ogni cat e chiudi con 1 mbss. Il corpo della tua angioletta inizierà a risultare più definito, con una base di 24 mb (24 sts).
- Row 3: Shaping the Body
- Lavora 3 cat, poi 1 ma (maglia alta) nella stessa m, e successivamente 2 ma in ogni m del giro. Al termine, la base del corpo si allargherà con un totale di 48 m (48 sts).
- Row 4: Continue the Body
- Ripeti 3 cat, poi 1 ma in ogni m e chiudi con 1 mbss. Questo giro crea una forma bella e piena, mantenendo il totale a 48 m (48 sts).
- Row 5: Create Spaces
- Ripeti 1 ma e 1 cat, saltando 1 m per 24 volte. Le aperture cominceranno a formarsi, risultando in 24 ma e 24 spazi (24 ma e 24 sp).
- Row 6: Build upon the Spaces
- In ogni spazio, lavora 2 ma e 1 cat. Dovresti avere una produzione ricca di 48 ma e 24 spazi (48 ma e 24 sp).
- Row 7: Expand the Body
- Ripeti 3 ma e 1 cat in ogni spazio, aumentando a 72 m nel totale (72 ma e 24 sp).
- Row 8: Complex Stitching
- In ogni spazio, lavora 3 ma, 2 cat e 3 ma; questo passaggio arricchisce il vestito, portando a 144 ma e 24 sp (144 ma e 24 sp).
- Row 9: Repeat the Dress Pattern
- Ripeti il passo precedente per un altro giro, mantenendo il totale a 144 ma e 24 sp. È affascinante vedere la tua angioletta prendere forma!
- Row 10: Finalize the Body Shape
- In ogni spazio, lavorare 5 ma, creando una struttura solida per il corpo con 120 ma (120 ma).
- Row 11: Final Detailing
- Ripeti 1 mb, salta 1 m e lavora 5 ma nella m successiva per 40 volte. Questo creerà 40 ventagli che abbelliranno il vestito. Chiudi e nascondi il filo.
- Row 1: Create Wings
- Avvia 7 cat e lavora 6 mb dalla seconda cat per formare la prima ala. Dovresti notare la forma della ala cominciare a prendere vita con 6 mb (6 sts).
- Row 2: Shape the Wings
- Fai 1 cat, volta e lavora 2 mb nella prima m, 4 mb e 2 mb nell’ultima m. Questo darà alla tua ala una forma affascinante e traforata con 8 mb (8 sts).
- Row 3: Expanding the Wings
- Fai 1 cat, volta e lavora 2 mb nella prima m, 6 mb e 2 mb nell’ultima m. Ora la tua ala dovrebbe mostrare 10 mb (10 sts).
- Row 4: Further Wing Expansion
- Fai 1 cat, volta, e procedi come nel passo precedente per ottenere 12 mb (12 sts). Continua ad espandere la tua ala gradualmente.
- Row 5: Finalizing Wing Shape
- Fai 1 cat, volta e lavora 1 ma in ogni m (12 sts). La tua ala inizierà a sembrare più finita.
- Row 6: Adding Texture
- Fai 1 cat, volta e crea una combinazione di mb e ma per dare alla tua ala una finitura bellissima. Chiudi lasciando un filo lungo.
- Step 1: Assemble the Angel
- Cucire la testa al centro dell'apertura superiore del corpo, prestando attenzione a posizionarla centralmente. Assicurati che sia ben fissata per un aspetto ordinato e proporzionato.
- Step 2: Attach Wings
- Posiziona le ali simmetricamente dietro la testa e cucile saldamente alla parte superiore del corpo. Questo darà stabilità e un aspetto bilanciato all'intera angioletta.
- Step 3: Secure All Threads
- Fissa bene tutti i fili sul rovescio del tuo lavoro per evitare che si slaccino. La cura nei dettagli renderà il tuo Angioletti di Natale all’Uncinetto ancora più bello.
- Step 4: Final Touches
- Modella delicatamente le ali con le dita e stendi il vestito. Inumidisci leggermente il lavoro e lascialo asciugare in forma per mantenere la sua bellezza.
- Step 5: Add a Hanging Loop
- Aggiungi un piccolo cappietto di cat dietro la testa per appenderla. Ora la tua angioletta è pronta per abbellire il tuo albero di Natale o il tuo ambiente festivo!