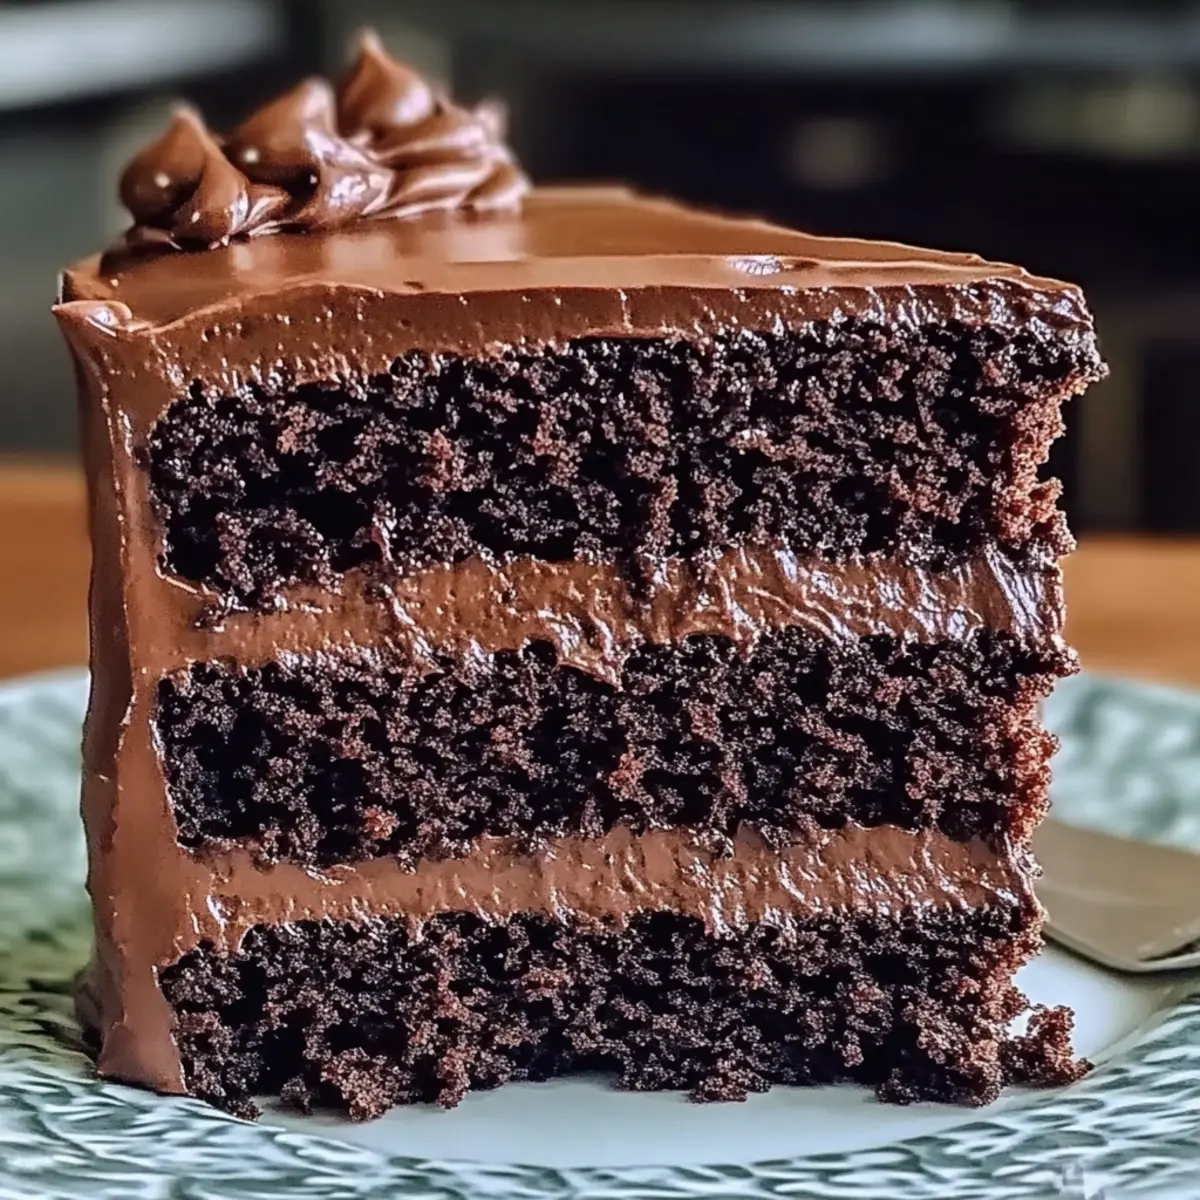
While watching the heartwarming movie “Matilda,” I was captivated not just by the story but by that iconic, towering chocolate cake that seemed to hold its own kind of magic. It’s the perfect dessert to echo childhood nostalgia and joy while becoming a centerpiece in gatherings. Today, I’m excited to share with you the best Matilda Chocolate Cake recipe, a triple chocolate indulgence that will satisfy even the most fervent sweet tooth. With its moist, fudgy texture and the ability to elevate any birthday or movie night, this cake comes together quickly, making it a stress-free addition to your repertoire. Imagine the smiles on your loved ones’ faces as they savor each rich bite, filled with dark, semi-sweet, and cocoa chocolate layers. Ready to bake your way to a memorable moment? Let’s get started!
Why is This Cake So Irresistible?
Decadence at Every Bite: This isn’t just any chocolate cake; it’s a triple chocolate wonder that will leave you craving more.
Classic Comfort: Inspired by the beloved movie “Matilda,” it evokes nostalgia, making it perfect for family gatherings.
Moist and Fudgy: Each slice offers an ultra-moist texture, thanks to premium ingredients like dark chocolate and buttermilk.
Crowd-Pleaser: Perfect for birthdays or movie nights, everyone will adore it, just like our Caramel Brownie Cheesecake.
Quick and Easy: With straightforward steps, even novice bakers can impress with this luxurious dessert!
Versatile Options: Customize flavors by adding orange zest or using your favorite chocolate types, like in our Chocolate Oat Cookies.
Best Matilda Chocolate Cake Ingredients
For the Cake
- Dark Chocolate – Provides moisture and richness. Use high-quality chocolate (60-70% cocoa) for best results.
- Dutch-Processed Cocoa Powder – Adds depth of flavor and contributes to the cake’s dark color. No direct substitution; unsweetened cocoa can be used in a pinch.
- All-Purpose Flour – Offers structure to the cake. Gluten-free flour can be substituted, but results may vary.
- Granulated Sugar – Sweetens the cake. Can replace with coconut sugar for a healthier option.
- Light Brown Sugar – Adds moisture and enhances flavor. Can be substituted with all granulated sugar, but texture may differ.
- Unsalted Butter – Provides a tender crumb. Use vegan butter for a dairy-free version.
- Large Eggs – Binds ingredients and helps with leavening. Flax eggs can be used as a vegan substitute.
- Buttermilk – Enhances moisture and flavor. Milk mixed with vinegar or lemon juice works as a substitute.
- Baking Soda & Baking Powder – Both act as leavening agents for cake rise. Ensure they are fresh for best results.
- Espresso Powder – Intensifies chocolate flavor. Optional; can omit if not available.
- Pure Vanilla Extract – Enhances overall flavor profile. Never use imitation vanilla for best taste.
- Salt – Balances sweetness and enhances flavors. Omit if using salted butter.
- Semi-Sweet Chocolate Chips – Add texture and sweetness. Milk chocolate can be an alternative for a sweeter cake.
For the Ganache
- Heavy Cream – Creates a smooth, rich ganache. Make sure to heat just until simmering for the best results.
- Chopped Dark Chocolate – Forms the base of the ganache. Use high-quality chocolate for a rich flavor.
- Butter – Adds shine and creaminess to the ganache. Opt for unsalted to control the saltiness.
This collection of ingredients is what makes the best Matilda chocolate cake experience a little slice of heaven! Happy baking!
Step‑by‑Step Instructions for The Best Matilda Chocolate Cake
Step 1: Preheat the Oven and Prepare Pans
Begin by preheating your oven to 350°F (175°C). While the oven is heating, take two 9-inch round cake pans and line the bottoms with parchment paper. Lightly grease the sides with butter or non-stick spray to ensure a smooth release after baking. You’ll want the pans ready to cradle the magic of the Matilda Chocolate Cake as it bakes!
Step 2: Melt the Dark Chocolate
In a microwave-safe bowl or using a double boiler, melt the dark chocolate until smooth and glossy, stirring occasionally to prevent burning. This process should take about 1-2 minutes in the microwave or 5 minutes on the stovetop. Allow the melted chocolate to cool slightly while you move on to the next step to maintain the right texture in the batter.
Step 3: Cream the Butter and Sugars
In a large mixing bowl, use an electric mixer to cream together the unsalted butter, granulated sugar, and light brown sugar until the mixture is light and fluffy, about 3 minutes. Make sure to scrape down the sides of the bowl for even mixing. Then, incorporate the eggs one at a time, mixing well after each addition, followed by the vanilla extract and the cooled melted chocolate until everything is combined smoothly.
Step 4: Combine Dry Ingredients
In another bowl, whisk together the all-purpose flour, Dutch-processed cocoa powder, baking soda, baking powder, espresso powder, and salt. This step ensures that all the leavening agents are evenly distributed throughout the flour, which is crucial for creating a well-risen and fluffy Matilda Chocolate Cake. Set this dry mixture aside after whisking.
Step 5: Alternate Adding Ingredients
Gradually add the dry ingredient mixture to the wet mixture, alternating with the buttermilk. Start with a portion of the dry ingredients, then a splash of buttermilk, and continue the process until all is combined, being careful not to overmix. This technique helps achieve the perfect texture for the cake. Finally, gently fold in the semi-sweet chocolate chips for that extra decadent touch.
Step 6: Bake the Cakes
Divide the batter evenly between the two prepared cake pans. Place them in the preheated oven and bake for 30-35 minutes, or until a toothpick inserted into the center comes out with moist crumbs, indicating a perfectly baked cake. Keep an eye on them towards the end of the baking time to prevent overcooking.
Step 7: Cool the Cakes
Once baked, remove the cake pans from the oven and let them cool in the pans for about 10 minutes. Then, carefully turn them out onto wire racks to cool completely. This cooling process is essential for maintaining the luxurious texture of your Matilda Chocolate Cake, so don’t rush it!
Step 8: Prepare the Ganache
To make the rich ganache, heat the heavy cream in a small saucepan over medium heat until it just begins to simmer. Pour the hot cream over the chopped dark chocolate in a bowl. Allow it to sit for 2 minutes before stirring in the unsalted butter and pure vanilla extract until the mixture is silky and smooth. This ganache will add a gorgeous finishing touch to your cake.
Step 9: Assemble the Cake
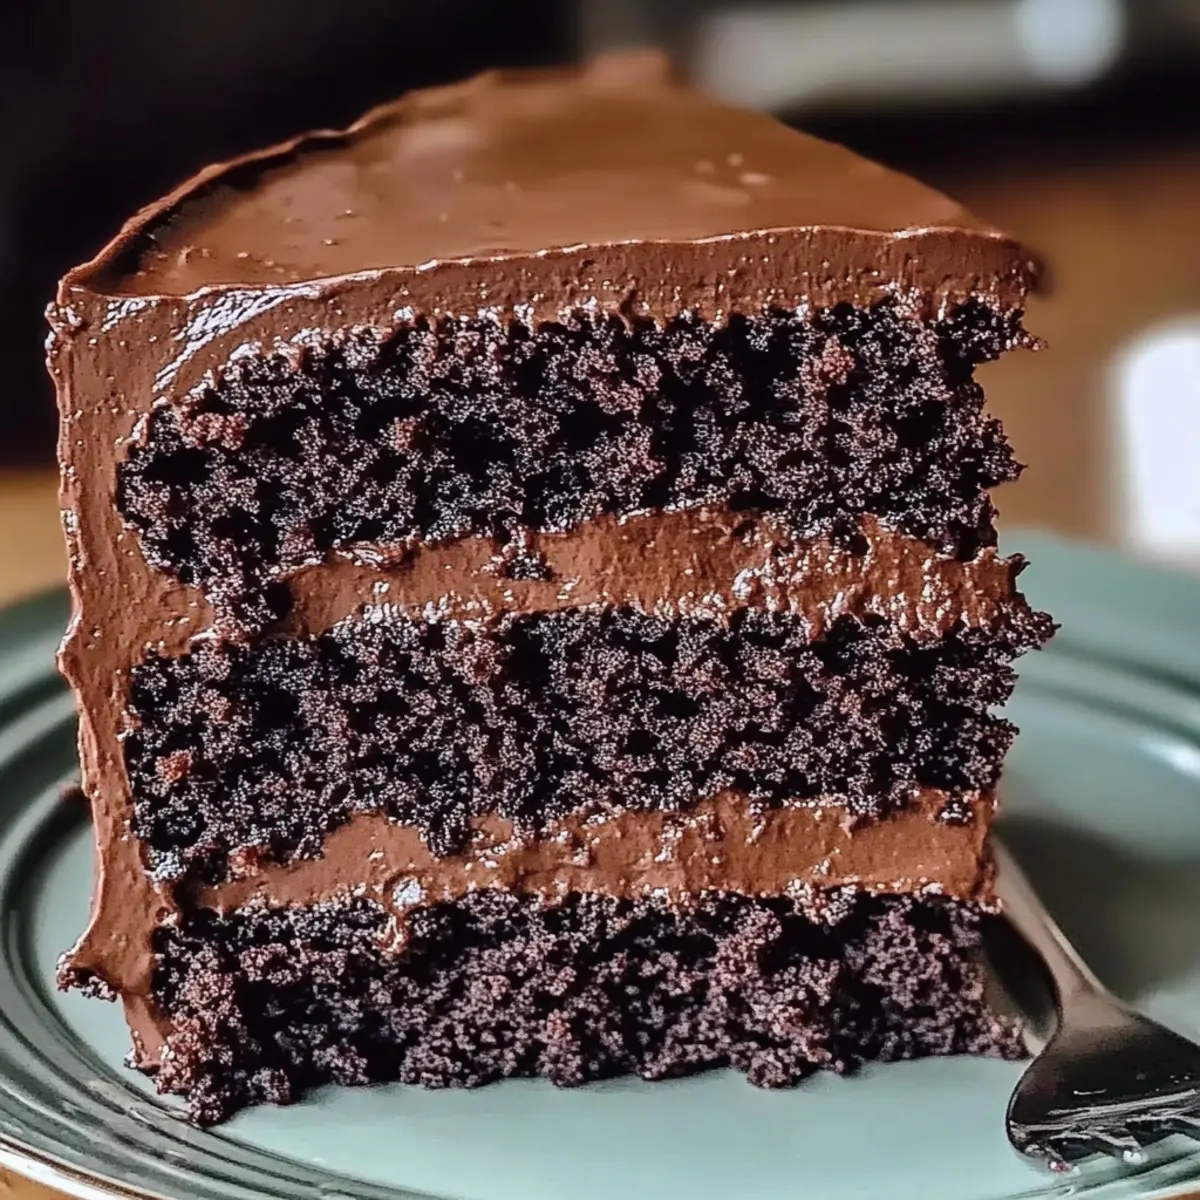
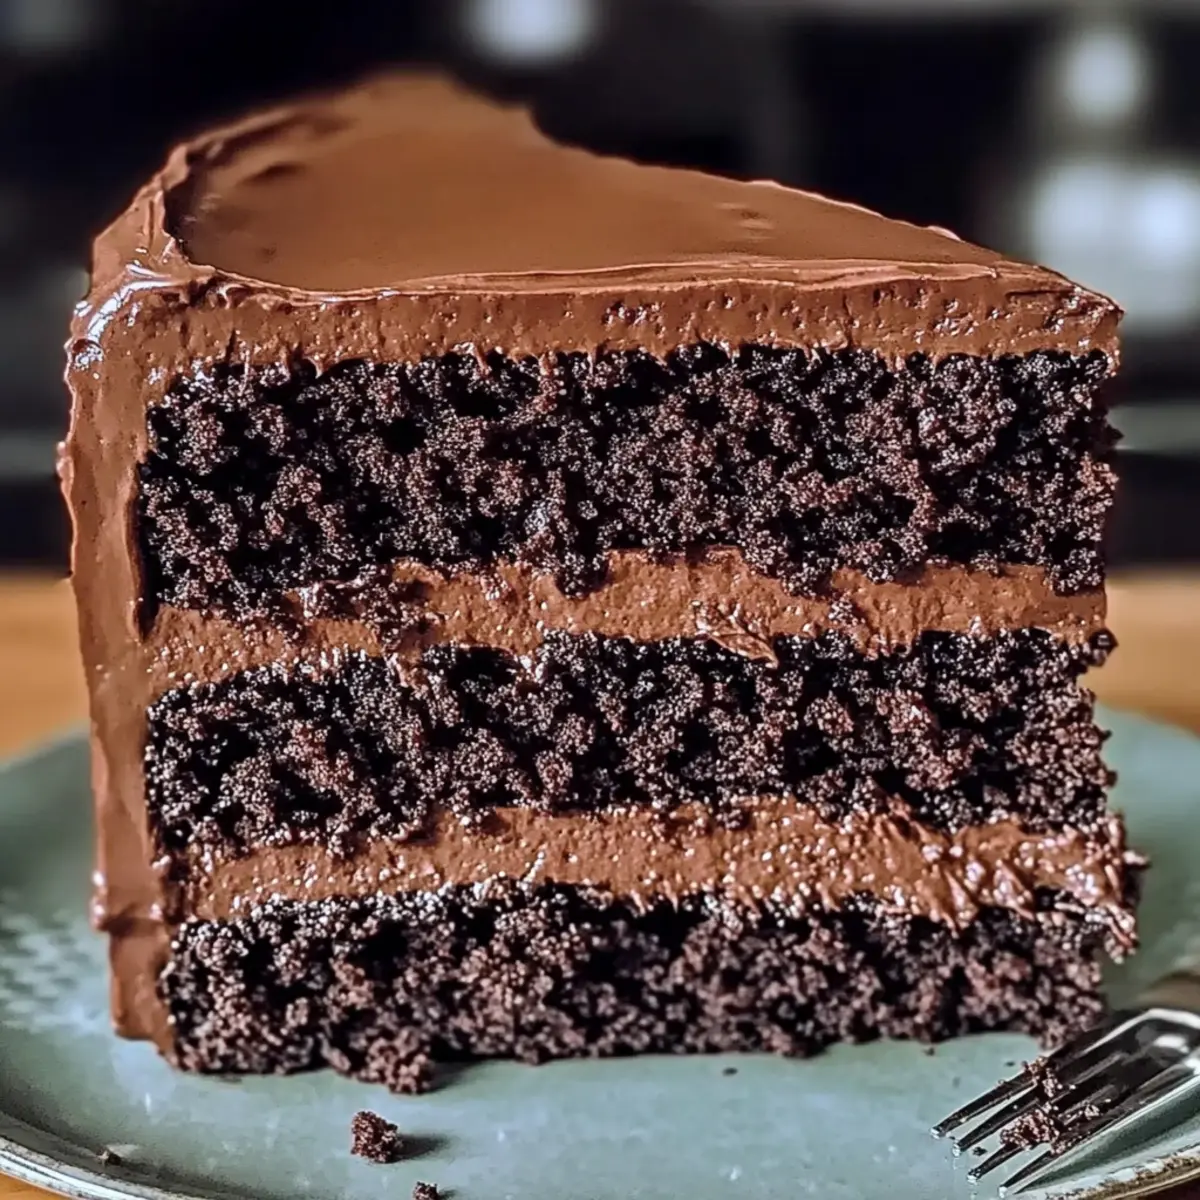
To assemble your decadent Matilda Chocolate Cake, place one cooled layer on a serving plate. Spread a generous amount of ganache on top, creating a luscious layer. Carefully position the second layer on top, then pour the remaining ganache over the entire cake, allowing it to drape elegantly down the sides for a dramatic effect.
Step 10: Serve and Delight
Your beautiful Matilda Chocolate Cake is now ready to be enjoyed! Serve slices to your family and friends, and watch the delighted expressions as they savor the rich chocolate layers. This cake is perfect for special occasions, movie nights, or just because—making it a wonderfully indulgent treat!
The Best Matilda Chocolate Cake Variations
Feel free to let your creativity shine as you customize this luscious cake!
-
Coffee Boost: Substitute cooled brewed coffee for water to amplify the chocolate flavor even more.
-
Dairy-Free Delight: Use almond or soy milk instead of buttermilk for a fantastic dairy alternative that maintains richness.
-
Citrus Twist: Incorporate orange zest into the batter for a refreshing citrus note that brightens up the cake.
-
Nutty Indulgence: Add chopped walnuts or pecans to the batter for a delightful crunch that complements the chocolate texture.
-
Minty Fresh: Stir in peppermint extract to give your cake a festive twist, perfect for holiday gatherings!
-
Gluten-Free Option: Replace all-purpose flour with a gluten-free blend to accommodate those with dietary preferences.
-
Spicy Chocolate: Add a pinch of cayenne pepper to the batter for a surprising kick that enhances the chocolate flavor.
-
Layered Surprise: Turn it into a layer cake with your favorite frosting between layers, such as cream cheese or a rich ganache.
While you’re at it, don’t forget to indulge in our Chocolate Oat Cookies for a cozy treat or the rich flavors found in our Gingerbread Latte Cake. The options are limitless, just like the joy you’ll spread with every bite!
Expert Tips for the Best Matilda Chocolate Cake
-
Quality Matters: Use high-quality dark chocolate. It makes all the difference in flavor; cheap chocolate can lead to a dull taste.
-
Room Temperature Ingredients: Ensure all ingredients are at room temperature for a smooth batter and optimal rise.
-
Don’t Overmix: Once you combine the wet and dry ingredients, mix just until combined. Overmixing can lead to a tough cake.
-
Cooling Time: Be patient during the cooling process. Rushing this step can affect the cake’s texture, making it less moist.
-
Ganache Consistency: Let the ganache cool slightly before pouring over the cake. This ensures a beautiful drip effect without overpowering the cake.
-
Customize Flavors: Feel free to add a subtle twist, like orange zest or a hint of almond extract, to make the best Matilda chocolate cake even more personal!
How to Store and Freeze Matilda Chocolate Cake
Room Temperature: Store the cake in an airtight container at room temperature for up to 3 days. This keeps it fresh while maintaining its decadent texture.
Fridge: If you want to keep it longer, refrigerate the cake for up to 1 week. Be sure to cover it with plastic wrap or an airtight container to prevent it from absorbing odors.
Freezer: To extend its shelf life, freeze the unassembled cake layers wrapped tightly in plastic wrap and foil for up to 3 months. Thaw in the refrigerator before decorating and serving.
Reheating: If you prefer a warm slice, microwave it for about 10-15 seconds. Enjoy this best Matilda chocolate cake warm, and it will taste just as delicious!
What to Serve with Decadent Matilda Chocolate Cake?
Pairing this rich chocolate creation with delightful accompaniments enhances the overall experience, transforming dessert into a memorable moment.
-
Fresh Berries: Juicy raspberries or strawberries add a bright, tangy contrast to the richness of the cake, refreshing your palate between bites.
-
Vanilla Ice Cream: A scoop of creamy vanilla ice cream melts beautifully over warm cake, creating a luxurious combination that’s simply irresistible.
-
Espresso: Sipping on a shot of espresso amplifies the chocolate notes, creating a deep, sumptuous experience that chocolate lovers will adore.
-
Chocolate Sauce: Drizzling some extra chocolate sauce over each slice adds an indulgent layer of flavor, making every bite even more decadent.
-
Whipped Cream: Light and airy whipped cream provides a delightful texture contrast, enhancing the cake’s richness without overwhelming it.
-
Candied Orange Zest: For a hint of citrus, sprinkle some candied orange zest on top, adding a lovely pop of flavor and color to your dessert.
-
Mint Tea: A soothing cup of mint tea cleanses your palate and balances the cake’s sweetness, offering a comforting finishing touch.
These pairings elevate your Matilda Chocolate Cake experience, ensuring each bite is celebrated in delicious harmony.
Make Ahead Options
These decadent Matilda Chocolate Cakes are perfect for meal prep enthusiasts! You can bake the cakes up to 24 hours in advance; simply wrap each layer in plastic wrap once cooled to prevent drying out. The ganache can also be prepared ahead of time and stored in the refrigerator for up to 3 days. Just remember to reheat it gently before assembly to achieve that silky, pourable consistency. When you’re ready to serve, layer the chilled cake with ganache and let it sit at room temperature for about 30 minutes. This way, you’ll have a show-stopping dessert ready to delight your loved ones with minimal last-minute effort, just as delicious as if it were freshly made!

Matilda Chocolate Cake Recipe FAQs
What type of chocolate should I use for the best Matilda Chocolate Cake?
Absolutely! For the ultimate flavor and texture, I recommend using high-quality dark chocolate with a cocoa content of 60-70%. It provides the richness and moisture that make this cake irresistible.
How should I store leftovers of the Matilda Chocolate Cake?
You can keep your leftover cake in an airtight container at room temperature for up to 3 days to maintain its moisture. If you need to store it longer, refrigerate it for up to a week, ensuring it’s well-covered to prevent it from drying out.
Can I freeze the Matilda Chocolate Cake, and if so, how?
Very! To freeze, wrap the unassembled cake layers tightly in plastic wrap and then foil, and pop them in the freezer for up to 3 months. When you’re ready to enjoy, simply thaw them in the refrigerator overnight before decorating and serving. It’s like having a special treat waiting for you!
What if my cake doesn’t rise properly?
The more the merrier in baking! Make sure your baking powder and baking soda are fresh—old leavening agents can lead to a dense cake. Also, be careful not to overmix your batter after combining wet and dry ingredients, as this can lead to a tough texture.
Is the Matilda Chocolate Cake suitable for those with dietary restrictions?
Yes! This cake can be adapted for various diets. You can use vegan butter and flax eggs for a dairy-free and egg-free version, and substitute regular flour with gluten-free flour—just keep in mind that texture may vary slightly.
What should I look for to know when the cake is fully baked?
Perfect! When your cake is done, a toothpick inserted into the center should come out with moist crumbs, not wet batter. It typically takes 30-35 minutes in the oven, so keep an eye on it towards the end of the baking time for the best results.
The Best Matilda Chocolate Cake You'll Ever Indulge In
Ingredients
Equipment
Method
- Preheat your oven to 350°F (175°C) and prepare two 9-inch round cake pans by lining them with parchment paper and greasing the sides.
- Melt the dark chocolate in a microwave-safe bowl or double boiler until smooth. Allow to cool slightly.
- Cream together the unsalted butter, granulated sugar, and light brown sugar until fluffy. Add eggs one at a time, then the vanilla and melted chocolate.
- Whisk together all-purpose flour, cocoa powder, baking soda, baking powder, espresso powder, and salt in another bowl.
- Gradually add the dry mix to the wet mix, alternating with buttermilk until well combined. Fold in chocolate chips.
- Divide the batter between the prepared pans and bake for 30-35 minutes, until a toothpick inserted comes out clean.
- Let the cakes cool in the pans for 10 minutes, then turn them out onto wire racks to cool completely.
- Heat the heavy cream until it simmers, pour over chopped dark chocolate, let sit for 2 minutes, then mix in butter and vanilla until smooth.
- Assemble the cake by placing one layer on a plate, adding ganache, topping with the second layer, and pouring remaining ganache over the cake.
- Serve slices to family and friends and enjoy the delicious Matilda Chocolate Cake!
Leave a Reply