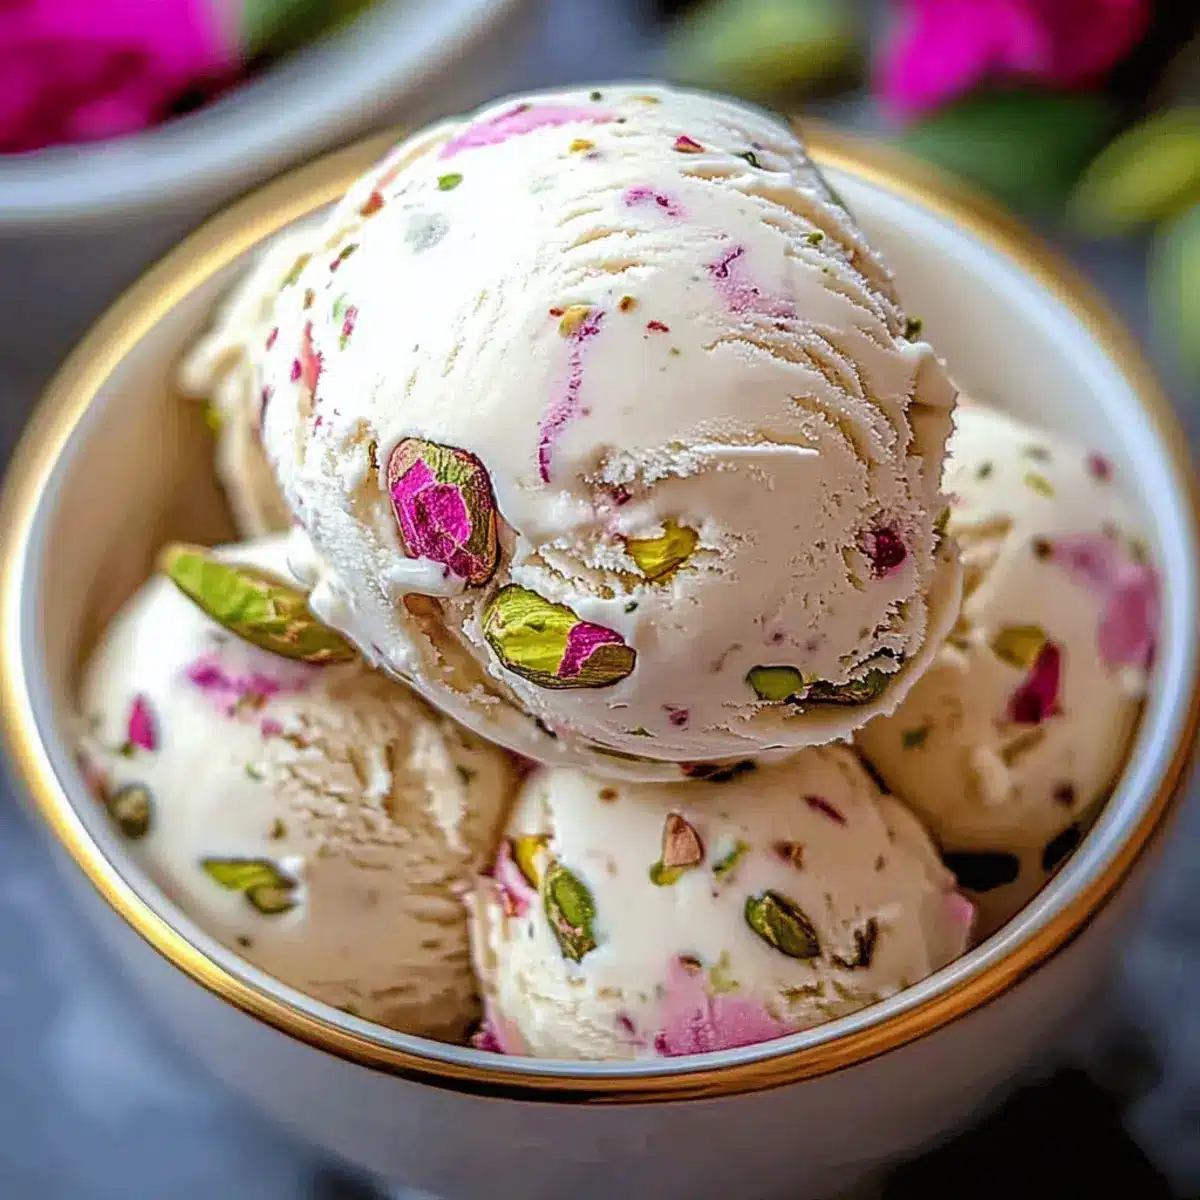
The moment I first tasted Rose Pistachio Cheesecake Ice Cream, I was swept away into a world of creamy decadence that felt like summer in a bowl. This delightful dessert harmoniously blends the richness of cheesecake with delicate floral rose undertones and a satisfying crunch from pistachios. What I love most about this recipe is its effortless charm—whether you choose the classic churn method or opt for the no-churn convenience, it promises to be a showstopper at any gathering. Perfect for a warm afternoon treat or an elegant finish to your dinner party, this easy dessert will have your loved ones asking for seconds. So, are you ready to bring a taste of luxury to your kitchen?

Why is Rose Pistachio Ice Cream special?
Exquisite Taste: The combination of creamy cheesecake, floral rose, and crunchy pistachios creates a surprising flavor explosion that you won’t forget.
Effortless Preparation: Whether you choose the churn or no-churn option, making this indulgent dessert is quick and simple, perfect for busy home cooks.
Versatile Serving Options: Serve it elegantly in dessert bowls or on a brownie for a delightful twist, making it suitable for any occasion.
Crowd-Pleasing Delight: This ice cream is bound to impress friends and family, ensuring smiles all around during summer gatherings or dinner parties.
Cultural Touch: Embrace the rich tradition of Middle Eastern desserts, bringing an exotic flair to your homemade treats. Pair it with my refreshing Italian Cream Soda for a complete sweet experience!
Rose Pistachio Ice Cream Ingredients
For the Base
- Cream Cheese (8 oz / 225 grams) – Provides a rich, creamy texture; make sure it’s softened before mixing.
- Granulated Sugar (1 cup / 200 grams) – Adds sweetness; feel free to adjust based on your taste preference.
- Heavy Whipping Cream (2 cups / 480 ml) – Adds a luscious creaminess to your ice cream.
- Whole Milk (1 cup / 240 ml) – Balances the richness of the heavy cream.
- Vanilla Extract (1 teaspoon) – Enhances the overall flavor profile of this delightful treat.
For the Flavoring
- Rose Water (2 tablespoons) – Infuses an aromatic floral flavor; opt for high-quality rose water for the best results.
- Lemon Juice (1 tablespoon) – Brightens and balances the sweet flavors to prevent them from becoming too heavy.
For the Crunch
- Shelled Pistachios (1/2 cup, roughly chopped) – Adds a delightful crunch and nutty flavor; you can substitute with almonds or cashews if desired.
Optional Enhancements
- Pink Food Coloring – For an aesthetically pleasing touch; use sparingly to avoid overpowering the natural beauty of the ice cream.
This Rose Pistachio Ice Cream will surely bring joy and elegance to your dessert table!
Step‑by‑Step Instructions for Rose Pistachio Ice Cream
Step 1: Prepare the Cream Cheese Mixture
In a large mixing bowl, beat 8 oz of softened cream cheese with 1 cup of granulated sugar using an electric mixer until the mixture is smooth and fluffy, about 3–5 minutes. You want a creamy consistency without lumps; this will serve as the rich base for your Rose Pistachio Ice Cream.
Step 2: Combine Wet Ingredients
Add 2 cups of heavy whipping cream, 1 cup of whole milk, 2 tablespoons of rose water, 1 teaspoon of vanilla extract, and 1 tablespoon of lemon juice to the cream cheese mixture. Blend on low speed until everything is combined and slightly thickened, which should take about 2 minutes. The mixture will start to get creamy and aromatic!
Step 3: Adjust Color and Texture
If you like a touch of whimsy, add pink food coloring, a few drops at a time, to achieve your desired hue. Mix gently until the color is evenly distributed. This playful touch adds visual appeal to your Rose Pistachio Ice Cream, making it even more inviting to serve.
Step 4: Churning the Ice Cream
For the churn method, pour the prepared mixture into your ice cream maker and churn according to the manufacturer’s instructions, usually about 20–25 minutes. In the last 5 minutes of churning, fold in the ½ cup of roughly chopped pistachios to incorporate that delightful crunch throughout the ice cream.
Step 5: No-Churn Freezing Option
If you prefer the no-churn method, fold the pistachios into the mixture and immediately pour it into a freezer-safe container. Cover the container tightly with a lid or plastic wrap and freeze for at least 6 hours or until firm. This will allow your Rose Pistachio Ice Cream to set perfectly without an ice cream maker.
Step 6: Serve the Ice Cream
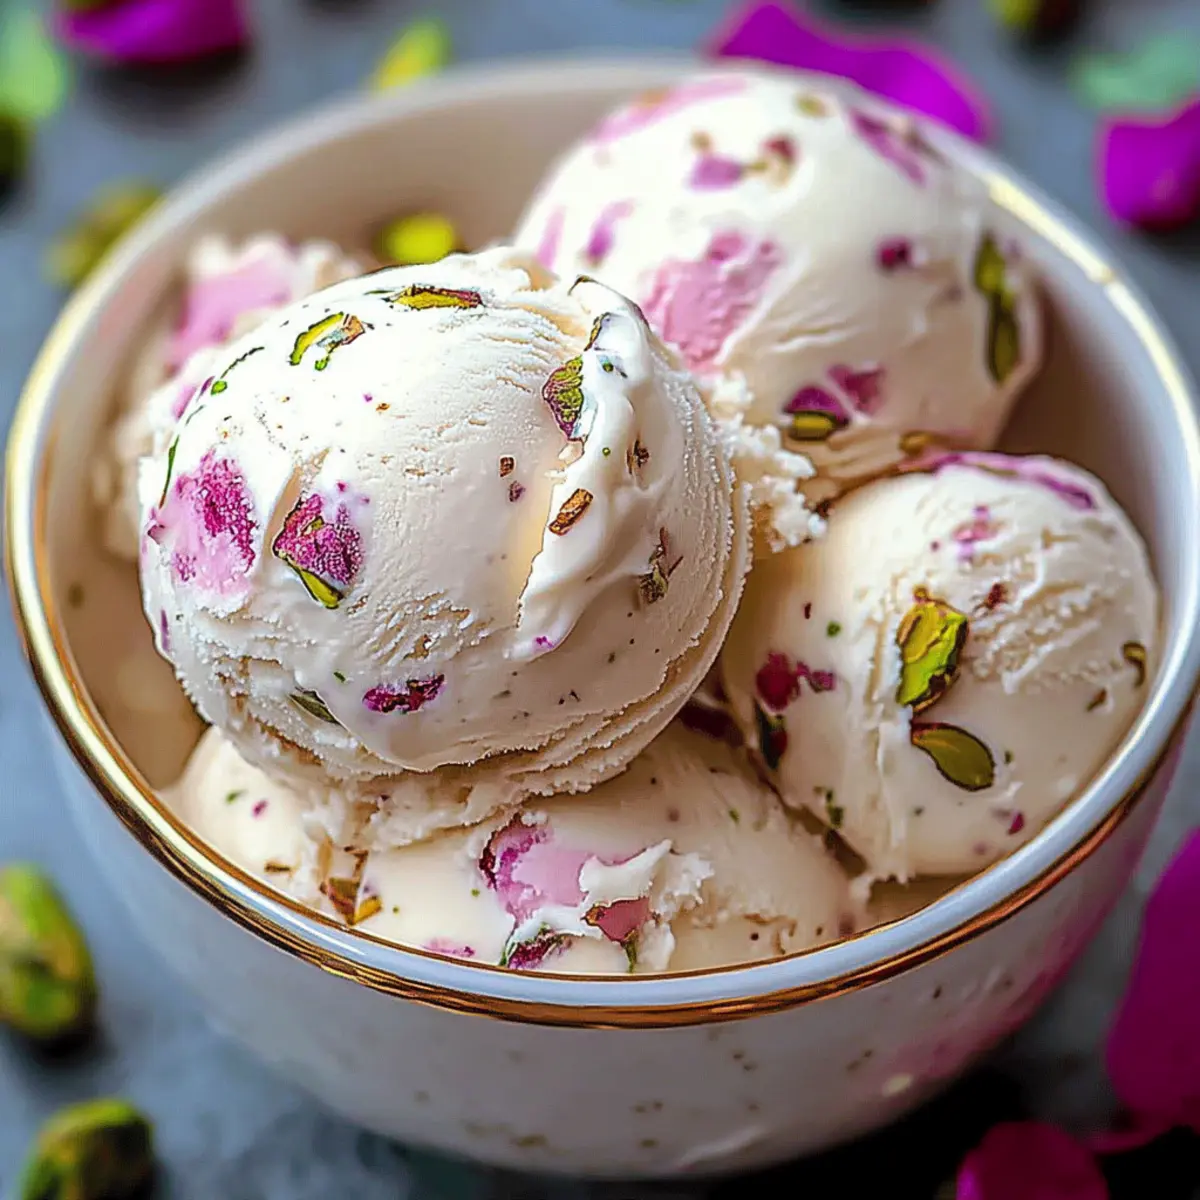
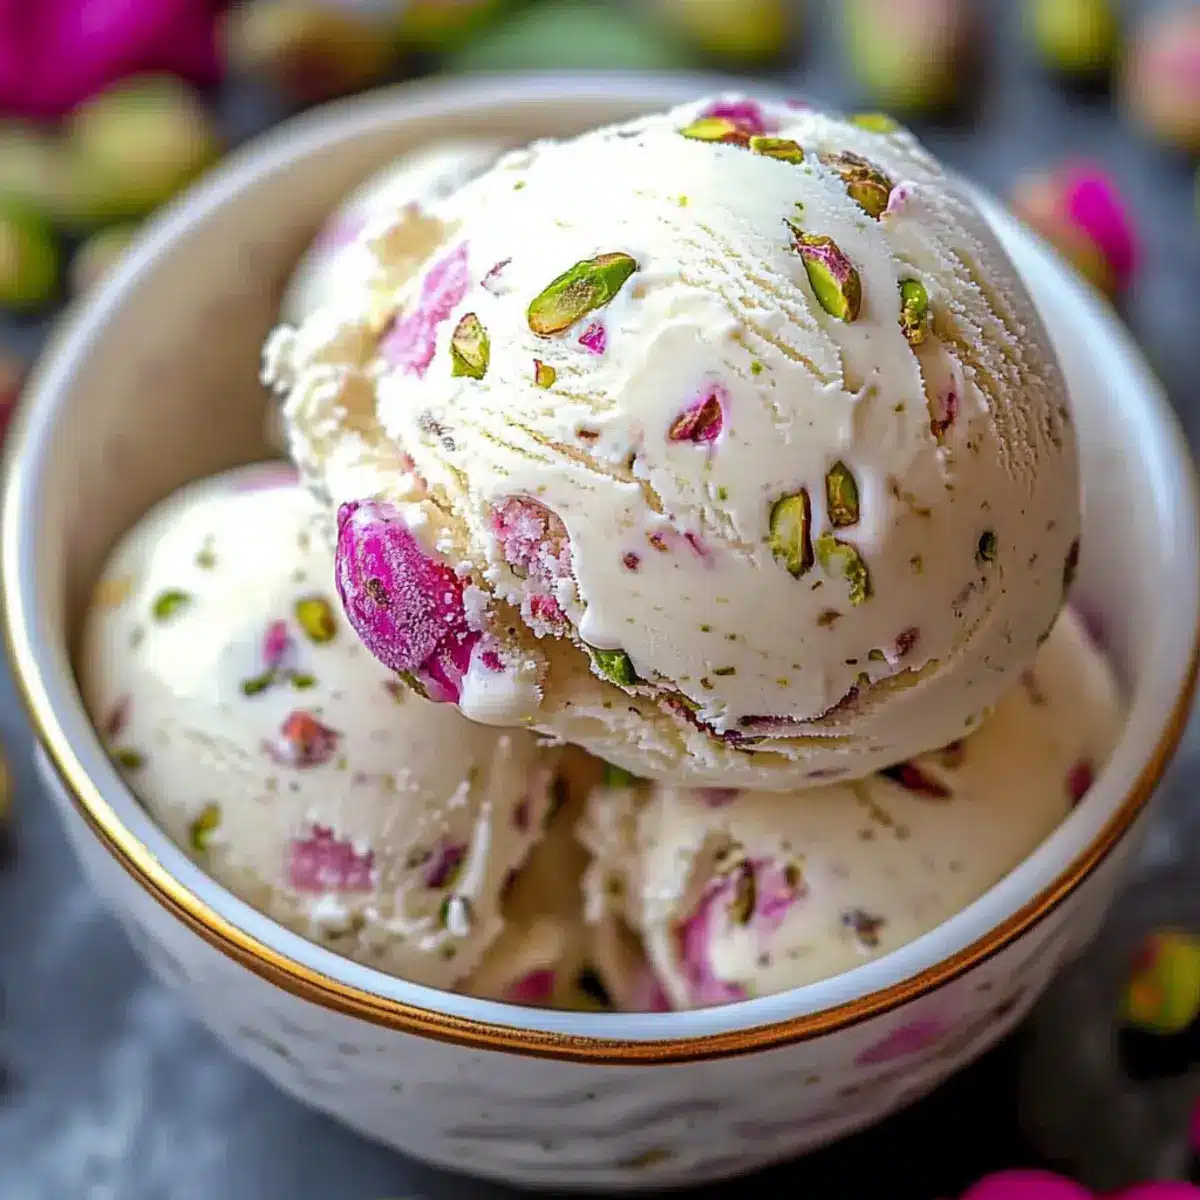
Once your ice cream has reached a creamy consistency, remove it from the freezer and let it sit at room temperature for about 5 minutes to soften slightly. Use an ice cream scoop to serve generous portions into bowls. Garnish with additional pistachios or dried rose petals for a sophisticated touch that complements the luxurious flavor.
Rose Pistachio Ice Cream Variations
Feel free to customize this delightful dessert and explore the endless ways to elevate your ice cream experience!
-
Nut-Free: Substitute pistachios with sunflower seeds or pumpkin seeds for a crunchy twist without the nuts.
-
Dairy-Free: Use coconut cream instead of heavy cream and almond milk in place of whole milk for a vegan-friendly version.
-
Raspberry Swirl: Add a swirl of raspberry sauce to the ice cream mixture before freezing for a fruity flavor contrast.
The tartness of raspberries beautifully balances the rich sweetness of the ice cream, creating a delightful surprise in every scoop!
-
Chocolate Drizzle: Once served, drizzle melted dark chocolate over the ice cream for a decadent touch that enhances the flavors.
This addition not only adds an extra layer of richness but also brings a bit of elegance with its glossy finish.
-
Floral Fusion: Experiment with different floral extracts like lavender or orange blossom for a unique spin on the classic rose flavor.
Each floral note will lend a different personality to your ice cream, inviting endless tasting adventures.
-
Citrus Zest: Grate fresh lemon or orange zest into the mixture for a zippy, bright flavor that adds a refreshing layer.
-
Almond Joy: Replace pistachios with almond slices and add shredded coconut for a delightful take on the classic Almond Joy candy flavor.
Pairing it with a refreshing Italian Cream Soda would perfectly complement the sweetness of the ice cream!
- Spicy Kick: Add a pinch of cayenne pepper or crushed red pepper flakes to the base for a surprising, spicy kick that plays well with the floral notes.
Let your creativity soar with these variations and transform your Rose Pistachio Cheesecake Ice Cream into a personalized masterpiece!
Expert Tips for Rose Pistachio Ice Cream
-
Soften Cream Cheese: Always bring your cream cheese to room temperature to avoid clumps, ensuring a silky base for your Rose Pistachio Ice Cream.
-
Start Small with Rose Water: Begin with less rose water than suggested; you can always add more to suit your taste without overwhelming the ice cream’s flavor profile.
-
Don’t Over-Churn: Keep an eye on your ice cream while churning to prevent air incorporation; over-churning can lead to a grainy texture instead of creamy perfection.
-
Use Quality Ingredients: High-quality rose water and fresh pistachios elevate the overall flavor and authenticity of your ice cream; it’s worth the investment!
-
Storage Matters: To avoid ice crystals, store your Rose Pistachio Ice Cream in an airtight container. Place wax paper directly on the surface before closing for added protection.
How to Store and Freeze Rose Pistachio Ice Cream
Airtight Container: Store your Rose Pistachio Ice Cream in an airtight container to keep it fresh for up to 2 weeks while preventing ice crystals from forming.
Freezer: If freezing, ensure the container is tightly sealed. For the best texture, consume your homemade ice cream within 2 weeks, although it can last longer if properly stored.
Reheating: When you’re ready to enjoy, let the ice cream sit at room temperature for about 5 minutes before scooping for the perfect creamy consistency.
No-Churn Tip: If you used the no-churn method, remember to mix it gently with a spatula after scooping to revive some of its soft creaminess before serving.
Make Ahead Options
These Rose Pistachio Cheesecake Ice Cream treats are fantastic for meal prep enthusiasts eager to save time on busy weeknights! You can prepare the cream cheese mixture and refrigerate it up to 24 hours in advance, allowing the flavors to meld beautifully. When ready to churn or freeze, just fold in the chopped pistachios and follow the original method for churning or no-churning. If you opt for the no-churn method, the ice cream can be prepared in advance and stored in the freezer for up to 3 days. To maintain its creamy texture, ensure the container is airtight, preventing ice crystals. When it’s time to serve, let it sit at room temperature for a few minutes to soften, and you’ll have a luxurious dessert ready to impress, all with minimal effort!
What to Serve with Rose Pistachio Cheesecake Ice Cream?
Dive into a world filled with delectable pairings that will elevate your dessert experience to new heights.
- Rich Brownies: The fudgy texture of brownies complements the creaminess of the ice cream, creating a delightful contrast. Serve warm, layered with a scoop of your ice cream for pure bliss!
- Fresh Berries: Plump, juicy berries bring a burst of tartness that beautifully balances the sweetness of the ice cream, adding a refreshing element to each bite. Consider a medley of raspberries, strawberries, and blueberries for vibrant color and taste!
- Almond Biscotti: Crunchy and slightly sweet, almond biscotti pairs wonderfully as a crunchy side treat, perfect for dipping into the creamy goodness of your homemade ice cream.
- Mint Tea: Refreshing mint tea serves as a palate cleanser that enhances the floral notes of the rose and pistachio, making each spoonful feel even more luxurious.
- Chocolate Sauce: A drizzle of rich chocolate sauce adds a decadent element and pairs beautifully with the botanicals of the ice cream, creating an irresistible sweet-and-floral harmony.
- Coconut Macaroons: Chewy coconut macaroons bring a tropical touch that harmonizes with the rose and nutty flavors, creating a deliciously nutty and sweet pairing.
- Saffron Rice Pudding: This creamy dessert mirrors the luxurious feel of your ice cream, enhancing your meal with an intriguing cultural touch that contrasts beautifully with the flavors of rose.
- Sparkling Rose: Pair your indulgent scoop with a glass of sparkling rose for a sophisticated toast that mirrors the delightful floral elegance found in your ice cream.
Each of these pairings enhances the experience, so get creative and enjoy every bite!
Rose Pistachio Cheesecake Ice Cream Recipe FAQs
What is the best way to select ripe pistachios?
For the best flavor and texture in your Rose Pistachio Cheesecake Ice Cream, choose unsalted, shelled pistachios that are vibrant green. Avoid any nuts with dark spots or that feel soft to the touch, as these can indicate spoilage. Fresh pistachios will add the ideal nutty crunch.
How should I store the ice cream to keep it fresh?
Absolutely! Store your Rose Pistachio Cheesecake Ice Cream in an airtight container to prevent ice crystals from forming. It can last up to 2 weeks in the freezer. For added freshness, place a layer of wax paper over the surface of the ice cream before sealing the container tightly. This extra step is a game-changer!
Can I freeze the ice cream longer than 2 weeks?
While your homemade ice cream can technically last beyond 2 weeks if stored properly, I recommend consuming it within that time frame for the best flavor and texture. The longer it sits in the freezer, the more it may lose its creamy consistency.
How can I troubleshoot if my ice cream turns out icy?
If your Rose Pistachio Cheesecake Ice Cream ends up icy instead of creamy, this could be due to over-churning or improper freezing. To fix it, gently fold the ice cream in a mixing bowl to break up any ice crystals. Then, refreeze it for a few hours to restore its creamy texture. Remember, starting with room temperature cream cheese can help prevent this issue!
What are the dietary considerations for this recipe?
If you or a guest has allergies, always check for possible cross-contamination, especially if using store-bought pistachios. This recipe does contain dairy, so it may not be suitable for dairy-free diets. However, you can make some substitutions: use a dairy-free cream cheese and coconut milk to create a plant-based version of the Rose Pistachio Cheesecake Ice Cream.
Can I modify the recipe to cater to pets?
Absolutely! While traditional ice cream isn’t suitable for pets, you can create a pet-friendly version by blending plain yogurt (without added sugars or artificial flavors) and a small amount of mashed banana. Make sure to leave out any sugar additions or flavorings. However, always consult your veterinarian before introducing new treats to your pet’s diet.
Rose Pistachio Ice Cream: Indulge in Homemade Bliss
Ingredients
Equipment
Method
- In a large mixing bowl, beat 8 oz of softened cream cheese with 1 cup of granulated sugar until smooth and fluffy, about 3–5 minutes.
- Add 2 cups of heavy whipping cream, 1 cup of whole milk, 2 tablespoons of rose water, 1 teaspoon of vanilla extract, and 1 tablespoon of lemon juice. Blend on low speed for about 2 minutes.
- If desired, add pink food coloring, a few drops at a time, to achieve your preferred hue.
- For the churn method, pour the mixture into an ice cream maker and churn according to the manufacturer's instructions for about 20–25 minutes, adding the chopped pistachios in the last 5 minutes.
- For the no-churn method, fold in the pistachios and pour the mixture into a freezer-safe container. Freeze for at least 6 hours or until firm.
- Once the ice cream is firm, let it sit at room temperature for about 5 minutes to soften slightly before scooping into bowls.
Leave a Reply