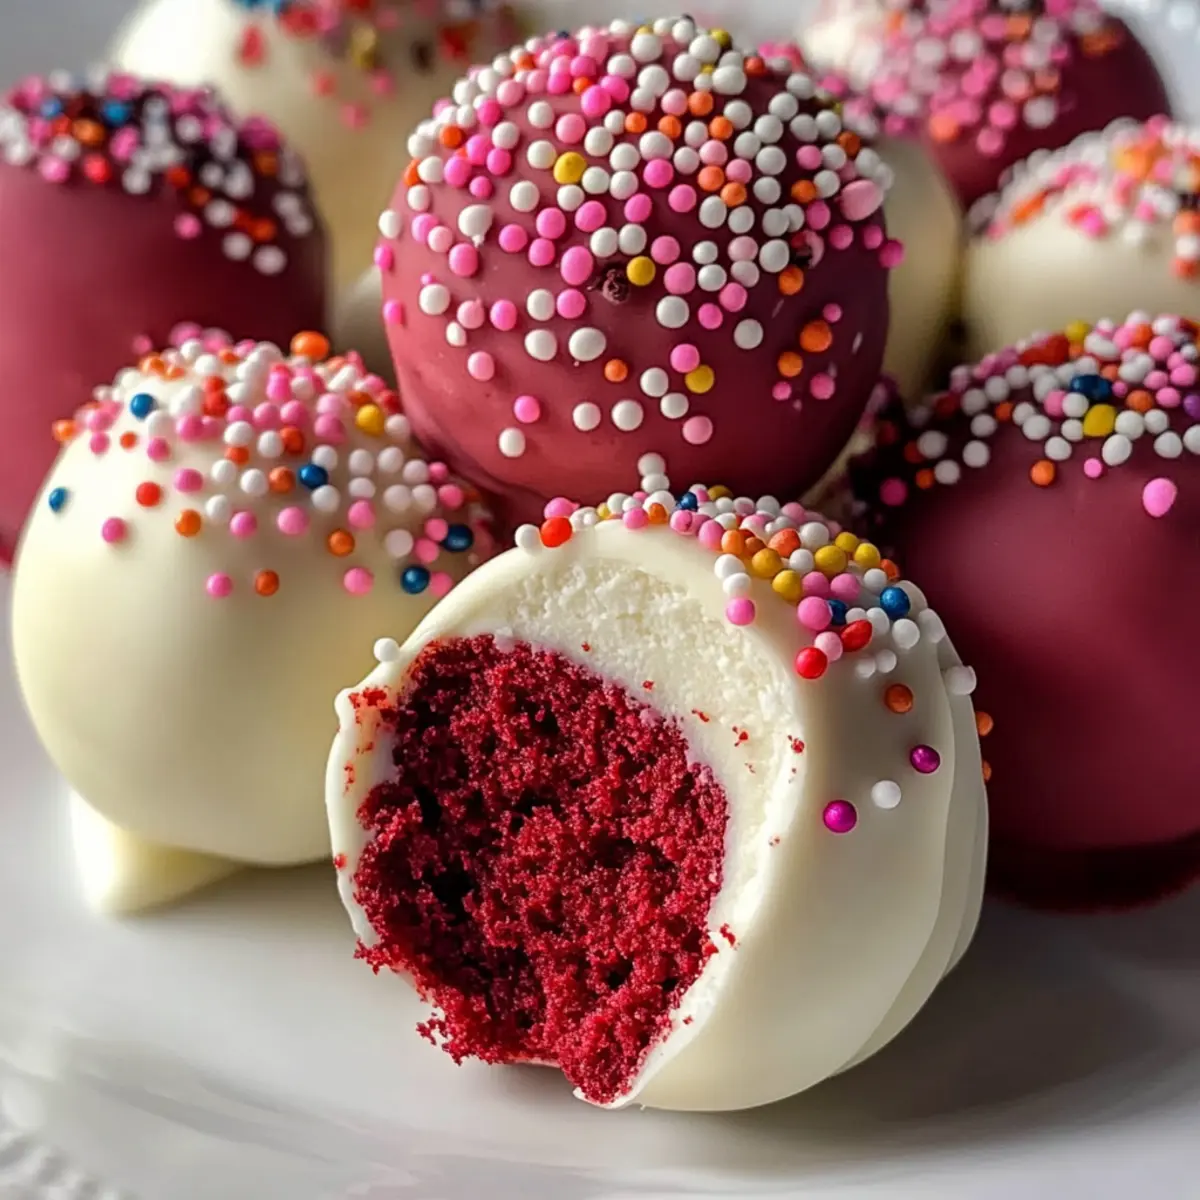
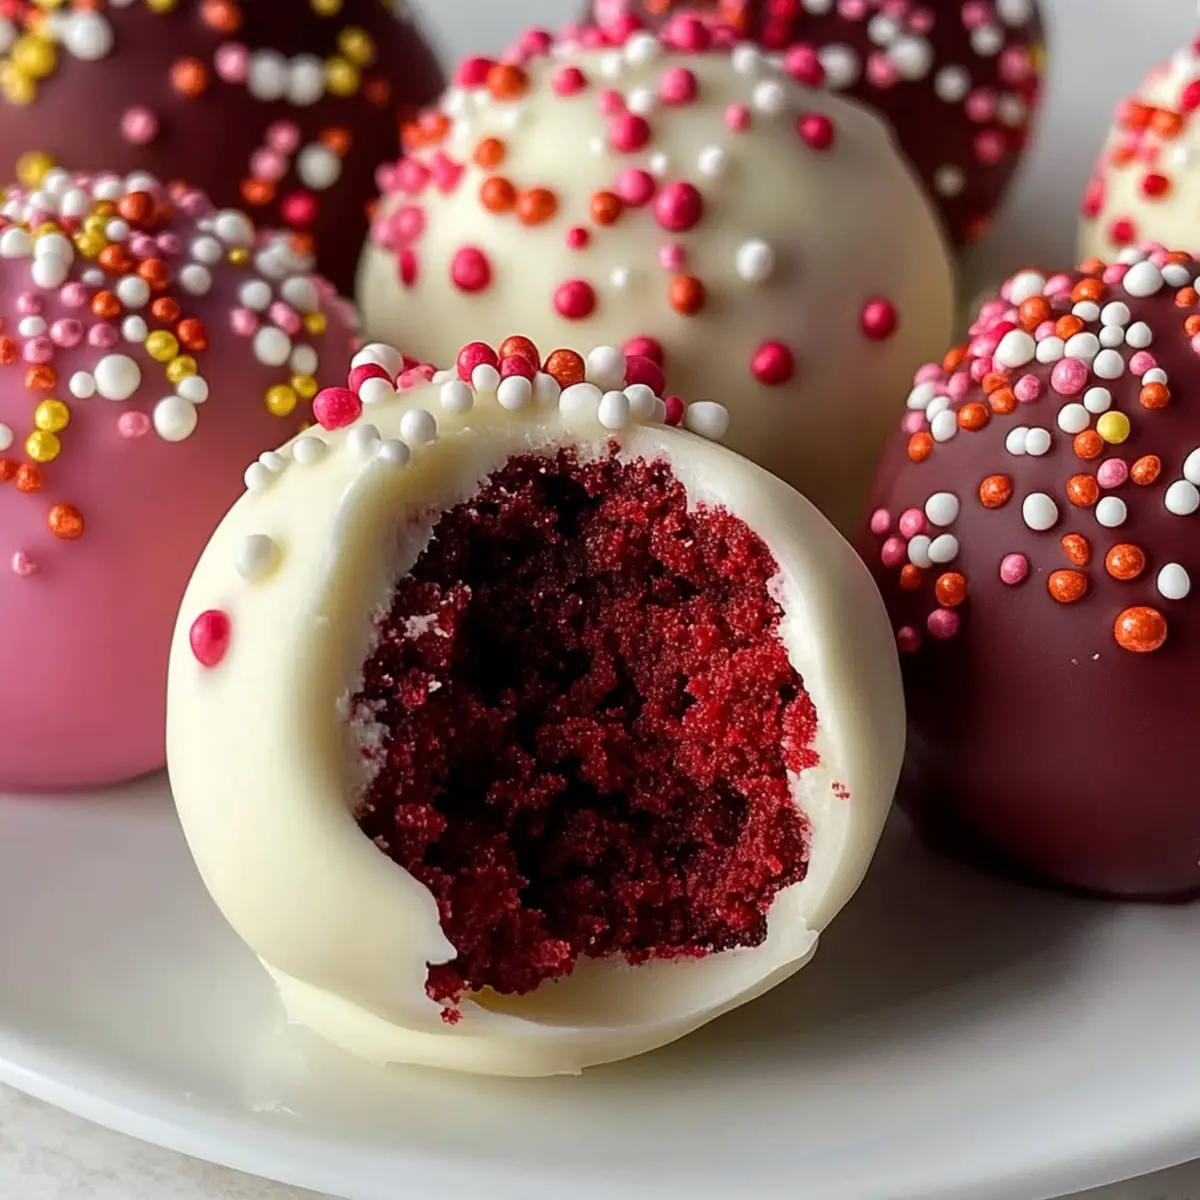
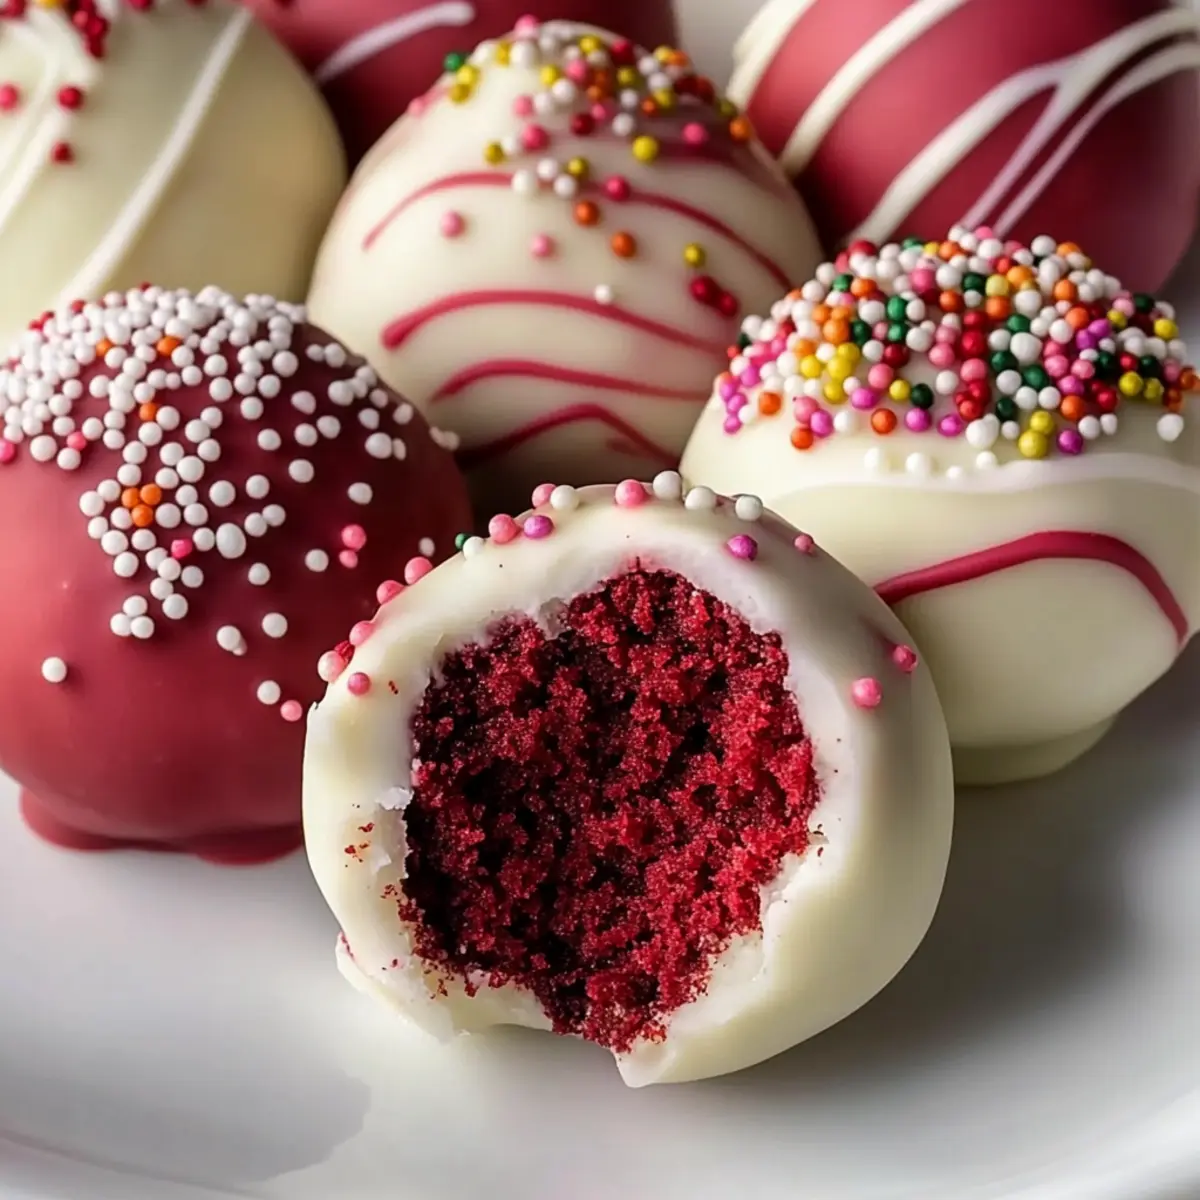
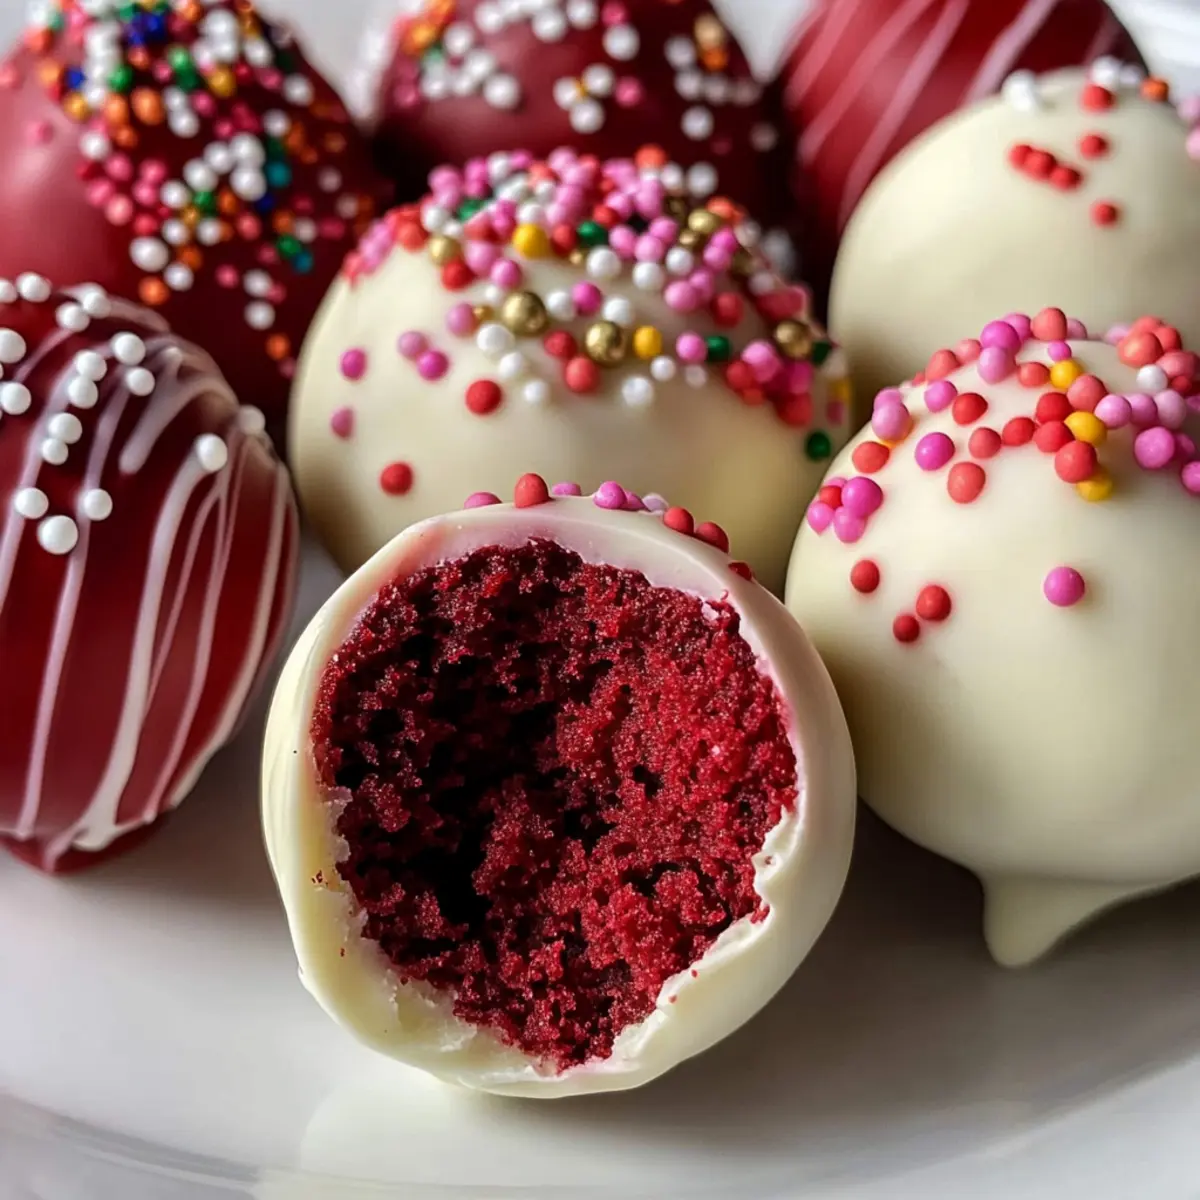
On a chilly afternoon, I found myself with leftover red velvet cake and an idea that would soon spark joy in my kitchen. Enter the delightful world of Red Velvet Cake Balls—an irresistible combo of soft, tangy cake and rich cream cheese frosting, transformed into delectable truffles. These perfectly poppable treats, coated in creamy white chocolate, are not just eye-catching; they’re a celebration in every bite! Ideal for festive occasions like Valentine’s Day or Christmas, they offer a fun twist on traditional desserts and are super easy to whip up. Plus, they’re a fantastic way to impress guests while avoiding the hassle of elaborate baking! Ready to discover the secret to making cake balls that will drive everyone wild with delight? Let’s dive in!
Why Are You Going to Love These?
Irresistible Flavor: The rich blend of tangy red velvet cake and sweet cream cheese frosting creates a flavor explosion you simply can’t resist.
Easy to Make: This simple recipe comes together quickly, making it perfect for a baking session with friends or a fun solo project.
Festive Appeal: These cake balls aren’t just delicious; they make a stunning centerpiece at parties, especially on Valentine’s Day or during Christmas celebrations.
Endless Customization: From choosing different chocolate coatings to adding mix-ins like mini chocolate chips, your creativity knows no bounds.
Make-Ahead Friendly: Roll them up and freeze, so you have a stash of sweet treats ready for unexpected guests or last-minute celebrations.
Imagine presenting these at your next gathering, perfectly alongside a cozy drink like hot cocoa for the ultimate dessert experience. For more great festive ideas, check out our delightful Christmas Meatballs Sweet or try out my sumptuous French Onion Meatballs.
Red Velvet Cake Balls Ingredients
For the Cake Balls
• Red Velvet Cake Mix – This is the foundation for your delightful cake balls; a homemade version can also be used for an authentic touch.
• Eggs – Provides richness and helps bind everything together; swap with an egg substitute for a vegan delight.
• Cream Cheese Frosting – Infuses tangy moisture into your cake balls; try vanilla frosting for a different flavor dimension.
For the Coating
• White Chocolate – Adds a sweet and creamy layer that perfectly contrasts the tangy interior; dark chocolate can be used for a bolder taste.
For Decoration
• Sprinkles (optional) – A fun and festive touch that elevates the presentation; choose colors to match your special occasion.
Make your Red Velvet Cake Balls a show-stopping treat at your next gathering!
Step‑by‑Step Instructions for Red Velvet Cake Balls
Step 1: Bake Cake
Prepare the red velvet cake mix according to package instructions, pouring the batter into a greased 9×13-inch pan. Bake at 350°F (175°C) for 25–30 minutes, or until a toothpick inserted into the center comes out clean. Once baked, allow the cake to cool completely on a wire rack, which should take about 1 hour.
Step 2: Crumble Cake
After the cake has cooled, break it into pieces and transfer to a large mixing bowl. Use your hands to crumble the cake into fine crumbs, ensuring there are no large chunks remaining. This step is crucial for achieving the right texture for your Red Velvet Cake Balls.
Step 3: Mix with Frosting
Add 1 cup of cream cheese frosting to the bowl of crumbled cake. Mix the frosting and cake crumbs together until fully combined. Allow the mixture to rest for about 5 minutes; this resting period helps the flavors meld and ensures the consistency feels like stiff cookie dough for shaping.
Step 4: Adjust Texture
Check the consistency of the mixture. If it feels too crumbly and won’t hold together, gradually add more frosting, one tablespoon at a time. Mix well after each addition until the dough is moist enough to roll into balls without sticking to your hands.
Step 5: Shape Balls
Using a cookie scoop or your hands, shape the mixture into 1-inch balls. Place each cake ball onto a parchment-lined baking sheet, ensuring they are spaced evenly apart. This step is essential to maintain their shape and make future dipping easier.
Step 6: Freeze
Once all the cake balls are shaped, place the baking sheet in the freezer for about 1 hour, or until the balls are completely firm. Freezing them helps set their shape, making it easier to coat them in chocolate without them falling apart.
Step 7: Melt Chocolate
Set up a double boiler over medium heat and add your white chocolate chips. Stir constantly as they melt until the chocolate is smooth and glossy, which should take about 5–10 minutes. Keep the melted chocolate warm to ensure easy dipping of your Red Velvet Cake Balls.
Step 8: Dip Cake Balls
Using a toothpick, carefully dip each frozen cake ball into the melted white chocolate, ensuring they are fully coated. Tap off any excess chocolate before placing them back on the parchment paper. This step will give your cake balls a beautiful, professional finish.
Step 9: Decorate
Immediately sprinkle your favorite decorations, such as festive sprinkles, onto the dipped cake balls before the chocolate hardens. If you prefer, allow the chocolate to set first, then drizzle with melted dark chocolate for an elegant touch, creating a stunning visual appeal for your dessert.
Tips for the Best Red Velvet Cake Balls
-
Perfect Ratio: Ensure the right balance of cake to frosting; too much frosting can make the Red Velvet Cake Balls too soft, so start with less and adjust as needed.
-
Chill for Texture: Freezing the shaped balls before dipping helps maintain their shape during coating, resulting in a smooth and professional finish.
-
Controlled Dipping: Use a toothpick to dip each ball for better control and less mess; it helps keep your hands clean and the chocolate coating neat.
-
Smooth Chocolate: Stir constantly while melting your chocolate to avoid burning; using a double boiler ensures gentle, even heat and a velvety texture.
-
Creative Decorations: Experiment with various toppings like crushed nuts or colored sprinkles that complement festive occasions; making these cake balls visually appealing is half the fun!
Red Velvet Cake Balls Variations
Feel free to transform these delightful Red Velvet Cake Balls to suit your taste buds and dietary needs!
-
Dairy-Free: Substitute cream cheese frosting with a plant-based version and use dairy-free chocolate for coating. It’s a simple switch that keeps all the flavor intact.
-
Gluten-Free: Use a gluten-free red velvet cake mix for a scrumptiously inclusive treat. Everyone deserves to enjoy these cake balls at your next gathering!
-
Nutty Crunch: Fold in crushed walnuts or pecans into the cake mixture for an unexpected twist. This added crunch pairs beautifully with the creamy interior.
-
Mini Chocolate Chips: Mix in mini chocolate chips into the cake batter for bursts of chocolatey flavor. They’ll take each bite to another level of indulgence!
-
Spiced Twist: Add a pinch of cinnamon and nutmeg to elevate the flavor profile. The warmth of spices can transform these cake balls into a holiday favorite.
-
Coconut Glam: Roll the finished cake balls in toasted coconut flakes instead of sprinkles before serving. This adds a tropical flair that makes them stand out.
-
Peppermint Bliss: For a seasonal twist, use peppermint-flavored frosting and dip them in white chocolate while sprinkling crushed candy canes on top. It’s like a festive celebration in every bite!
-
Chocolate Coating: Swap out white chocolate for rich dark chocolate to deepen the overall flavor. This creates a delicious contrast with the sweet, tangy interior—perfect for chocolate lovers!
These variations allow you to tailor your Red Velvet Cake Balls for any occasion, whether it’s Valentine’s Day or a festive holiday party. And if you’re looking for more tempting treats, check out my Gingerbread Latte Cake or our scrumptious Gingerbread Wreath Cake.
How to Store and Freeze Red Velvet Cake Balls
Room Temperature: Store leftover Red Velvet Cake Balls in an airtight container for up to 3 days if you plan to enjoy them quickly.
Fridge: For slightly longer storage, keep the cake balls in the fridge, layered with parchment paper, for up to 5 days. This helps maintain their fresh taste and texture.
Freezer: To enjoy these delicious treats later, freeze Red Velvet Cake Balls in a single layer for up to 3 months. Once firm, transfer to a freezer-safe bag with parchment paper between layers.
Reheating: Thaw frozen cake balls in the refrigerator overnight for the best texture; avoid reheating in the microwave to maintain their delicate consistency.
What to Serve with Red Velvet Cake Balls
Indulging in these sweet morsels can be even more delightful when paired with tasty companions that enhance their flavors.
-
Creamy Hot Cocoa: This rich, warm drink complements the sweetness of the cake balls, making for a cozy pairing, especially on chilly nights.
-
Festive Chai Latte: The spiced flavors of chai elevate the red velvet’s charm, creating an aromatic experience that dances on your palate.
-
Rich Vanilla Ice Cream: A scoop of this creamy classic balances the tanginess of the cake balls, adding a refreshing touch to every bite.
-
Crisp Apple Salad: A mix of sweet and tart apples adds an excellent crunch, contrasting the smoothness of the cake balls while refreshing your palate.
-
Chocolate-Dipped Strawberries: These elegant fruits enhance the dessert’s indulgent vibes, perfect for celebrating love or any festive occasion.
-
Pineapple Coconut Smoothie: The tropical flavors break the richness, providing a bright and sunny twist to your dessert table.
-
Decadent Red Wine: Choosing a lovely fruity red wine can truly bring out the deep cocoa notes in the cake, turning your dessert into an elegant treat.
-
Mini Cheesecake Bites: These creamy delights echo the richness of the cake balls while offering a different texture, creating a splendid dessert spread.
Make Ahead Options
These Red Velvet Cake Balls are a fantastic choice for meal prep, saving you time and effort on busy days! You can roll the undipped cake balls and freeze them for up to 2 months ahead of time, ensuring you always have a delicious treat ready to go. Simply shape the cake mixture, place them on a parchment-lined baking sheet, and freeze until firm before transferring them to an airtight container. When you’re ready to serve, dip them in melted white chocolate and decorate as desired. By preparing them in advance, you can easily impress guests with these festive delights while keeping your kitchen stress-free!
Red Velvet Cake Balls Recipe FAQs
What is the best way to choose ripe ingredients for the Red Velvet Cake Balls?
Absolutely! When selecting your ingredients, especially for the red velvet cake mix, opt for a brand with a vibrant color and quality ingredients. If you are making a homemade version, ensure your cocoa powder is fresh and not expired, as this can significantly impact flavor. For the cream cheese frosting, use full-fat cream cheese for the best texture and taste—test the cream cheese for any dark spots or an off smell.
How should I store Red Velvet Cake Balls, and how long do they last?
These delightful cake balls can be stored in an airtight container at room temperature for up to 3 days. If you prefer to keep them longer, refrigerate them for up to 5 days, layering them between parchment paper to prevent sticking. Always ensure the container is sealed tightly to maintain their freshness!
Can I freeze Red Velvet Cake Balls? If so, how?
Very! To freeze Red Velvet Cake Balls, place them in a single layer on a baking sheet and freeze until firm, about 1-2 hours. Once they are solid, transfer the cake balls to a freezer-safe bag or container, placing parchment paper between layers to prevent sticking. They’ll stay delicious for up to 3 months! When you’re ready to enjoy, simply thaw them in the refrigerator overnight for the best texture.
What should I do if my mixture is too crumbly or too wet when making the cake balls?
No worries! If the mixture feels too crumbly and won’t hold together, gradually add more frosting, about one tablespoon at a time, mixing well after each addition. You want the consistency to be like stiff cookie dough—soft enough to roll into balls but firm enough to hold its shape. Conversely, if the mixture is too wet and sticky, you can add more crumbled cake until the desired texture is reached. Just be patient and adjust slowly!
Are there any dietary considerations for these Red Velvet Cake Balls?
Indeed! If you have dietary restrictions, you can easily modify the recipe. For a gluten-free option, use a certified gluten-free red velvet cake mix. To make it vegan, swap eggs for a suitable plant-based substitute like applesauce or flaxseed meal mixed with water, and opt for dairy-free cream cheese frosting. Always check the labels of your ingredients to ensure they comply with your dietary needs!
Can I use other coatings besides white chocolate?
Absolutely! You can switch things up by using dark chocolate for a richer flavor or even milk chocolate if you prefer a sweeter taste. For a unique twist, try rolling the dipped cake balls in crushed nuts, cocoa powder, or colored sprinkles to match your occasion. Your creativity is the limit with coatings!
Decadent Red Velvet Cake Balls That Steal the Show
Ingredients
Equipment
Method
- Prepare the red velvet cake mix according to package instructions, pouring the batter into a greased 9x13-inch pan. Bake at 350°F (175°C) for 25–30 minutes, or until a toothpick inserted into the center comes out clean. Allow the cake to cool completely on a wire rack, which should take about 1 hour.
- Once the cake has cooled, break it into pieces and transfer to a large mixing bowl. Use your hands to crumble the cake into fine crumbs, ensuring there are no large chunks remaining.
- Add 1 cup of cream cheese frosting to the bowl of crumbled cake. Mix the frosting and cake crumbs together until fully combined. Allow the mixture to rest for about 5 minutes.
- Check the consistency of the mixture. If it feels too crumbly, gradually add more frosting, one tablespoon at a time, mixing well after each addition.
- Using a cookie scoop or your hands, shape the mixture into 1-inch balls. Place each cake ball onto a parchment-lined baking sheet.
- Once all the cake balls are shaped, place the baking sheet in the freezer for about 1 hour, or until the balls are completely firm.
- Set up a double boiler over medium heat and add your white chocolate chips. Stir constantly as they melt until smooth.
- Using a toothpick, carefully dip each frozen cake ball into the melted white chocolate, ensuring they are fully coated. Tap off any excess chocolate.
- Immediately sprinkle your favorite decorations onto the dipped cake balls before the chocolate hardens.
Leave a Reply