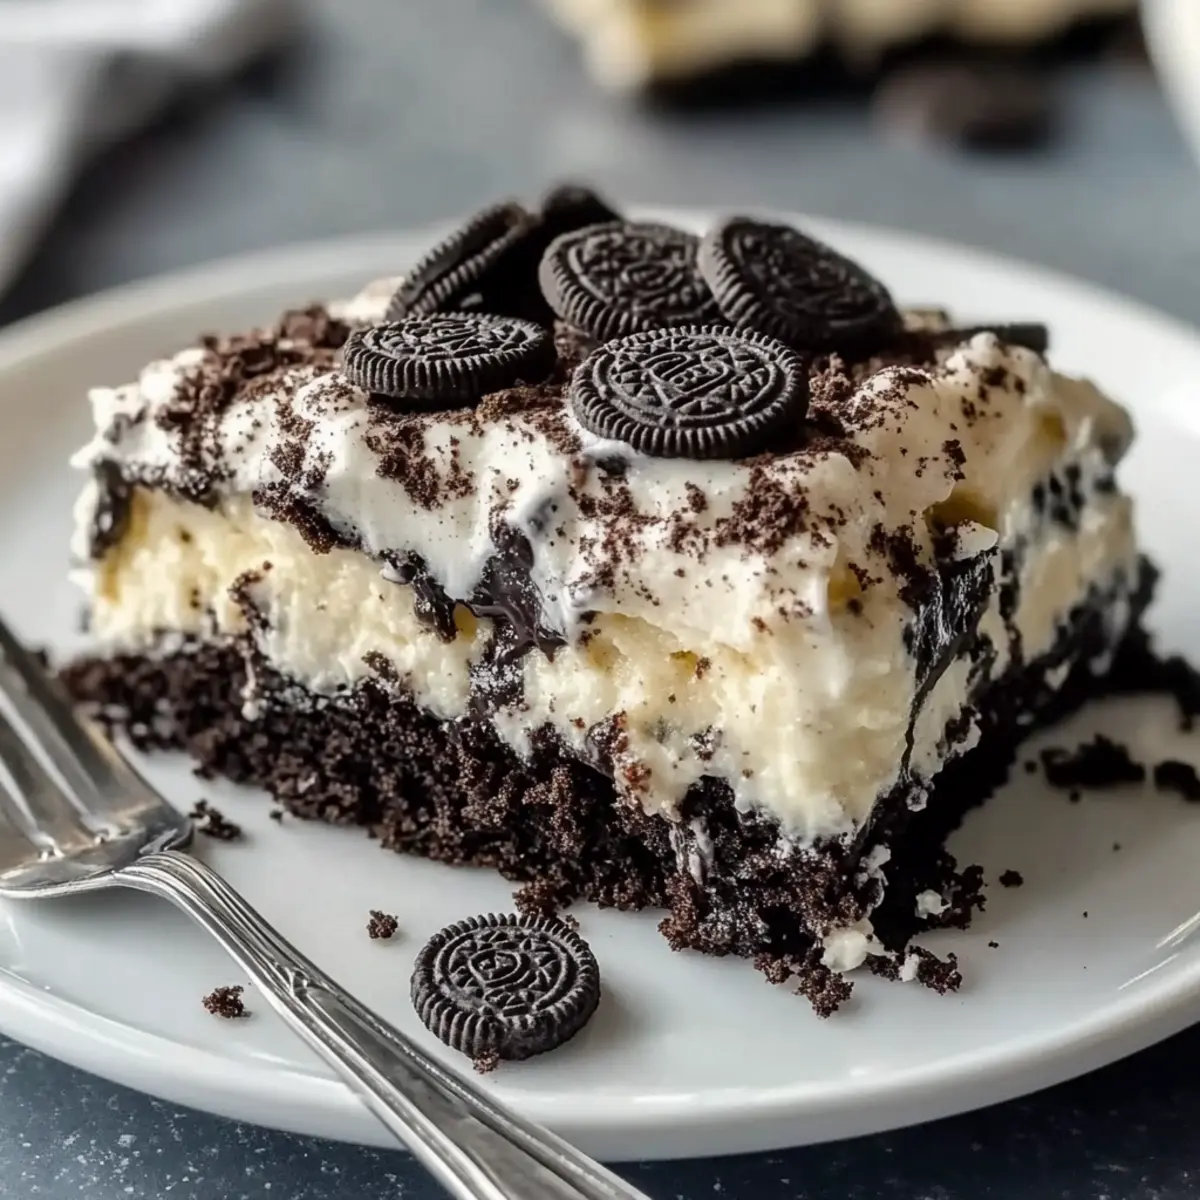
As the scent of chocolate wafted through my kitchen, I couldn’t help but feel a sense of joy mixing the ingredients for this 5-Ingredient Oreo Dump Cake. This dessert marries the nostalgic crunch of Oreos with a gooey pudding layer, making it a delightful treat that’s super simple to whip up. With minimal prep time and effortless clean-up, this Oreo Dump Cake Recipe is a crowd-pleaser that everyone will adore. Plus, it’s perfect for those moments when a sweet craving strikes and you need something irresistibly delicious in a snap. So, are you ready to dive into a chocolatey adventure that will have your loved ones cheering for more? Let’s bake!
Why Is This Oreo Dump Cake Special?
Simplicity reigns supreme with this 5-ingredient dessert, ensuring that even novice bakers can create something incredibly delicious! Indulgent layers of Oreos, creamy pudding, and cake mix come together for an effortlessly decadent treat. Minimal effort means you can enjoy dessert without hours of preparation. Crowd-pleaser status is guaranteed; everyone loves the combination of chocolate and Oreos. Serve it warm with a scoop of vanilla ice cream for the ultimate treat, just like in my Gingerbread Wreath Cake or top it with whipped cream for added flair! Get ready to impress your family and friends with this delightful Oreo Dump Cake!
Oreo Dump Cake Ingredients
• Get ready to create magic!
For the Cake
- Oreo Cookies – The base layer providing delightful crunch, or swap with any chocolate cookie for a unique taste.
- Instant Chocolate Pudding Mix – Adds creamy richness; remember to use instant pudding for the perfect texture.
- Cold Milk – Essential for setting the pudding; whole milk or cream can elevate the flavor.
- Chocolate Cake Mix – Gives structure to your cake; opt for a gluten-free mix if needed.
- Unsalted Butter – Moisture enhancer that binds everything together; melted coconut oil works for dairy-free options.
For the Topping
- Whipped Topping (e.g., Cool Whip) – Adds a creamy layer on top; feel free to use homemade whipped cream for that extra touch.
- Mini Chocolate Chips (optional) – For bursts of chocolate goodness; you can skip this or use nuts for a different crunch.
- Extra Oreo Cookies (optional) – A fun garnish that elevates your presentation—because why not?
Dive into this delightful Oreo Dump Cake Recipe to create a simple yet luscious dessert that will have everyone craving more!
Step‑by‑Step Instructions for Oreo Dump Cake Recipe
Step 1: Preheat and Prepare
Start by preheating your oven to 350°F (175°C) while you grease a 9×13-inch baking dish. Use butter or non-stick spray to ensure easy removal later. The warm, inviting aroma of your preheating oven will set the stage for the delectable Oreo dump cake that awaits you.
Step 2: Layer the Oreos
Next, evenly spread a layer of chopped Oreo cookies along the bottom of your prepared baking dish. Aim for a generous, even layer covering all the corners. The crispy textures of the Oreos will contrast beautifully with the creamy layers that follow, creating the base for your indulgent Oreo dump cake.
Step 3: Prepare the Pudding Mix
In a medium bowl, whisk together the instant chocolate pudding mix and cold milk until it thickens, about 2 minutes. Make sure there are no lumps, and the mixture has a smooth, creamy consistency. Once ready, pour the pudding layer evenly over the Oreo base, creating a luscious foundation for your cake—watch it settle beautifully between the layers.
Step 4: Sprinkle the Cake Mix
Now, open a box of chocolate cake mix and evenly sprinkle it over the pudding layer. Use a spatula to gently spread the mix to ensure that every bit of the pudding is covered. This layer will bake into a satisfying cake top, providing a delightful contrast to the gooey pudding and crunchy Oreos below.
Step 5: Add the Butter
Melt unsalted butter and drizzle it evenly across the chocolate cake mix layer. This step is crucial; it will soak through the cake mix during baking, adding moisture and flavor to your Oreo dump cake. The golden melted butter will create a rich, buttery finish that everyone will love.
Step 6: Bake to Perfection
Place your assembled baking dish into the preheated oven and bake for 35 minutes. You’ll know it’s done when the top is set and slightly crisp while the middle remains soft and gooey. The decadent aroma of chocolate will fill your kitchen, signaling that your Oreo dump cake is almost ready!
Step 7: Cool and Serve
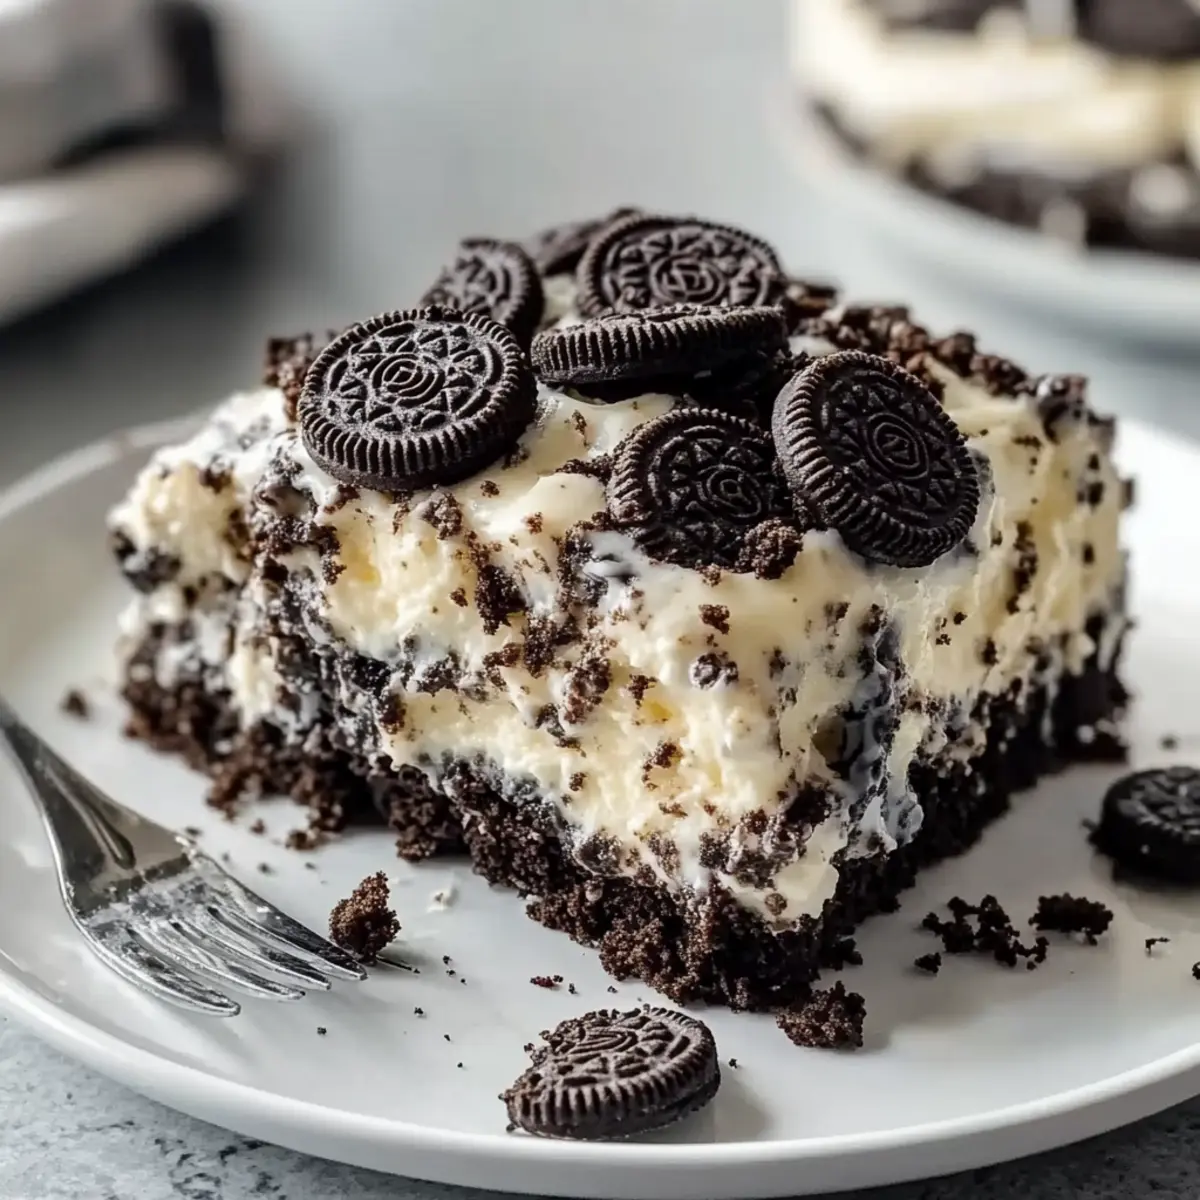
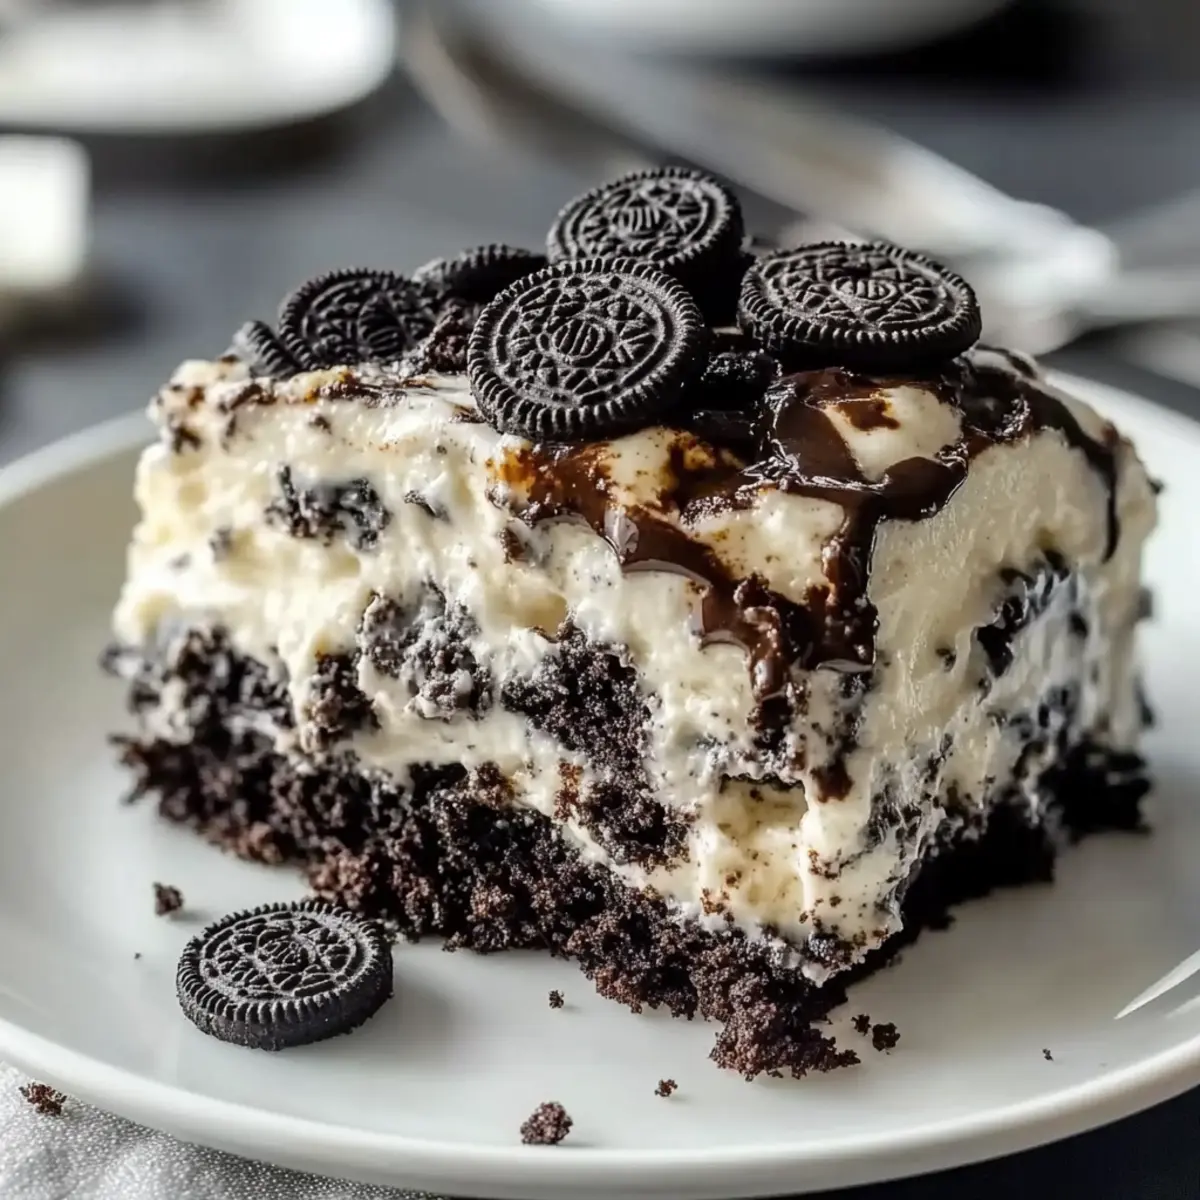
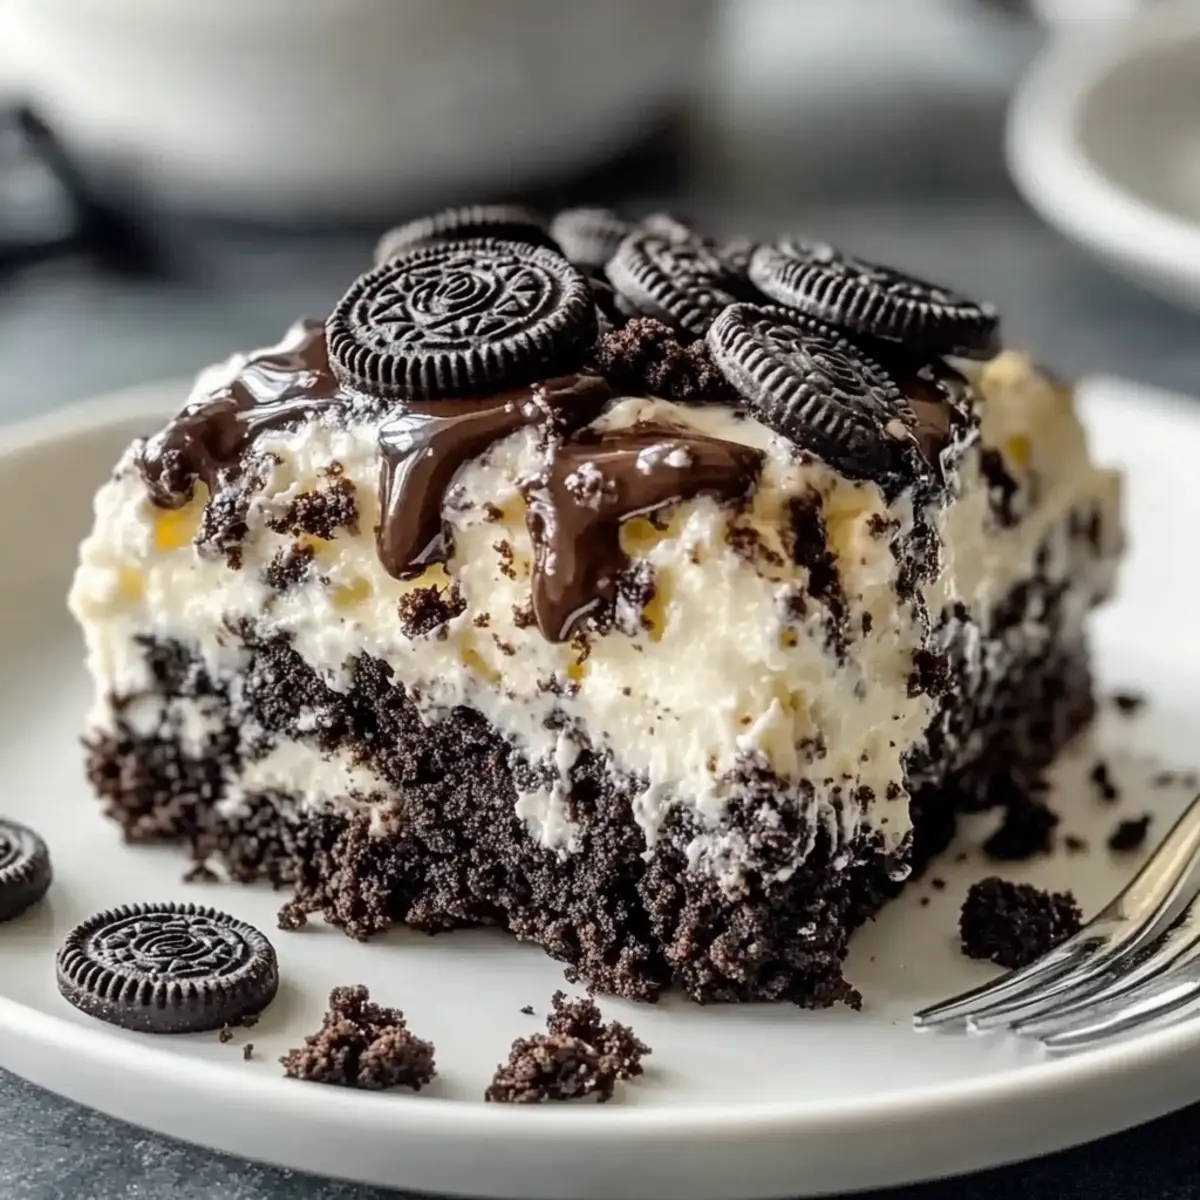
Once baked, remove the cake from the oven and let it cool for about 10 minutes. This brief cooling allows the layers to meld together perfectly. Serve warm by topping it with whipped topping, mini chocolate chips, or extra Oreos for an enticing presentation. Your Oreo dump cake is now ready to be enjoyed!
Storage Tips for Oreo Dump Cake
Fridge: Store any leftovers in an airtight container or cover the dish with plastic wrap for up to 4 days. Keep it chilled to maintain that delicious gooeyness.
Freezer: For longer storage, you can freeze the cooled Oreo dump cake. Wrap it tightly in plastic wrap and then in aluminum foil. It will stay fresh for up to 2 months.
Reheating: When you’re ready to enjoy your cake, thaw in the fridge overnight if frozen. Reheat in the microwave for 15-30 seconds for a warm, gooey treat.
Serving: Enjoy the Oreo dump cake warm or at room temperature. For the ultimate indulgence, top with whipped cream or a scoop of vanilla ice cream!
What to Serve with Oreo Dump Cake
Looking to complete your meal with delightful sides and sweet pairings that harmonize beautifully with this indulgent dessert?
-
Vanilla Ice Cream: The creamy coldness complements the warm, chocolatey cake, intensifying the dessert experience.
-
Fresh Berries: Strawberries or raspberries add a refreshing tartness that cuts through the richness of the cake.
-
Chocolate Sauce Drizzle: A warm drizzle enhances the chocolate flavor, providing a decadent touch that chocolate lovers will adore.
-
Whipped Cream: A dollop adds a light, airy texture and balances the cake’s richness, creating a delightful contrast.
-
Coffee: Pairing a warm cup of coffee with your cake enhances the chocolate notes and adds a comforting touch to your dessert experience.
-
Mint Tea: A refreshing herbal tea can cleanse the palate, offering a soothing end to your meal.
-
Chocolate-Covered Pretzels: Their salty crunch adds texture and saltiness, balancing the sweet, gooey indulgence of the cake beautifully.
-
Peanut Butter Cookies: The nutty flavor pairs well with chocolate, creating a harmonious blend for any sweet tooth.
-
Pecan Pie: A slice of this classic dessert contrasts wonderfully with the Oreo cake, delivering two sweet treats on one plate.
Expert Tips for the Best Oreo Dump Cake
- Even Layering: Ensure all layers are evenly distributed to guarantee consistent baking and delicious results in your Oreo dump cake.
- Check Doneness: Keep an eye on the baking time; the top should be slightly crisp while the middle stays gooey. Adjust if using a different baking dish size.
- Add Flavor: Enhancing your pudding with a splash of vanilla extract or coffee can elevate the overall taste.
- Cool Before Serving: Let the cake rest for about 10 minutes after baking to allow the layers to meld beautifully.
- Customize Toppings: Don’t hesitate to use homemade whipped cream or crushed nuts for added texture and flavor!
Make Ahead Options
These delicious Oreo Dump Cake treats are perfect for busy home cooks looking to save time! You can prepare the layers up to 24 hours in advance by assembling the Oreo base and chocolate pudding layer, then cover the dish tightly and refrigerate. For optimal flavor, make sure to keep it airtight to prevent drying out. When you’re ready to bake, simply sprinkle the chocolate cake mix on top, drizzle with melted butter, and pop it in the oven. This way, you can enjoy a freshly baked dessert with minimal effort, just when that sweet craving strikes! Your Oreo Dump Cake will be just as mouthwatering, delivering all the indulgence you desire.
Oreo Dump Cake Recipe Variations
Feel free to unleash your creativity and customize this recipe to suit your taste buds!
- Dairy-Free: Substitute regular milk with almond or coconut milk, and use dairy-free whipped topping for a deliciously creamy finish.
- Gluten-Free: Replace the chocolate cake mix with a gluten-free variety to accommodate those with gluten sensitivities.
- Flavorful Pudding: Try swapping the chocolate pudding for vanilla or butterscotch pudding for a new flavor dimension. Each variation brings a unique twist that’s worth exploring!
- Nutty Surprise: Mix in a handful of chopped walnuts or pecans into the pudding layer for added crunch and richness. The nutty flavor pairs beautifully with the chocolate!
- Peanut Butter Delight: Incorporate a dollop of peanut butter into the pudding mix before layering for a nutty and creamy enhancement. Your taste buds will do a happy dance!
- Fruity Layer: Toss in some sliced bananas or berries between layers to introduce a fruity contrast that complements the rich chocolate perfectly.
- Sprinkling Fun: Feel free to add a sprinkle of colorful sprinkles or festive toppings on top for a fun, celebratory look. Perfect for birthdays or any special occasion!
- Extra Crunch: For additional texture, mix in some mini chocolate chips or crushed Oreos on top of the whipped topping for that extra special touch.
These variations not only allow you to put your own spin on the classic recipe but can also elevate your dessert experience. And if you’re in the mood for something else, don’t miss out on trying my delightful Wild Rice Pilaf or the comforting Stuffing Holiday Comfort!
Oreo Dump Cake Recipe FAQs
What kind of Oreos should I use for this recipe?
You can use regular Oreo cookies for that classic flavor, but feel free to experiment with different varieties like Double Stuff or even flavored Oreos such as mint or peanut butter for a unique twist!
How long can I store leftover Oreo dump cake?
Leftover Oreo dump cake can be stored in the refrigerator in an airtight container for up to 4 days. Make sure to cover it well to keep it fresh, and the gooey texture will still be delightful!
Can I freeze my Oreo dump cake?
Absolutely! To freeze, allow the cake to cool completely, then wrap it tightly in plastic wrap followed by aluminum foil. This will keep it fresh for up to 2 months. When you’re ready to serve it, thaw it in the refrigerator overnight, then reheat in the microwave for 15–30 seconds before enjoying!
What can I do if my cake mix isn’t distributing evenly?
If you find your cake mix isn’t spreading evenly over the pudding layer, gently use a spatula to coax it into place. You want to make sure every bit of pudding is covered so it bakes evenly. Additionally, sprinkle the mix lightly from a height to help it distribute better.
Is this recipe safe for people with nut allergies?
Yes! The classic ingredients in this Oreo dump cake recipe do not contain nuts, making it a lovely option for gatherings. However, be cautious of any additional toppings or brands of cookies you choose that may contain nuts. Always check labels to ensure safety for those with dietary restrictions.
Decadent Oreo Dump Cake Recipe for Effortless Indulgence
Ingredients
Equipment
Method
- Preheat your oven to 350°F (175°C) and grease a 9x13-inch baking dish.
- Evenly spread a layer of chopped Oreo cookies along the bottom of your prepared baking dish.
- In a medium bowl, whisk together the instant chocolate pudding mix and cold milk until it thickens, about 2 minutes.
- Open a box of chocolate cake mix and evenly sprinkle it over the pudding layer.
- Melt unsalted butter and drizzle it evenly across the chocolate cake mix layer.
- Place the baking dish into the preheated oven and bake for 35 minutes.
- Once baked, remove from the oven and let cool for about 10 minutes before serving.
Leave a Reply