The aroma of freshly cooked Roti Canai wafts through my kitchen, transporting me to bustling street markets where this crispy, flaky delight reigns supreme. This Flaky Roti Canai Recipe captures that essence, letting you enjoy a delicious experience right at home. Not only is it a quick and satisfying way to elevate your meals, but it also serves as a perfect companion to your favorite curries or even on its own with a drizzle of honey. Imagine impressing your friends and family with a dish that combines centuries-old culinary tradition with a playful twist. So, are you ready to roll up your sleeves and give this comforting treat a try?

Why Is Roti Canai So Irresistible?
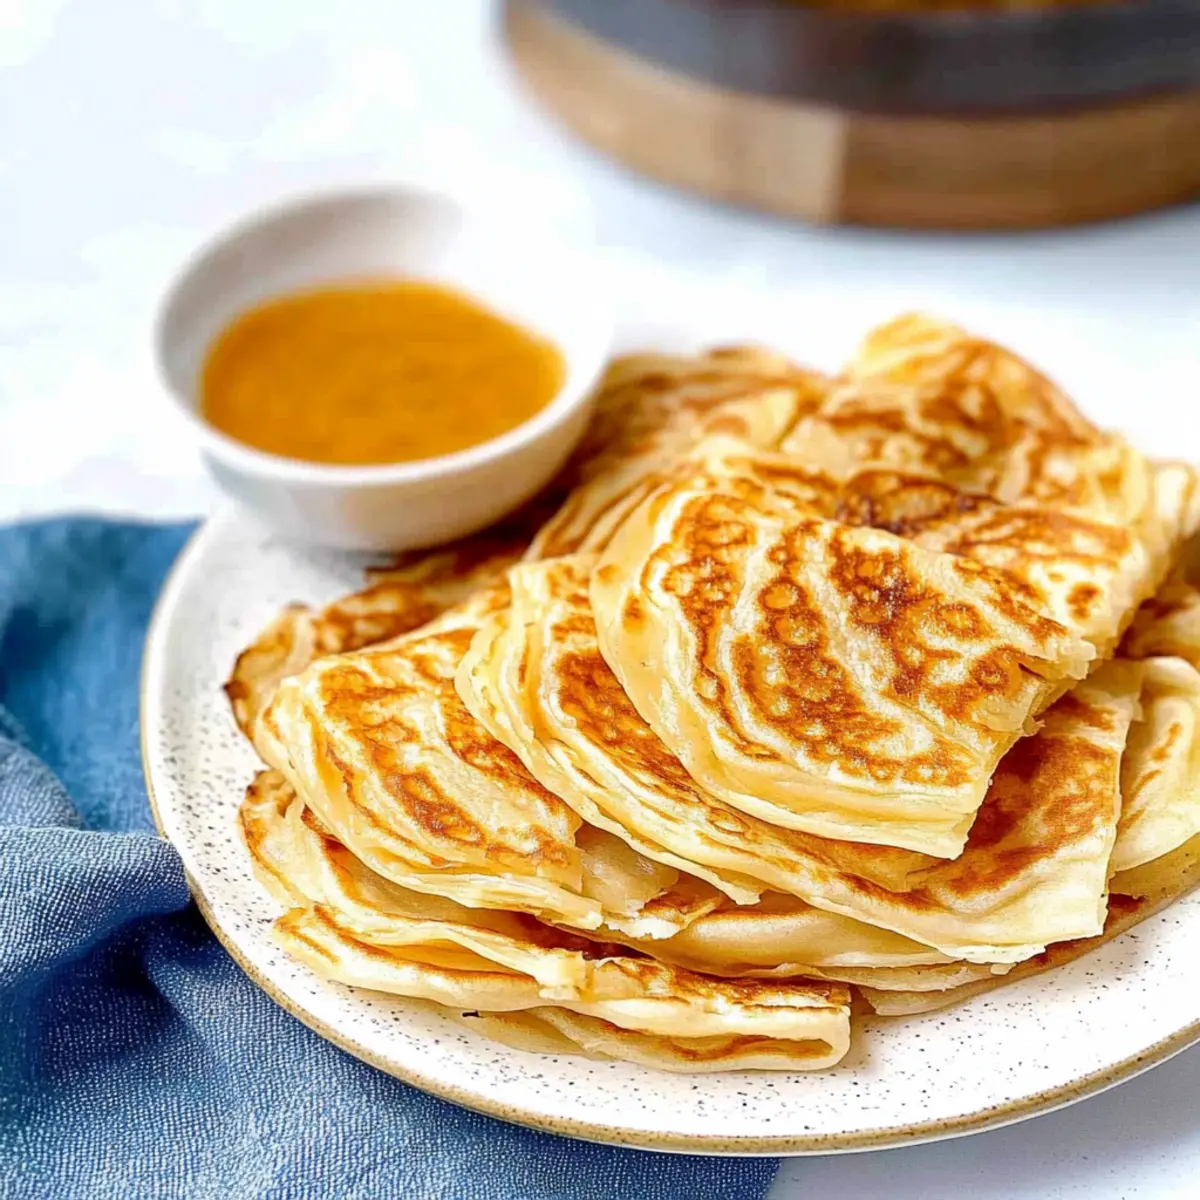
Crispy, flaky goodness: The texture of Roti Canai is simply unmatched, featuring layers that crisp to perfection while maintaining a soft, fluffy interior. Easily customizable: Whether you add spices, fillings, or enjoy it plain, the variations ensure that each batch can reflect your taste. Rapid preparation: This recipe is not only quick but also a delightful way to create a homemade experience that rivals any restaurant. For a full meal, pair with Beef Taco Soup or serve as a versatile breakfast wrap! Cultural tradition: Bringing a piece of South Asian heritage to your kitchen connects you to a rich culinary history. Once you try making this Roti Canai, you won’t want to go back to takeout!
Flaky Roti Canai Ingredients
For the Dough
- Flour – All-purpose flour is the best choice for structure and a perfect texture in your Flaky Roti Canai.
- Sea Salt – Enhances the flavor; kosher salt works as an excellent alternative if needed.
- Boiling Water – Critical for activating gluten, ensuring elasticity; don’t skip this step!
- Room Temperature Water – Hydrates the dough, adjusted based on how much your flour absorbs.
- Oil – Needed for coating and cooking; feel free to swap with butter or ghee for an extra rich taste.
For Cooking
- Non-Stick Cooking Spray or Oil – To lightly grease the pan, helping your roti cook evenly and avoid sticking.
Step‑by‑Step Instructions for Flaky Roti Canai Recipe
Step 1: Mix the Dry Ingredients
In a large mixing bowl, combine 2 cups of all-purpose flour and 1 teaspoon of sea salt. Stir them together until evenly mixed, creating a solid foundation for your Flaky Roti Canai. The salt enhances the flavor, making the roti even more delicious. This step is quick but crucial to ensure a well-seasoned dough.
Step 2: Incorporate Boiling Water
Next, slowly add ¾ cup of boiling water to your flour mixture while stirring with a spoon. The hot water activates the gluten, giving your dough elasticity. Mix until the flour starts to clump together, forming a shaggy mass. You may see steam rising; that’s a good sign you’re on the right track!
Step 3: Add Room Temperature Water
Gradually introduce ½ cup of room temperature water into the dough, mixing until it comes together and forms a scraggly ball. If the dough feels too dry or flaky, add a splash more water. This step is vital for achieving the perfect texture in your Flaky Roti Canai, ensuring it’s neither too dry nor too sticky.
Step 4: Rest the Dough
Cover the bowl with a clean kitchen towel and let the dough rest for 30 minutes to 1 hour. This resting period allows the gluten to relax, resulting in a softer and more pliable dough. You’ll know it’s ready when it feels smooth and slightly springy when touched.
Step 5: Knead the Dough
After resting, transfer the dough to a lightly floured surface. Knead it for 5 to 10 minutes until you achieve a smooth, elastic consistency. This step is essential for developing the structure needed for layers in your Flaky Roti Canai. Don’t rush – the more you knead, the better the texture will be!
Step 6: Portion the Dough
Divide the kneaded dough into 8 equal portions. Shape each piece into a round ball, ensuring they’re smooth and uniform. This step allows for even cooking later on and keeps your roti uniform in size, leading to that delightful crispy texture everyone loves.
Step 7: Oil the Dough Balls
Roll each dough ball in a shallow plate filled with oil, coating them evenly. Place the oiled balls onto a plate with space in between to prevent sticking. This oil will help create those perfect flaky layers later on. Cover with a towel and let them rest for at least 2 hours, or overnight for best results.
Step 8: Shape the Roti
To create the roti, take one dough ball and flatten it slightly. Using your fingers, gently stretch it outwards, working it into a paper-thin layer. Don’t rush—this technique takes practice, but the goal is to achieve a delicate, translucent dough that will yield beautiful layers in your Flaky Roti Canai.
Step 9: Roll and Coil the Dough
After stretching, spread a thin layer of oil or ghee across the dough. Roll it into a tube shape, then coil it tightly, tucking the end underneath. This technique helps create the flaky layers you’re after. Repeat for all dough balls, ensuring each one is coiled snugly.
Step 10: Cook the Roti
Heat a non-stick frying pan over medium heat. Once hot, place a coiled roti in the pan, cooking for about 2 to 3 minutes on each side, or until golden brown. Flip often to ensure even cooking and that crispy finish everyone desires. You’ll see those beautiful flaky layers develop as it cooks.
Step 11: Cool and Serve
After cooking, transfer the roti to a cooling rack. Lightly squish the roti to separate the layers before serving. This final touch reveals the flaky goodness of your Flaky Roti Canai. Serve warm with your favorite curry or chutneys for a comforting and satisfying meal.
Make Ahead Options
These Flaky Roti Canai are ideal for busy cooks looking to save time during the week! You can prepare the dough up to 24 hours in advance; just follow the steps until after you portion and oil the dough balls (Step 7). Cover them tightly with plastic wrap and refrigerate to maintain freshness. When you’re ready to enjoy, remove the dough from the refrigerator and let it sit at room temperature for about 30 minutes before shaping and cooking. This waiting time ensures that your roti will still have that delightful texture when cooked. By prepping in advance, you’ll have a delicious, homemade meal ready with minimal effort!
What to Serve with Flaky Roti Canai?
Elevate your meal with delightful pairings that enhance the flaky, crispy texture of your homemade treat.
- Sayur Lodeh: This Indonesian vegetable curry is packed with rich flavors and can beautifully complement the flaky roti, creating a wholesome meal.
- Dhal Curry: The creamy, spiced lentil mixture provides a hearty contrast, allowing each bite of roti to soak up the comforting flavors.
- Chutneys Galore: Whether it’s tangy tamarind or spicy mint chutney, these vibrant dips will add a fresh zing to each mouthful of the roti.
- Egg Bhurji: Scrambled Indian-style eggs with spices give a spicy kick, perfect for a hearty breakfast wrap that showcases the roti’s versatility.
- Fresh Salad: A refreshing cucumber and tomato salad adds crunch, balancing the richness of the roti with a light, zesty note. Toss in a squeeze of lime for extra brightness!
- Mango Lassi: A sweet yogurt-based drink that cools the palate, perfectly balancing spicy curries and enhancing the overall dining experience.
- Coconut Rice: Fluffy rice cooked with coconut milk brings a subtle sweetness, pairing wonderfully with the savory elements of your meal.
- Banana and Honey: For a sweet twist, serve the roti with sliced bananas drizzled in honey as a delightful dessert that echoes its flaky goodness.
Expert Tips for Flaky Roti Canai
- Rest Is Key: Ensure the dough rests adequately; this step develops gluten, contributing to the light and flaky texture of your Roti Canai.
- Use Hot Water: Always use boiling water when mixing, as it activates gluten for elasticity and ensures the perfect consistency in your dough.
- Stretch Gently: When shaping the dough, use a gentle hand to avoid tearing; practice makes perfect, so don’t rush the stretching process!
- Oil for Layers: Generously coat your dough balls with oil; this creates distinct layers and helps achieve that crispy, flaky finish you desire.
- Watch the Heat: Cook on medium heat and flip often; uneven cooking can lead to burnt spots, so keep an eye on your roti for the best results.
How to Store and Freeze Flaky Roti Canai
Fridge: Keep cooked Roti Canai wrapped in a clean cloth or placed in an airtight container for up to 3 days to maintain freshness and prevent sogginess.
Freezer: For longer storage, freeze individual roti between layers of parchment paper and place them in a freezer bag. They can last up to 2 months and preserve their flaky texture.
Reheating: To reheat, thaw in the fridge overnight, then warm in a pan over medium heat for 2-3 minutes on each side until crispy. Enjoy your Flaky Roti Canai just like fresh!
Make-Ahead: If you’re preparing the dough in advance, it can be refrigerated for up to 24 hours. Just remember to allow it to come to room temperature before shaping and cooking.
Flaky Roti Canai Recipe Variations
Feel free to let your creativity shine with these delightful twists to make your Roti Canai truly unique!
- Vegetarian Twist: Add finely chopped spinach or herbs to the dough for a nutritious, flavorful kick that pairs beautifully with curries.
- Sweet Delight: Mix in a tablespoon of sugar to the dough or serve it with honey and fruits for a delightful dessert option.
- Spiced Up: Incorporate a pinch of cumin or chili powder into the flour for a warm, spicy flavor that complements any dish!
- Cheesy Center: Stuff the roti with shredded cheese before cooking for a gooey, mouthwatering filling that cheese lovers will adore.
- Godhambara Roti: For a simpler version, skip the layering process and roll the dough flat before cooking. Enjoy a more straightforward, yet equally delicious bread.
- Nutty Flavor: Scatter sesame seeds or crushed nuts on the dough before rolling for added texture and a delightful nutty flavor.
- Crispy Layers: Instead of coiling, try folding the dough into quarters for thicker, layered roti that are crispy on the outside but fluffy within!
- Herbed Infusion: Add fresh herbs like cilantro or mint to the dough for an aromatic touch that brightens up this comforting classic.
Looking for more delicious sides? Why not try your Roti Canai with a rich Beef Taco Soup or pair it next to a bowl of Wild Rice Pilaf? The possibilities for great flavor combinations are endless!

Flaky Roti Canai Recipe FAQs
What type of flour should I use for making Roti Canai?
Absolutely, for the best results, I recommend using all-purpose flour. It provides the ideal balance of elasticity and texture, ensuring your Roti Canai turns out beautifully crispy and flaky. If you want to experiment, you might also try bread flour for a chewier texture, but all-purpose is the classic go-to!
How can I tell if the dough has rested enough?
After resting the dough for 30 minutes to 1 hour, it should feel smooth and slightly springy to the touch. You’ll notice it becomes easier to knead and shape. If it’s still tough or hard, give it a little more time – patience is key to achieving that perfect Roti Canai!
What’s the best way to store leftover Roti Canai?
To keep your Flaky Roti Canai fresh, wrap it in a clean cloth or store it in an airtight container for up to 3 days in the fridge. For longer storage, you can freeze it. Simply place each cooked roti between layers of parchment paper, then store them in a freezer bag. They can last up to 2 months and still taste amazing!
How do I reheat frozen Roti Canai?
To enjoy frozen Roti Canai, first, thaw them overnight in the fridge. Then, warm them in a non-stick pan over medium heat for about 2-3 minutes on each side. This method helps maintain their flaky texture and recreates that freshly cooked taste, perfect for enjoying with your favorite curry or chutney!
Can I make the dough ahead of time?
Yes, feel free to prepare the dough in advance! You can refrigerate it for up to 24 hours. Just remember to let it come to room temperature before you start shaping and cooking. Preparing ahead is a great time-saver and allows you to enjoy freshly made Roti Canai even on busy days!
Are there any dietary considerations for Roti Canai?
Roti Canai can be made vegetarian-friendly, simply by using vegetable oil instead of ghee or butter. If you’re catering to those with allergies, be aware that this recipe contains gluten due to the flour. Always ensure to check for any personal dietary needs of your guests before serving. The more the merrier!

Flaky Roti Canai Recipe for Crispy, Comforting Delights
Ingredients
Equipment
Method
- In a large mixing bowl, combine the flour and sea salt; stir together until mixed.
- Slowly add boiling water while stirring until a shaggy mass forms.
- Gradually incorporate room temperature water until the dough comes together.
- Cover and let the dough rest for 30 minutes to 1 hour.
- Knead the dough for 5 to 10 minutes until smooth and elastic.
- Divide the dough into 8 equal portions and shape into balls.
- Oil the dough balls and let them rest for at least 2 hours.
- Flatten one dough ball and stretch it into a paper-thin layer.
- Spread oil or ghee, roll into a tube shape and coil tightly.
- Cook the coiled roti in a medium-heated pan for 2-3 minutes on each side.
- Transfer to a cooling rack, gently squish to separate layers and serve warm.
Leave a Reply