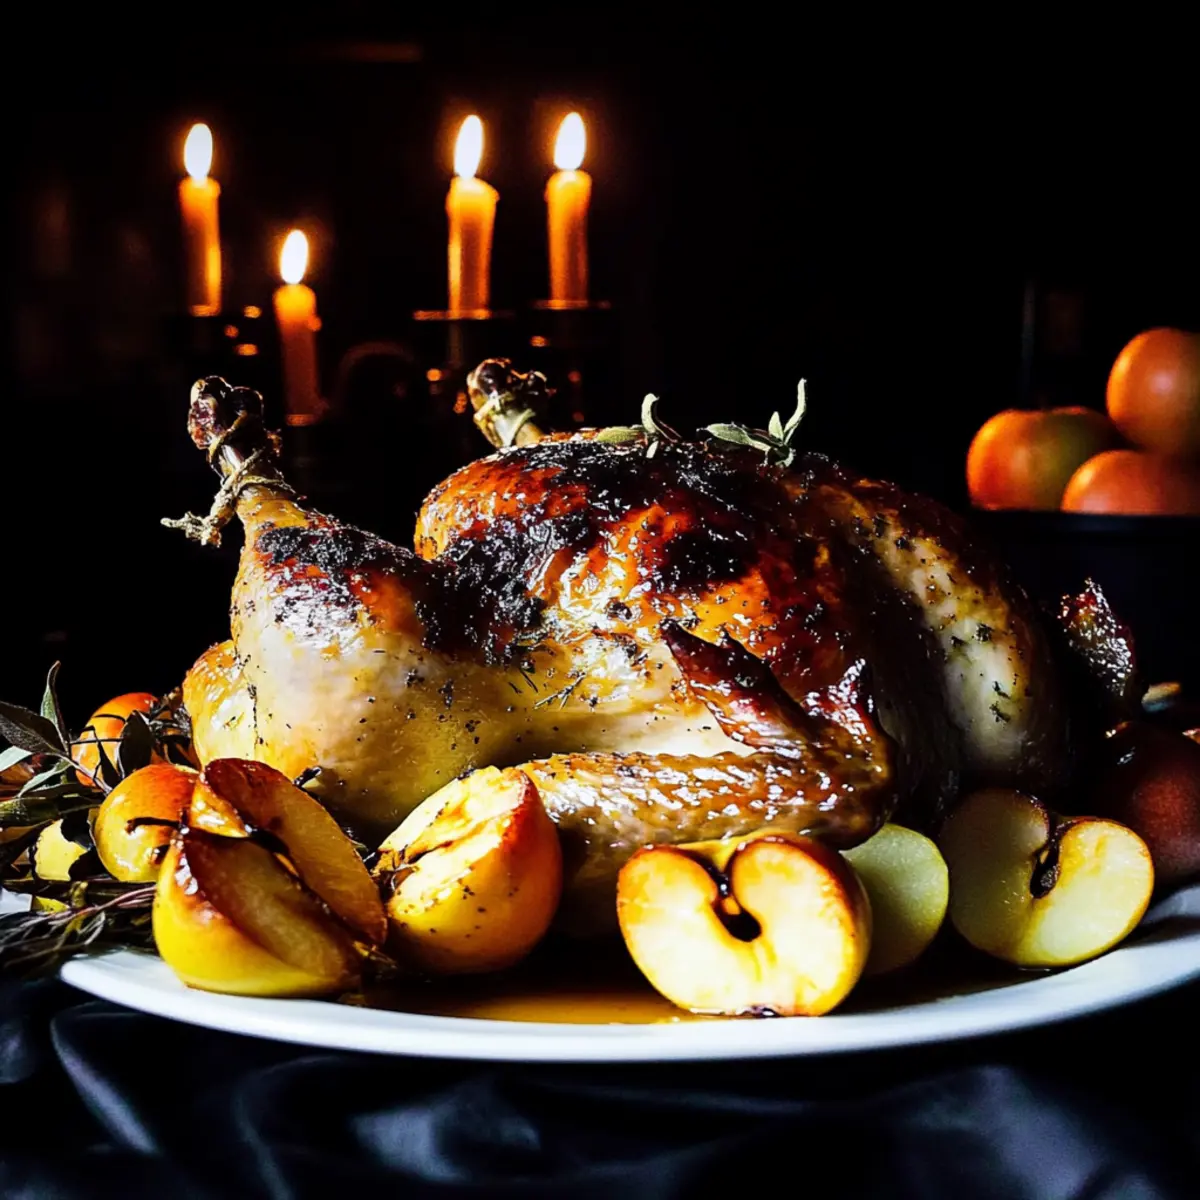
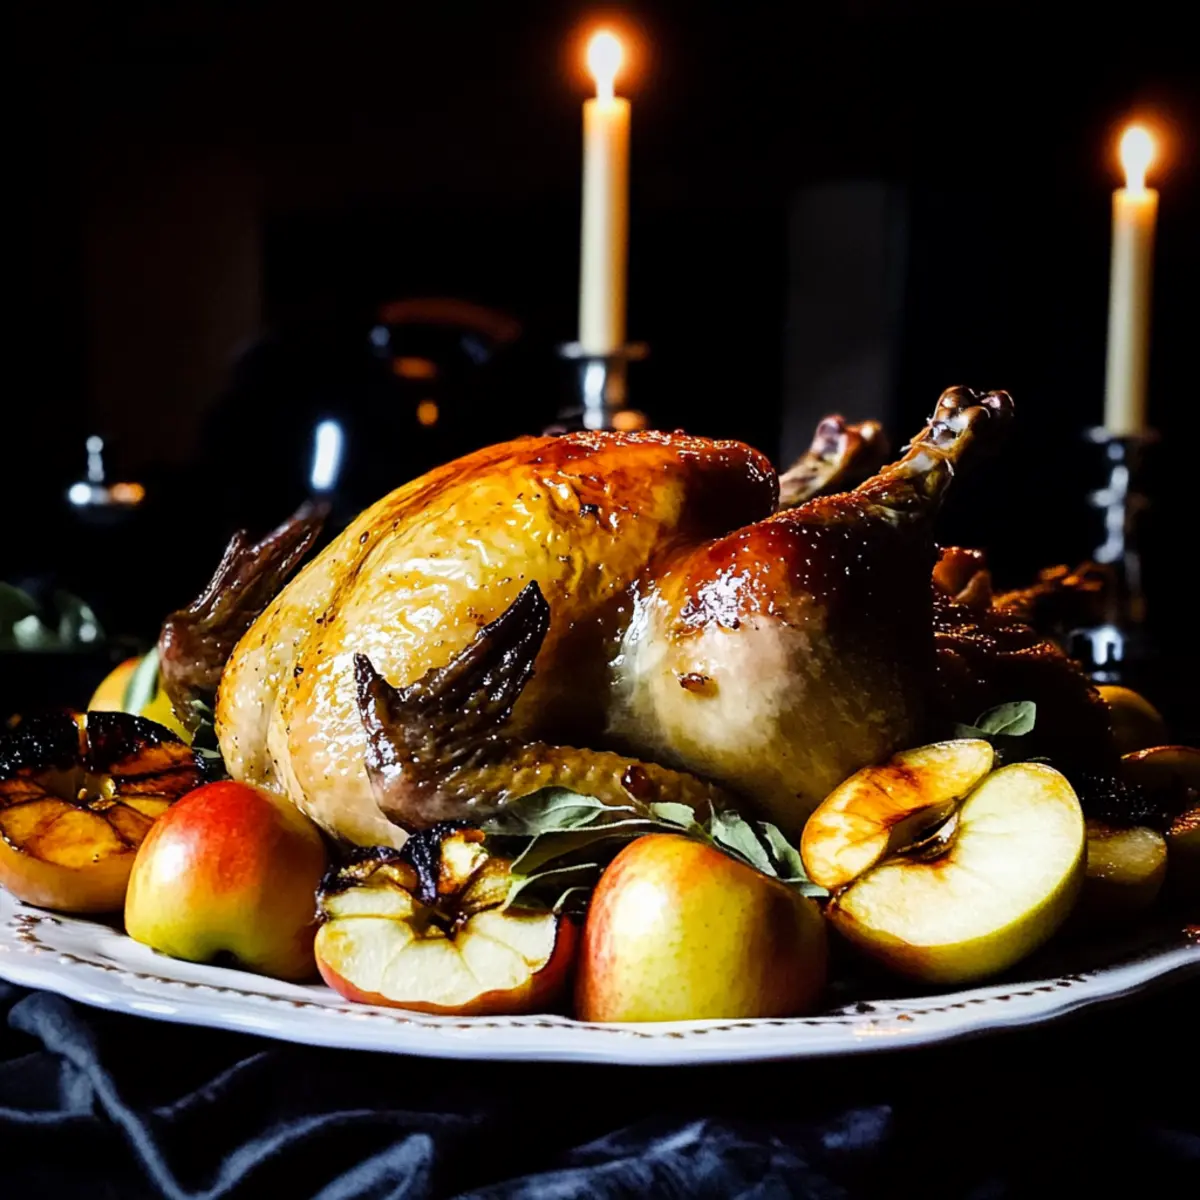
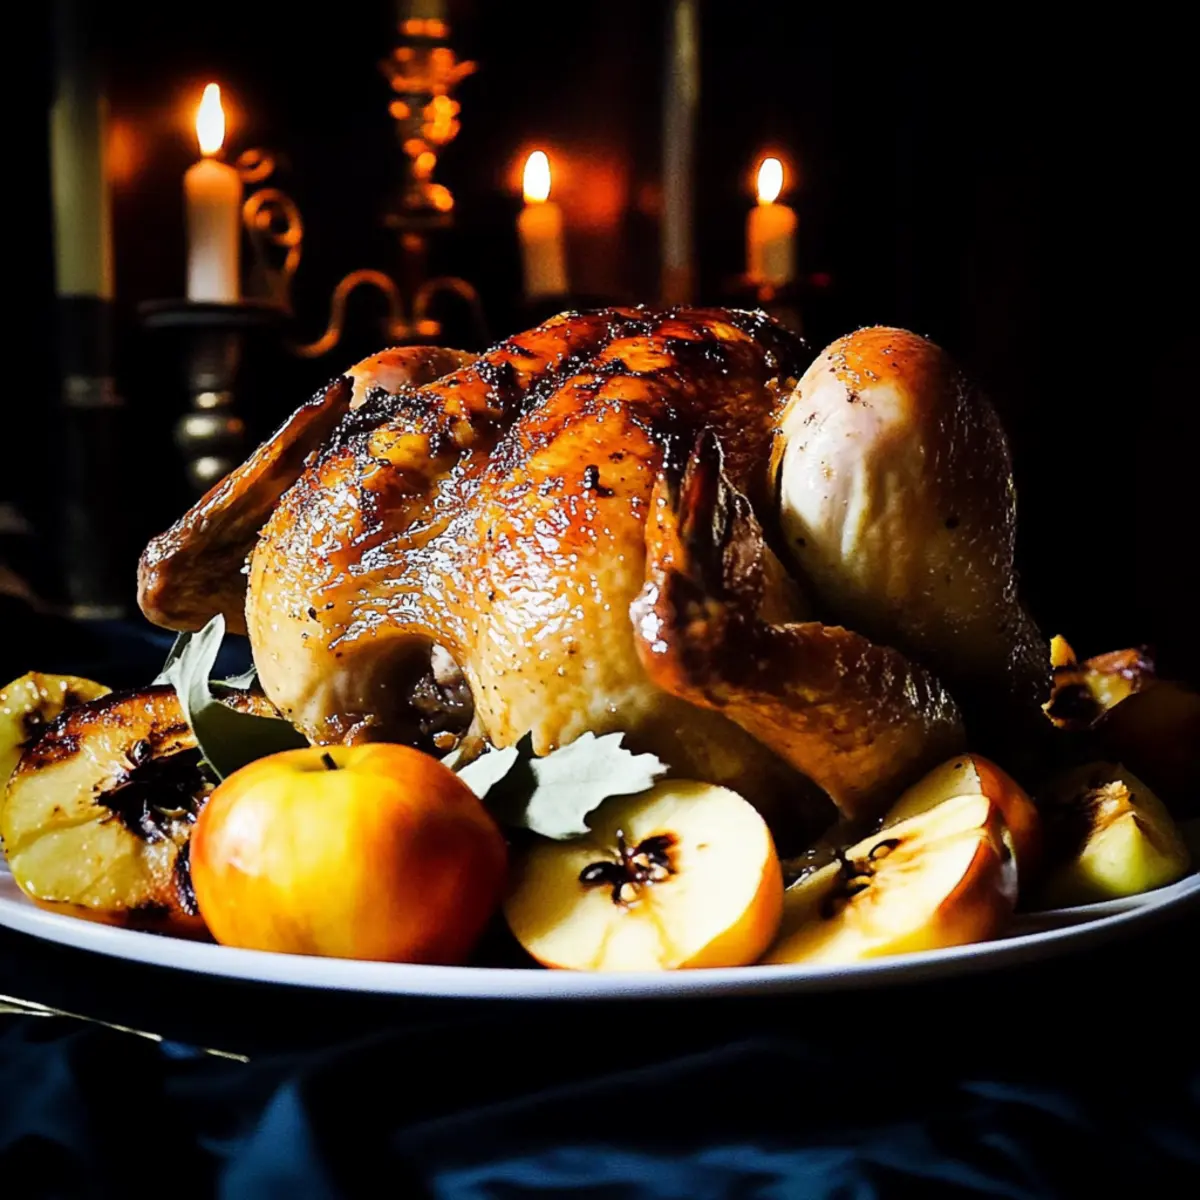
A crisp autumn breeze swept through the kitchen as I prepped for our family gathering, the scent of apple cider dancing in the air. There’s something truly magical about preparing a roast chicken this way, especially with my Cider Brined Roast Chicken on the menu. This dish not only guarantees a moist and juicy chicken, but it also brings a delightful burst of seasonal flavor to the table. The combination of cider and a rich maple glaze creates an entrancing aroma that will captivate your guests from the moment they walk in. Plus, it’s a simple yet impressive centerpiece that makes any mealtime feel like a celebration. Are you ready to elevate your fall feast with this delicious recipe?
Why is Cider Brined Roast Chicken a Must-Try?
Flavor Explosion: The infusion of apple cider brings a hint of sweetness, transforming ordinary roast chicken into a seasonal sensation.
Juicy Perfection: A long brining process ensures that every bite is moist and tender, leaving your guests raving for more.
Eye-Catching Presentation: With its golden, crispy skin and caramelized apples, this dish is as beautiful as it is delicious, perfect for impressing your loved ones.
Simple Elegance: The straightforward preparation allows anyone, from novice to experienced chefs, to create a stunning entrée that steals the spotlight at any gathering.
Make-Ahead Friendly: Brine the chicken a day in advance for effortless entertaining, just like with my Lobster Biscuit Chicken or Chicken Taco Soup.
Get ready to savor the comforting flavors of fall with this Cider Brined Roast Chicken—it’s sure to become a favorite at your Thanksgiving table!
Cider Brined Roast Chicken Ingredients
Get ready for a flavorsome fall dish!
For the Brine
• Water – Serves as the base for the brine.
• Apple Cider – Provides sweetness and flavor for brining and glazing; you can use unsweetened apple juice if you run out.
• Kosher Salt – Enhances flavor and moisture; reduce to ½ cup if using table salt.
• Brown Sugar – Adds the perfect balance of sweetness; can be reduced if you want less sugar.
• Fresh Thyme – Infuses herbal notes; substitute dried thyme when fresh isn’t available.
• Peppercorns – Adds a touch of spice; ground black pepper can work but will change the texture slightly.
• Ice Water – Essential for cooling the brine.
For the Chicken
• Roaster Chicken (6-7 lbs) – The star of the show; smaller turkeys or chickens can be swapped, just adjust the cooking time.
• Butter – Used for a flavorful compound butter under the skin; olive oil can substitute for a dairy-free option.
• Fresh Sage – Complements the chicken beautifully; use dried sage in smaller amounts if fresh isn’t on hand.
• Orange – Adds a fresh citrus note inside the chicken and in the butter; lemon can also be a great substitute.
• Pepper – Enhances the seasoning; opt for freshly cracked pepper for the best flavor.
For Roasting and Glazing
• Olive Oil – Serves as a base for roasting; any vegetable oil works as well.
• Onion – Adds aromatic flavor depth; shallots can make a lovely sweeter alternative.
• Garlic Cloves – Enhances savory qualities; garlic powder can suffice if you’re in a pinch.
• Gala Apples – Roasted alongside the chicken for sweetness; you can use firm apples like Fuji or Honeycrisp instead.
• Maple Syrup – Sweetens the glaze; honey can also serve as a delightful alternative.
• Flour – Used for thickening the gravy; cornstarch is a suitable gluten-free option.
• Chicken Broth or Additional Apple Cider – For making the gravy; opt for vegetable broth if you need a vegetarian option.
Your Cider Brined Roast Chicken is about to become the highlight of your fall gatherings—prepare for compliments!
Step‑by‑Step Instructions for Cider Brined Roast Chicken
Step 1: Brine the Chicken
Begin by stirring together 2 liters of water, 4 cups of apple cider, kosher salt, and brown sugar in a large pot over medium heat until fully dissolved. Once the brine has cooled, add 1 liter of ice water. Submerge the 6 to 7-pound chicken in the brine and refrigerate for 12-24 hours to ensure a moist, flavorful Cider Brined Roast Chicken.
Step 2: Prepare the Chicken
After brining, remove the chicken and pat it dry with paper towels to ensure the skin crisps while roasting. Place the chicken on a wire rack and let it air dry for 1 hour at room temperature. Meanwhile, make a compound butter by mixing softened butter with fresh thyme, sage, orange zest, salt, and pepper, preparing for basting the chicken.
Step 3: Preheat the Oven
Preheat your oven to 350°F (175°C). In a large roasting pan, scatter chopped onions, orange slices, garlic cloves, and additional herbs. This flavorful base will infuse the chicken as it roasts. Place the chicken on the rack above these aromatics to catch all the delicious drippings.
Step 4: Season the Chicken
Generously rub the compound butter all over the chicken, being sure to tuck some under the skin for added flavor. Stuff the cavity with remaining orange slices and herbs. The seasoning creates a crispy, herb-infused skin that’s integral to the success of your Cider Brined Roast Chicken.
Step 5: Roast the Chicken
Pour 1 cup of apple cider into the bottom of the roasting pan to keep the environment moist during cooking. Roast the chicken uncovered in the preheated oven for about 1 hour, checking for even browning. The skin should turn golden and crisp while the chicken starts reaching its perfect juiciness.
Step 6: Add the Apples
After 1 hour, carefully nestle trimmed Gala apples around the chicken in the pan. Baste the chicken with the pan juices and melted butter to enhance flavor and moisture. Continue roasting until your chicken reaches an internal temperature of 165°F (74°C), about another 30-60 minutes depending on the size.
Step 7: Prepare the Glaze
While the chicken is finishing, reduce the remaining apple cider with maple syrup in a saucepan over medium heat. Whisk in any remaining butter and allow the mixture to boil until slightly thickened, about 5-10 minutes. This sweet glaze will add a beautiful finish to the Cider Brined Roast Chicken.
Step 8: Glaze the Chicken
Begin glazing the chicken with your prepared maple glaze once it reaches an internal temperature of 140°F (60°C). Apply the glaze every 10 minutes to build up a delicious, caramelized crust until the chicken is fully cooked at 165°F (74°C). This adds a lovely shine and flavor to your roast.
Step 9: Make the Gravy
After removing the chicken from the oven, strain the pan juices into a bowl. In the same pan, create a roux by mixing the drippings with flour, then gradually whisk in the strained juices and remaining chicken broth or apple cider until thickened. This gravy will elevate your Cider Brined Roast Chicken to new heights.
Step 10: Serve
Let the Cider Brined Roast Chicken rest for about 15-20 minutes before carving to allow the juices to redistribute. Serve with the roasted apples and the rich gravy on the side, showcasing a stunning and comforting centerpiece that’s perfect for your fall gatherings.

Make Ahead Options
Preparing your Cider Brined Roast Chicken in advance can save you precious time during your busy weeknight or holiday feast! You can brine the chicken up to 24 hours before roasting, allowing it to soak in all the flavors. Simply follow the brining instructions and refrigerate the chicken in the brine. Additionally, you can prepare the compound butter and refrigerate it for up to 3 days—this way, all you need to do when you’re ready to cook is rub the butter onto the chicken and roast. To maintain quality, ensure the chicken is air-dried after brining to achieve that coveted crispy skin. When you’re set to serve, follow the roasting steps, and your stunning Cider Brined Roast Chicken will be just as delicious and time-efficient!
Cider Brined Roast Chicken Variations
Feel free to get creative with this beautiful roast chicken recipe—your taste buds will thank you!
-
Herb Blend: Swap fresh thyme and sage for rosemary and oregano for a new herbaceous twist. Each herb brings a different aromatic profile, making your dish unique.
-
Fruit Medley: Add pears or cranberries to the roasting pan for a fruity flavor burst. The added sweetness and tartness complement the rich chicken perfectly, making it a seasonal delight.
-
Spice It Up: Incorporate cayenne pepper or smoked paprika into the brine for a spicy kick. The warmth adds an exciting depth, perfect for those chilly autumn evenings.
-
Vegetarian Option: Try using a whole roasted cauliflower instead of chicken with the same brine for an impressive plant-based centerpiece. This version will still be flavorful but with a different but equally satisfying texture.
-
Maple Twist: Substitute brown sugar in the brine with maple sugar for a richer sweetness. This alternative not only enhances the flavor but also aligns beautifully with the maple glaze.
-
Bourbon Brine: For a more complex flavor, add a splash of bourbon to the brine. It complements the apple cider beautifully, giving the dish a sophisticated twist.
-
Cider Infused Gravy: Use apple cider exclusively instead of broth in the gravy for an even more intense apple flavor. It creates a luscious gravy that ties everything together nicely, reminiscent of my delicious Chicken Taco Soup.
-
Root Vegetable Roast: Toss in potatoes, carrots, and parsnips in the roasting pan with the chicken. These hearty additions will soak up all the flavors while roasting, making for a comforting side that pairs perfectly.
Embrace the versatility of this Cider Brined Roast Chicken. Whatever variations you choose, each bite is bound to create heartwarming memories at your table!
What to Serve with Cider Brined Roast Chicken
As the aroma of autumn fills your home, it’s time to create a memorable fall feast that perfectly complements your luscious roast chicken.
- Creamy Mashed Potatoes: The velvety texture of buttery mashed potatoes offers a comforting contrast to the crispy chicken skin, perfect for soaking up gravy.
- Garlic Roasted Brussels Sprouts: These slightly charred Brussels sprouts provide a nutty flavor that enhances the sweetness of the cider brine. Pair their crunchiness with the soft roasted apples for a delightful bite.
- Honey Glazed Carrots: The natural sweetness of the carrots pairs beautifully with the maple glaze, creating a harmonious balance of flavors on your plate.
- Cranberry Sauce: A tart cranberry sauce brings freshness and a vibrant color to your table, elevating the overall taste experience while celebrating the season.
- Apple Cider Sangria: A lightly spiced, fruity sangria crafted with apple cider offers a refreshing drink option, echoing the flavors in your roast chicken. It will have your guests coming back for more!
- Pumpkin Pie Bars: End your meal on a sweet note with these delicious dessert bars; their rich, spiced flavor will feel like an embrace, rounding out your fall gathering perfectly.
Expert Tips for Cider Brined Roast Chicken
- Air-Dry for Crispiness: Ensure the chicken is air-dried after brining for at least 1 hour; this step helps achieve a crispy skin that everyone loves.
- Watch the Temperature: Use an instant-read thermometer to check the chicken’s internal temperature; keep roasting until it hits 165°F for perfectly cooked Cider Brined Roast Chicken.
- Baste Frequently: Basting the chicken with pan juices during roasting adds flavor and moisture; do this every 20 minutes to keep it succulent.
- Use Foil for Browning: If dark spots develop during roasting, cover them lightly with aluminum foil to prevent burning while the rest continues to cook.
- Rest Before Carving: Let the chicken rest for 15-20 minutes post-roasting; this crucial step ensures the meat stays juicy and flavorful.
How to Store and Freeze Cider Brined Roast Chicken
Fridge: Store leftover Cider Brined Roast Chicken in an airtight container for up to 4 days. Make sure it’s cooled to room temperature before sealing to maintain freshness.
Freezer: Wrap portions of the cooled chicken tightly in plastic wrap and then in aluminum foil, or place in a freezer-safe bag. It can last for up to 3 months, retaining its juicy flavor upon reheating.
Reheating: Thaw in the refrigerator overnight before reheating. Warm in the oven at 350°F for about 20-30 minutes until heated through; use a meat thermometer to ensure it’s at least 165°F.
Gravy Storage: Store any leftover gravy separately in a sealed container in the fridge for up to 4 days or freeze for up to 3 months, perfect for enhancing future meals!
Cider Brined Roast Chicken Recipe FAQs
How should I choose the right apple cider for brining?
Absolutely! When selecting apple cider, look for one that’s freshly pressed and 100% pure, ideally without added sugars or preservatives. A good cider should have a rich aroma and a balanced sweetness. If you can’t find cider, a high-quality unsweetened apple juice can work in a pinch, but the flavors may not be as robust.
What’s the best way to store leftover Cider Brined Roast Chicken?
Very simply! Keep your leftover Cider Brined Roast Chicken in an airtight container, allowing it to cool to room temperature first. It will stay fresh in the fridge for up to 4 days. Just be sure to keep it sealed tight to prevent any moisture loss and preserve its delicious flavor.
Can I freeze the leftover Cider Brined Roast Chicken?
Absolutely! To freeze, wrap portions of your cooled chicken tightly in plastic wrap, followed by aluminum foil or place it in a freezer-safe bag, making sure to remove as much air as possible. It’s best enjoyed within 3 months for optimal taste. Thaw in the fridge overnight before reheating in a 350°F oven for about 20-30 minutes until warmed through.
What if my roast chicken isn’t browning properly?
Not to worry! If you notice that your chicken is not browning as beautifully as you’d like, cover any dark or burned spots with aluminum foil to protect them while still allowing the rest of the chicken to caramelize. Additionally, you can boost the browning by increasing your oven’s temperature to 375°F for the last part of cooking, but keep a close eye on it to prevent overcooking.
Is this Cider Brined Roast Chicken safe for my pets?
When it comes to sharing your Cider Brined Roast Chicken with pets, moderation is key. While plain roasted chicken is generally safe for dogs, avoid giving them seasoned meat that may contain garlic or onion, both of which can be harmful. Always consult your vet for tailored advice based on your pet’s dietary needs.
How do I ensure my chicken stays juicy while roasting?
To guarantee juicy perfection, keep the chicken well-brined for at least 12 hours. Make sure to air-dry the chicken after brining before roasting it; both of these steps enhance the moisture retention. Additionally, basting with pan juices every 20 minutes will also help to keep the chicken moist and full of flavor right until serving!
Moist Cider Brined Roast Chicken for Fall Gatherings
Ingredients
Equipment
Method
- Brine the chicken by stirring together water, apple cider, kosher salt, and brown sugar until dissolved. Cool and add ice water before submerging the chicken for 12-24 hours.
- Remove the chicken after brining and pat dry. Air dry on a wire rack for 1 hour. Prepare a compound butter with butter, thyme, sage, orange zest, salt, and pepper.
- Preheat the oven to 350°F (175°C). Scatter onions, orange slices, garlic, and additional herbs in a roasting pan. Place the chicken on a rack above these aromatics.
- Rub the compound butter all over the chicken and stuff the cavity with remaining orange slices and herbs.
- Pour apple cider into the pan and roast the chicken uncovered for about 1 hour, checking for even browning.
- Nestle Gala apples around the chicken after 1 hour. Baste with pan juices and melted butter, continue roasting until chicken reaches 165°F.
- Reduce the remaining apple cider with maple syrup until thickened. Whisk in remaining butter.
- Glaze the chicken every 10 minutes starting at an internal temperature of 140°F until it reaches 165°F.
- Strain pan juices to make gravy, mixing with flour, then gradually whisk in remaining liquids until thickened.
- Let the chicken rest for 15-20 minutes before carving and serve with roasted apples and gravy.
Leave a Reply