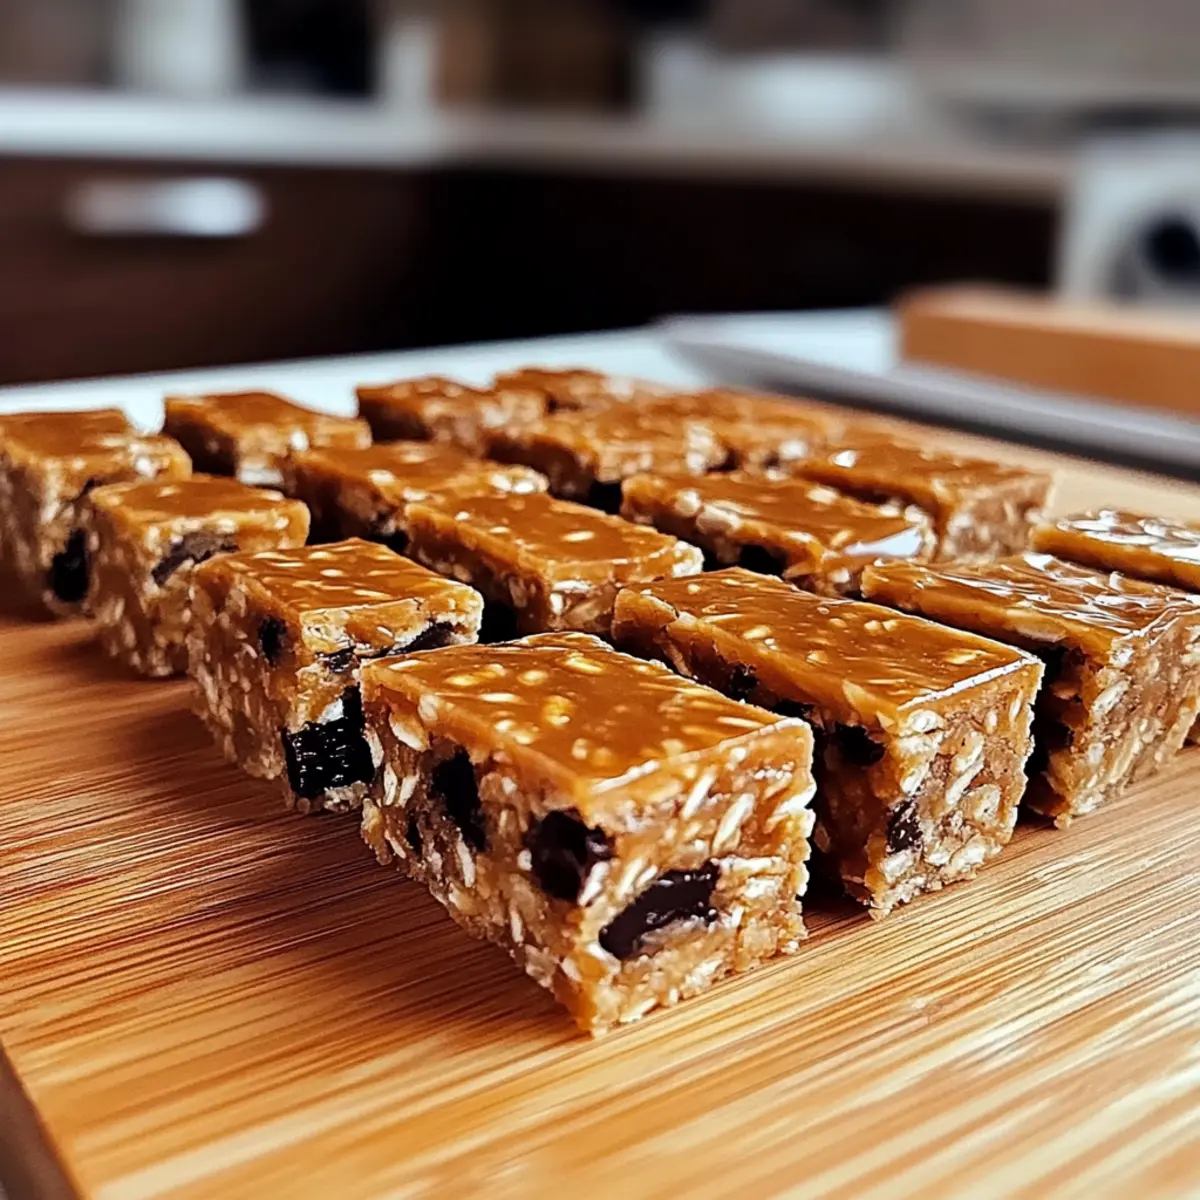
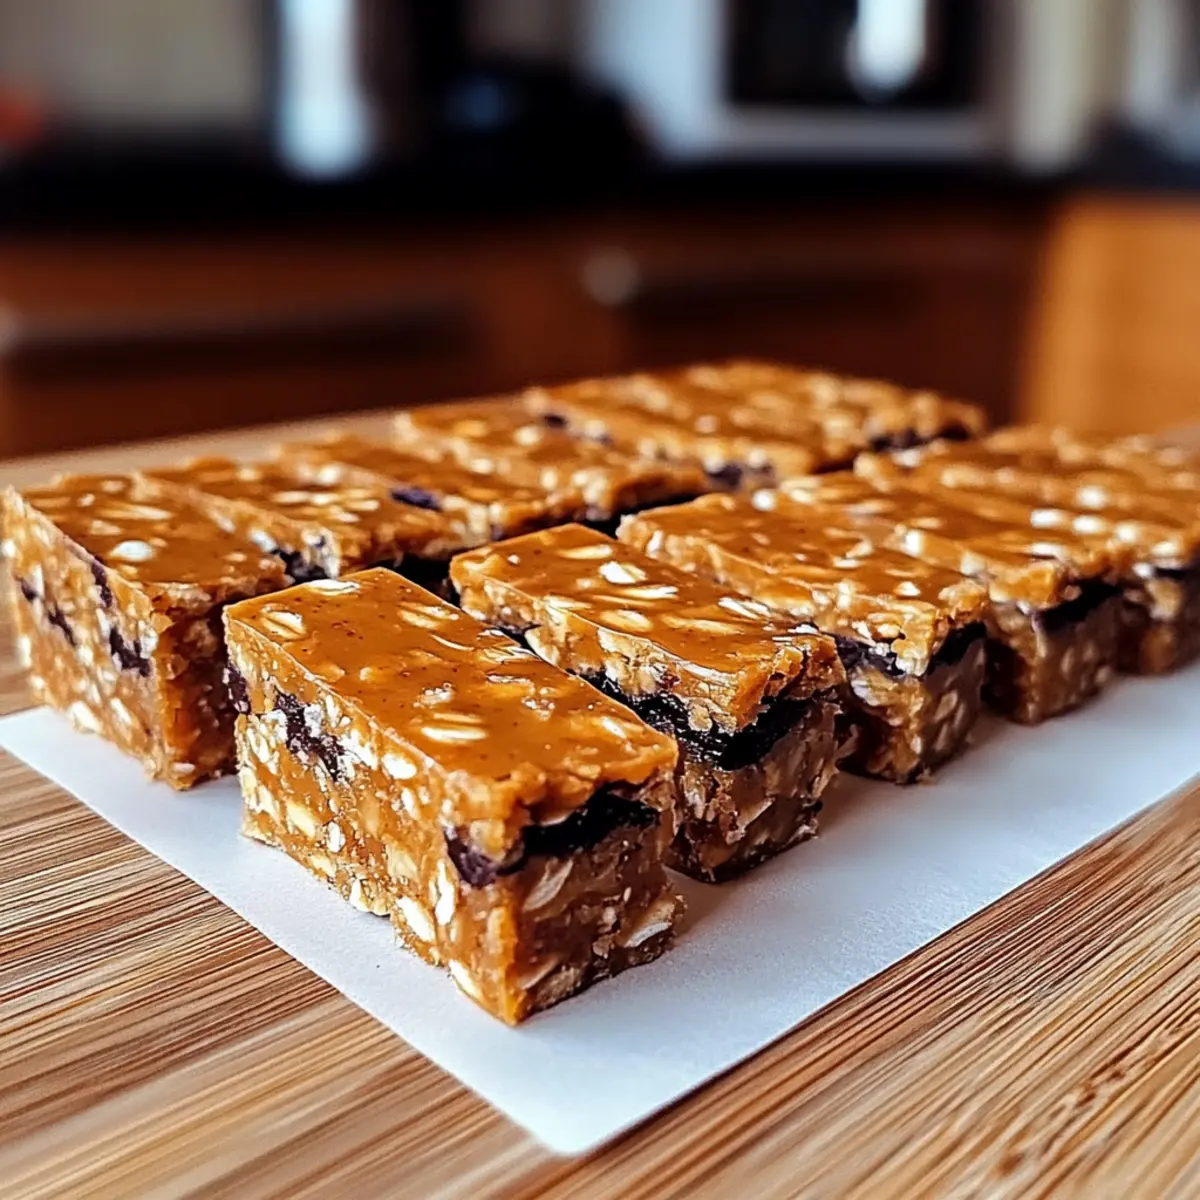
There I was, staring at a half-eaten box of sugary snacks, regretting my choice in quick bites. It was time for a change! Enter my no-bake Protein-Packed Chickpea and Date Snack Bars, a delightful solution that combines the natural sweetness of dates with the nutrition-packed goodness of chickpeas. Not only are these bars easy to whip up, but they’re also a fabulous source of protein and fiber, making them perfect for busy afternoons or post-workout fuel. Plus, with options for nut-free variations and the ability to throw in your favorite superfoods, you can keep things exciting with every batch! Curious about how to make these satisfying snacks? Let’s dive in!

Why Choose Chickpea and Date Snack Bars?
Healthier Alternative: Ditch the sugar! These wonderful snack bars offer a guilt-free treat that satisfies your sweet tooth without the extra calories.
Quick and Easy: No baking required! With a straightforward preparation process, you can whip these up in no time, perfect for busy lifestyles.
Customizable Flavors: Endless variations! Adapt this recipe to your liking by adding superfoods or opting for nut-free options to suit any dietary requirement.
Protein and Fiber Boost: Stay energized! The combination of chickpeas and dates delivers a fantastic punch of protein and fiber, making these bars an excellent choice for post-workout recovery or afternoon snacks.
Crowd-Pleaser: Great for everyone! Kids and adults will both love these chew bars, making them a hit for any gathering or lunchbox treat. If you’re also looking for a delicious side, check out my Crock Pot Mushrooms for a hearty addition!
Chickpea and Date Snack Bars Ingredients
For the Base
- Cooked Chickpeas – An excellent source of plant-based protein; drain and rinse canned chickpeas for a fresher taste.
- Pitted Dates – Provides natural sweetness and binds the bars together; soak in warm water if dry to enhance texture.
- Oats – Adds texture and fiber; opt for certified gluten-free oats if needed.
For the Creaminess
- Nut Butter (Peanut/Almond) – Contributes healthy fats and creaminess; switch to sunflower seed butter for a nut-free version.
- Honey/Maple Syrup – Acts as a sweetener and binder; use agave syrup for vegan-friendly bars.
Flavor Enhancers
- Vanilla Extract – Enhances overall flavor; consider almond extract for a different twist.
- Cinnamon – Adds warmth and depth; adjust according to your taste preferences.
- Salt – Balances sweetness; a pinch is all you need.
Optional Add-Ins
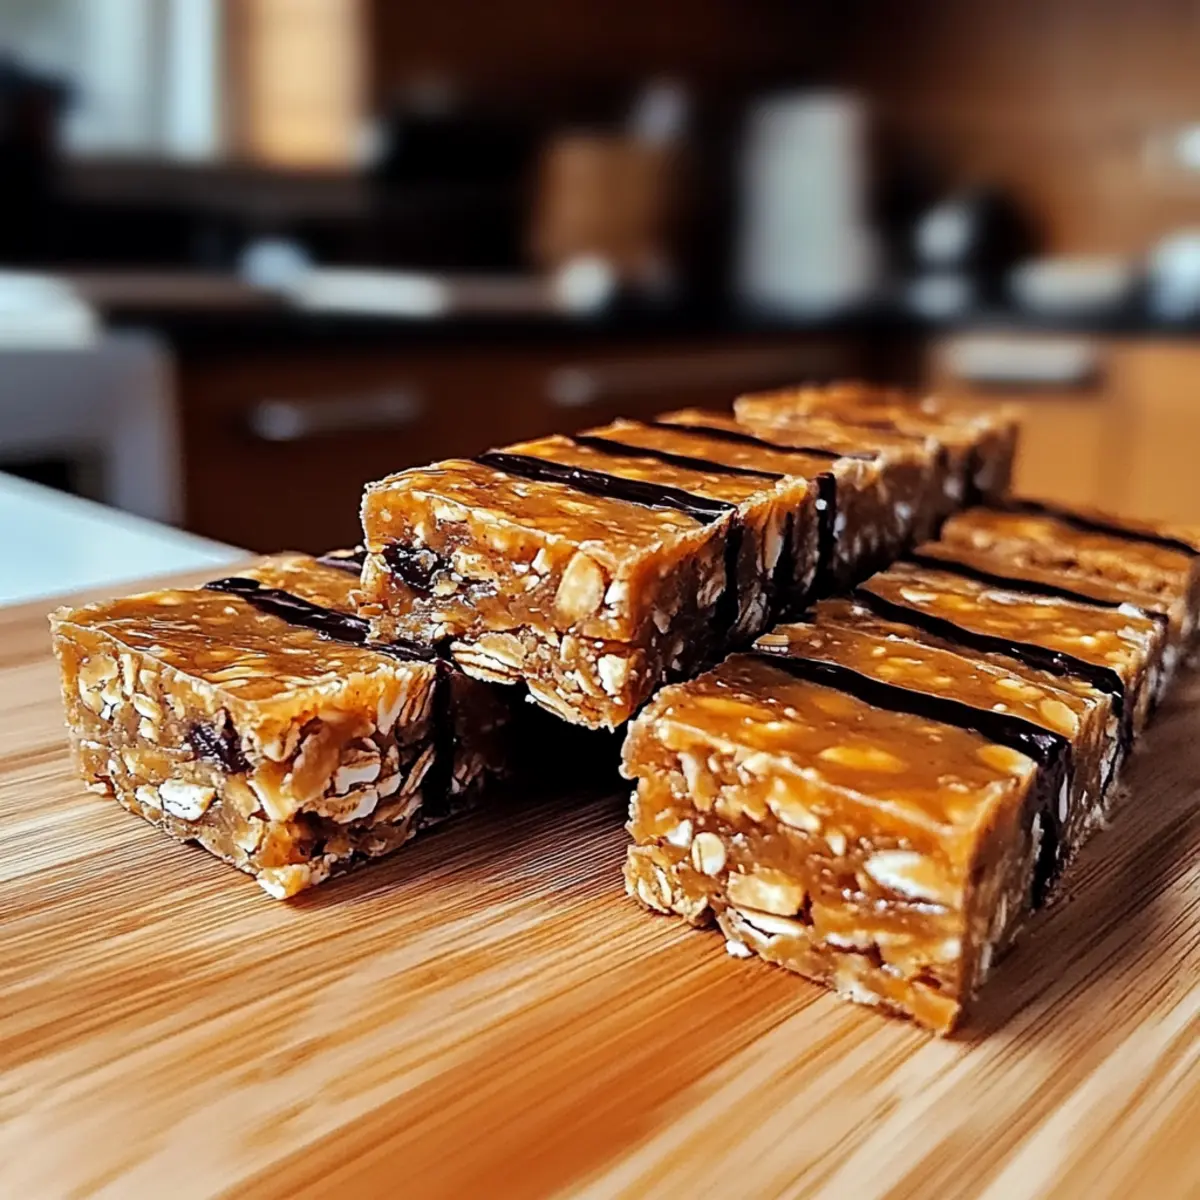
- Dark Chocolate Chips – Brings indulgence to the bars; swap with carob chips or omit for a more wholesome treat.
- Superfoods (Chia Seeds/Coconut Flakes) – Boosts nutritional value; experiment with different ingredients for exciting variations.
This blend of ingredients ensures that your Chickpea and Date Snack Bars are not only delicious but also incredibly satisfying for any time of the day!
Step‑by‑Step Instructions for Chickpea and Date Snack Bars
Step 1: Blend the Base
In a food processor, combine 1 cup of cooked chickpeas and 1 cup of pitted dates. Blend until the mixture becomes creamy and smooth, which should take about 1-2 minutes. If your dates are dry, consider soaking them in warm water for 5-10 minutes before blending to ensure a silky texture in your Chickpea and Date Snack Bars.
Step 2: Add Additional Ingredients
Once you achieve a smooth base, add 1/2 cup of oats, 1/4 cup of nut butter, 1 tablespoon of honey or maple syrup, 1 teaspoon of vanilla extract, 1/2 teaspoon of cinnamon, and 1/4 teaspoon of salt. Blend these ingredients together for another 2-3 minutes until the mixture is thick and pliable, creating a delightful consistency for your bars.
Step 3: Incorporate Optional Add-ins
If you want to elevate your Chickpea and Date Snack Bars, gently fold in 1/4 cup of dark chocolate chips by hand. This step adds a touch of indulgence while still keeping the bars wholesome. Ensure the chocolate chips are evenly distributed throughout the mixture for a balanced flavor in each bite.
Step 4: Prepare the Baking Dish
Line an 8×8-inch baking dish with parchment paper, allowing some overhang for easy removal later. Spread the mixture evenly into the dish, then press down firmly using a spatula or your hands. Ensure the bars are compact to help them hold together once chilled, creating the perfect texture for your snack bars.
Step 5: Chill to Set
Refrigerate the pressed mixture for at least 1 hour to allow it to set properly. During this time, the flavors meld and the bars firm up, making them easier to slice later on. After the hour, check that the bars are solid and ready for cutting, enhancing their chewy texture.
Step 6: Slice and Serve
Once fully chilled, carefully lift the mixture out of the baking dish using the parchment overhang. Slice the set mixture into bars of your desired size, creating perfect portions for snacking. Serve these nutritious Chickpea and Date Snack Bars as a quick energy boost or a satisfying treat at any time of day.
Expert Tips for Chickpea and Date Snack Bars
Perfect Texture: Ensure your chickpeas are well-rinsed and firm. If the mixture feels too wet, add more oats gradually.
Chilling Matters: Refrigerate the bars for at least an hour. This step is crucial for achieving a firm texture that holds up when sliced.
Avoid Crumbling: Press the mixture firmly into the baking dish. A compact mixture will prevent crumbling and enhance the chewiness of your Chickpea and Date Snack Bars.
Custom Sweetness: Adjust sweetness to your liking by adding more honey or maple syrup if needed, especially if your dates are less sweet.
Ingredient Check: Always check for allergens, especially when substituting nut butters or chocolate chips, ensuring a safe treat for everyone.
Chickpea and Date Snack Bars Variations
Feel free to unleash your creativity and personalize these bars to make them uniquely yours!
-
Nut-Free: Substitute nut butter with sunflower seed butter for a completely nut-free snack without losing flavor.
-
Superfood Boost: Toss in chia seeds or hemp seeds for an added nutritional lift and a nice crunch. They’re packed with omega-3s and taste great too!
-
Tropical Twist: Mix in unsweetened coconut flakes for a delightful tropical flavor. You’ll feel like you’re enjoying paradise with every bite.
-
Sample Dried Fruits: Try folding in chopped dried apricots or cranberries for a burst of sweetness and texture. This gives your bars a fruity surprise that contrasts beautifully with the chickpeas.
-
Spice It Up: Add a pinch of cayenne pepper or a dash of chocolate to elevate the flavor profile and give it a spicy kick. It’s a delightful contrast to the sweetness of the dates!
-
Cocoa Variation: For chocolate lovers, feel free to incorporate cocoa powder into the base or swap chocolate chips for carob chips for a unique twist.
-
Cinnamon Swirl: Increase the cinnamon to 1 teaspoon for extra warmth and flavor, resembling comfort food during chilly days. Perfect for cozy snacks!
-
Flavor Infusion: Experiment with flavored extracts such as almond or coconut to tweak the taste to your preference. Each one brings a unique flair to the bars.
For more delightful ideas, consider pairing these with my Easy Candied Yams for a beautiful balance of flavors or complement with my Crock Pot Mushrooms for a hearty addition. Enjoy!
Make Ahead Options
These Chickpea and Date Snack Bars are perfect for meal prep lovers! You can prepare the base mixture up to 24 hours in advance, allowing the flavors to meld beautifully. Simply blend the cooked chickpeas, pitted dates, oats, and other ingredients as outlined, then press into your lined baking dish. After chilling, securely wrap your dish with plastic wrap or foil to keep the bars fresh. When ready to serve, just slice them into bars and enjoy! For even longer storage, you can freeze individually wrapped bars for up to three months, ensuring you always have a nutritious snack on hand, just as delightful as when freshly made.
How to Store and Freeze Chickpea and Date Snack Bars
Fridge: Store the chickpea and date snack bars in an airtight container for up to 1 week. This helps maintain their chewy texture while keeping them fresh.
Freezer: For longer storage, individually wrap the bars in plastic wrap or parchment paper, then place them in a freezer-safe container. They can be frozen for up to 3 months.
Thawing: When ready to enjoy, simply transfer your frozen bars to the fridge for a few hours or overnight to thaw. Enjoy them as a quick snack whenever you need a boost!
What to Serve with Chickpea and Date Snack Bars?
These flavorful snack bars are perfect for enhancing your meal experience or satisfying a craving anytime!
-
Greek Yogurt: Creamy and rich, this pairs beautifully with your bars for a protein-packed breakfast or snack. Drizzle with a touch of honey for extra sweetness.
-
Fresh Berries: Bright and juicy berries add a refreshing contrast, making for a stunnning breakfast or quick afternoon treat. Their tartness complements the sweetness of the bars!
-
Dairy-Free Ice Cream: Indulge a little! Serve your bars with a scoop of creamy, dairy-free ice cream for a delightful dessert that adds a chilly twist.
-
Nut Butter Dip: Create a simple dip with your favorite nut butter to enhance the flavor profile of the bars. This adds extra creaminess and healthy fats!
-
Chia Seed Pudding: A light and nutritious pudding brings a delightful creaminess. Top it with nuts or fruits for a fun, textural experience alongside the bars.
-
Homemade Smoothie: A refreshing fruit smoothie provides a perfect balance of nutrition. Blend with greens for an added health boost that complements your bars beautifully.
-
Herbal Tea: A warm cup of herbal tea can elevate snack time, creating a soothing experience that pairs well with the sweetness of your bars.
-
Trail Mix: A handful of crunchy and savory nuts and seeds creates a satisfying contrast with the soft bars, making for a perfect on-the-go snack combo.
Chickpea and Date Snack Bars Recipe FAQs
How do I choose ripe dates for my Chickpea and Date Snack Bars?
When selecting dates, look for ones that are smooth, plump, and slightly sticky, indicating they are fresh and ripe. Avoid those with dark spots or a hard texture, as they may be past their prime. If your dates feel dry, soak them in warm water for 5-10 minutes to soften them before blending into the snack bars.
What is the best way to store my Chickpea and Date Snack Bars?
Store the bars in an airtight container in the refrigerator for up to one week. This keeps them chewy and fresh. If you want to enjoy them longer, wrapping each bar individually in plastic wrap or parchment paper and placing them in a freezer-safe container will allow them to last for up to 3 months in the freezer.
Can I freeze Chickpea and Date Snack Bars?
Absolutely! To freeze your snack bars, first slice them into your desired portions. Wrap each bar tightly in plastic wrap or parchment paper, then place them in a freezer-safe bag or container. When you’re ready to enjoy them, simply thaw them in the fridge for a few hours or overnight.
What should I do if my mixture is too wet or too dry?
If your mixture feels too wet, you can gradually add more oats—about 1 tablespoon at a time—until it reaches the desired consistency. Conversely, if it’s too dry and crumbly, add a small splash of water or an extra teaspoon of honey or maple syrup to help bind everything together. Aim for a thick, pliable texture that holds its shape.
Are Chickpea and Date Snack Bars suitable for people with nut allergies?
Yes! You can easily adapt this recipe for nut allergies by substituting nut butter with sunflower seed butter. Just make sure to check your other ingredients, like chocolate chips, as some brands may contain nuts or be processed in facilities with nuts. Enjoy a delicious, safe treat that everyone can enjoy!
Delicious Chickpea and Date Snack Bars for Any Time Boost
Ingredients
Equipment
Method
- In a food processor, combine 1 cup of cooked chickpeas and 1 cup of pitted dates. Blend until creamy and smooth, about 1-2 minutes.
- Add 1/2 cup of oats, 1/4 cup of nut butter, 1 tablespoon of honey or maple syrup, 1 teaspoon of vanilla extract, 1/2 teaspoon of cinnamon, and 1/4 teaspoon of salt. Blend for another 2-3 minutes until thick and pliable.
- Gently fold in 1/4 cup of dark chocolate chips by hand, ensuring even distribution.
- Line an 8x8-inch baking dish with parchment paper. Spread and press the mixture evenly into the dish.
- Refrigerate for at least 1 hour to allow the bars to set properly.
- Lift out the mixture using the parchment overhang and slice into bars of your desired size.
Leave a Reply