There’s something enchanting about the vibrant sizzle of marinated beef hitting a hot grill, filling the air with mouthwatering aromas. Beef Yakiniku, a beloved Japanese dish, brings that experience right into your kitchen with minimal fuss. This quick and flavorful recipe is not just a fantastic weeknight dinner option—it’s a celebration of savory-sweet goodness that can easily please everyone at the table. Plus, it’s gluten-free and adaptable for various tastes, making it a versatile choice for all culinary enthusiasts. As you dive into this delicious meal, imagine the smiles around your table as you serve up perfectly caramelized beef alongside steaming rice and fresh veggies. Ready to elevate your cooking game? Let’s get started!
Why Is Beef Yakiniku So Irresistible?
Sizzling Sensation: The moment the marinated beef hits the hot grill, it transforms into a tender, caramelized delight that’s simply unforgettable.
Easy Preparation: With just a handful of ingredients and a quick marinade, this dish comes together effortlessly, perfect for busy weeknights.
Flavor Explosion: The balance of savory, sweet, and spicy in the sauce truly elevates the taste, making every bite a joy.
Versatile Options: Whether you want to swap out the beef for chicken or customize the sauce, it fits various preferences—just like our delicious Ground Beef Philly!
Crowd-Pleasing: This dish is sure to impress family and friends, whether it’s a casual dinner or a festive gathering.
Perfect Pairings: Serve up with steaming rice and a side of fresh vegetables for a nutritious, satisfying meal that everyone will love.
Beef Yakiniku Ingredients
• Let’s dive into the delicious components!
-
Steak:
Thinly sliced flank or skirt steak – this is the main protein for your Beef Yakiniku, but you can also use sirloin or ribeye for a different flavor. -
Low-sodium light soy sauce (80 ml / ⅓ cup):
Provides umami and saltiness – for a gluten-free option, substitute with tamari instead. -
Gochujang (½ tbsp):
Adds a spicy kick to your dish – feel free to swap with sriracha or chili paste if you prefer less heat. -
Mirin (1 tbsp):
Infuses sweetness and a touch of complexity – no direct substitutes, but a mix of sake and sugar works in a pinch. -
Minced ginger (2 tsp):
Brings in a fragrant, zesty flavor – fresh is best, but ground ginger can do in a pinch. -
Garlic powder (½ tsp) or garlic paste (1 tsp):
Enhances the overall flavor depth – consider using fresh minced garlic for an even bolder taste. -
Sesame oil (1 tbsp):
Imparts nuttiness and aroma to the dish – a beloved ingredient with no substitutions recommended! -
Neutral oil (1 tbsp, e.g., avocado or rapeseed):
Suitable for high-temperature cooking – can swap for other high-heat oils as preferred. -
Light brown sugar (4 tbsp):
Balances the savory and spicy elements with sweetness – feel free to use granulated sugar as an alternative. -
To Serve:
-
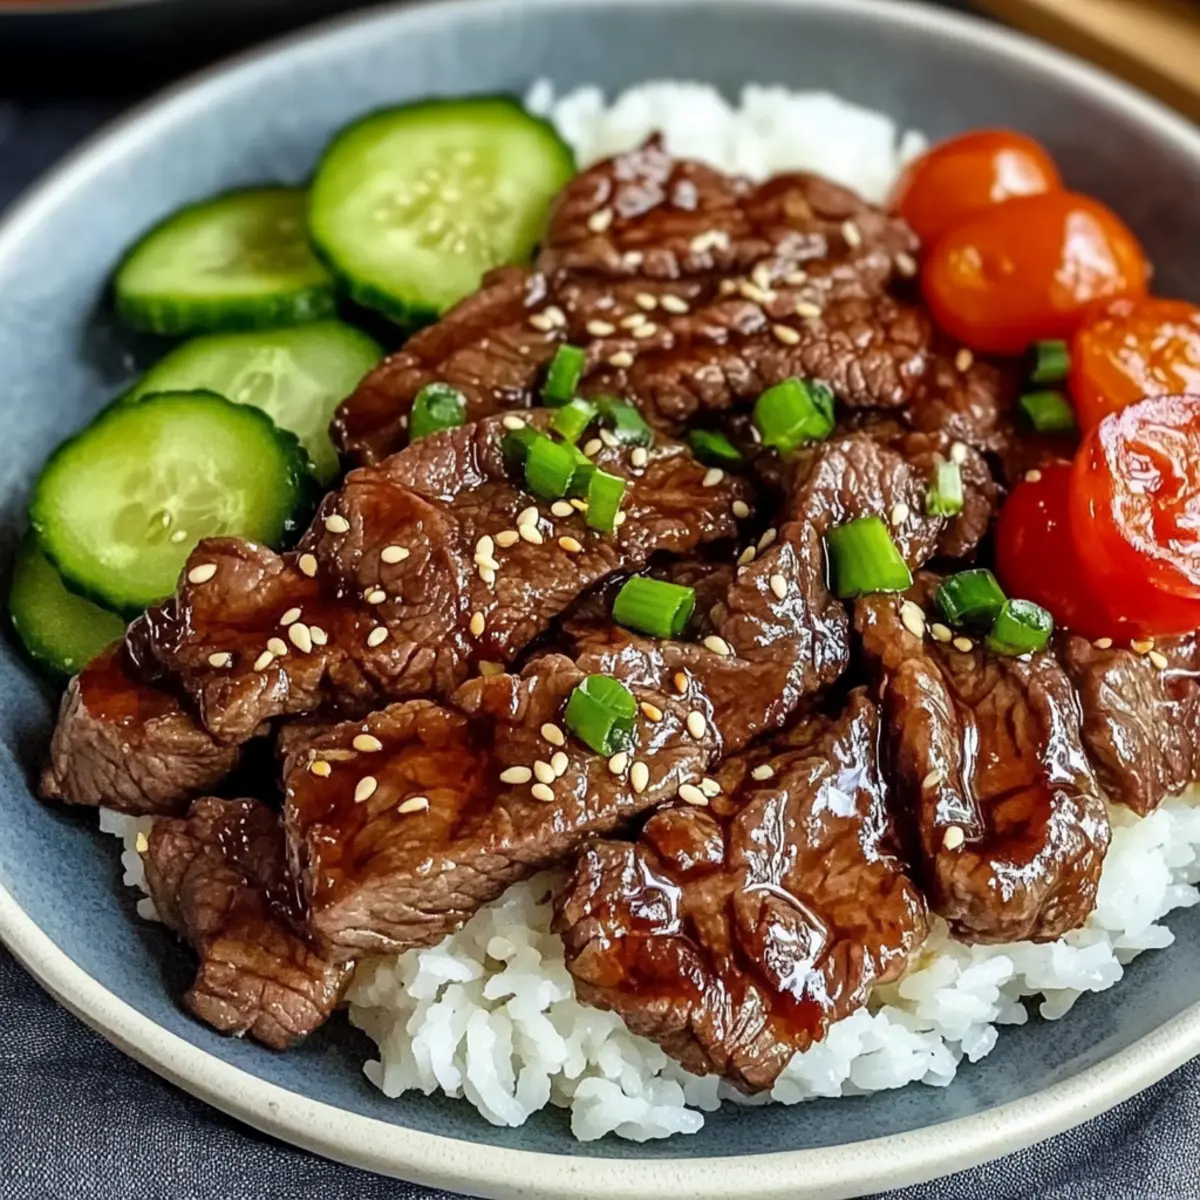
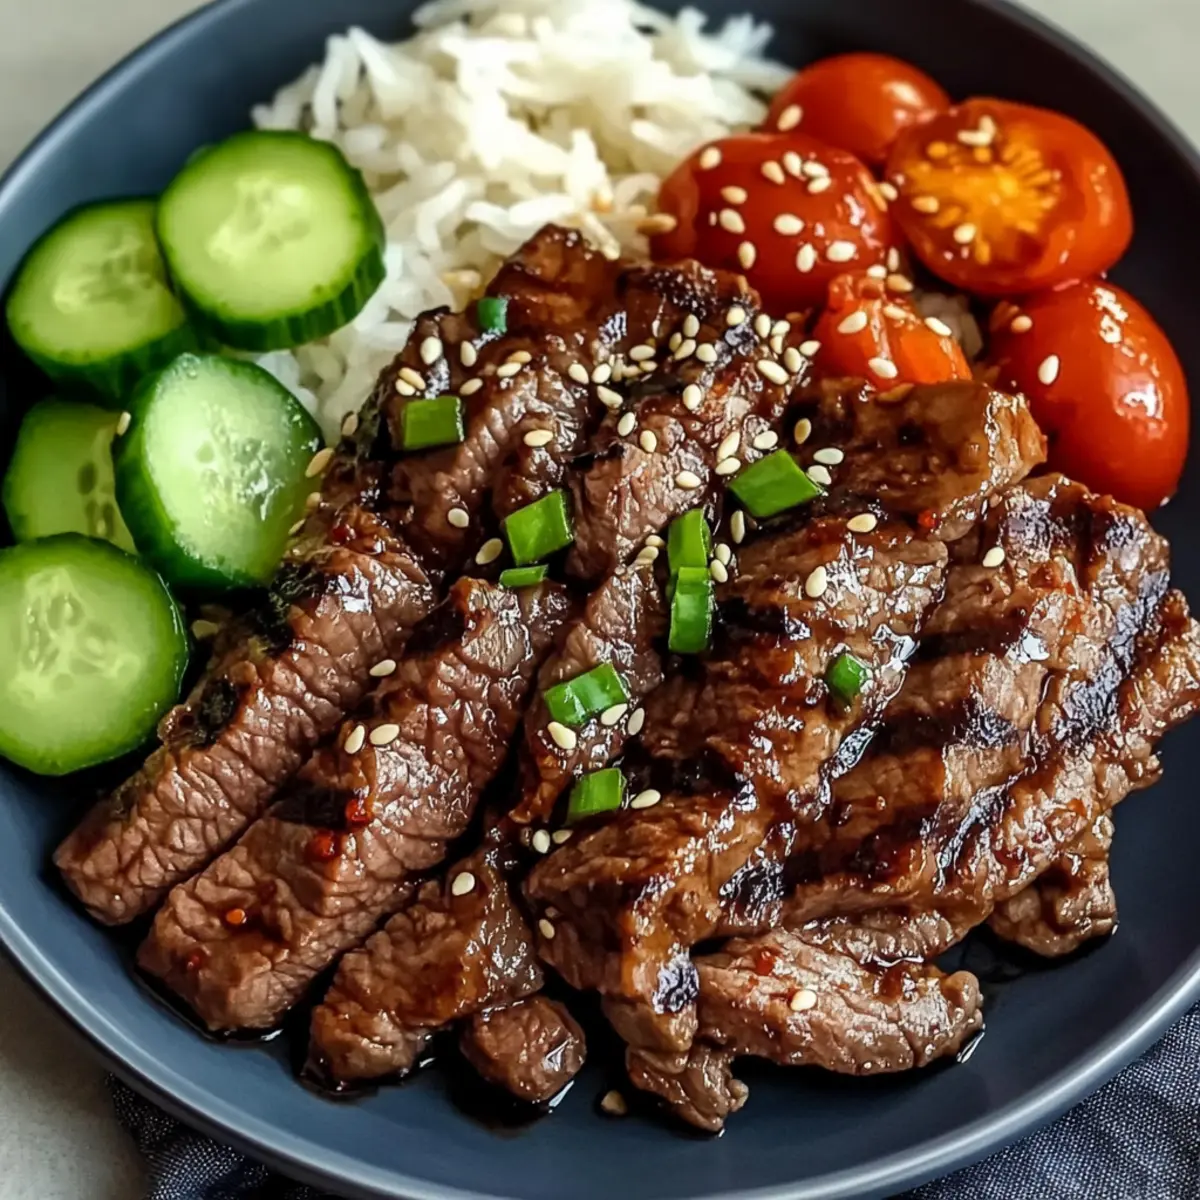
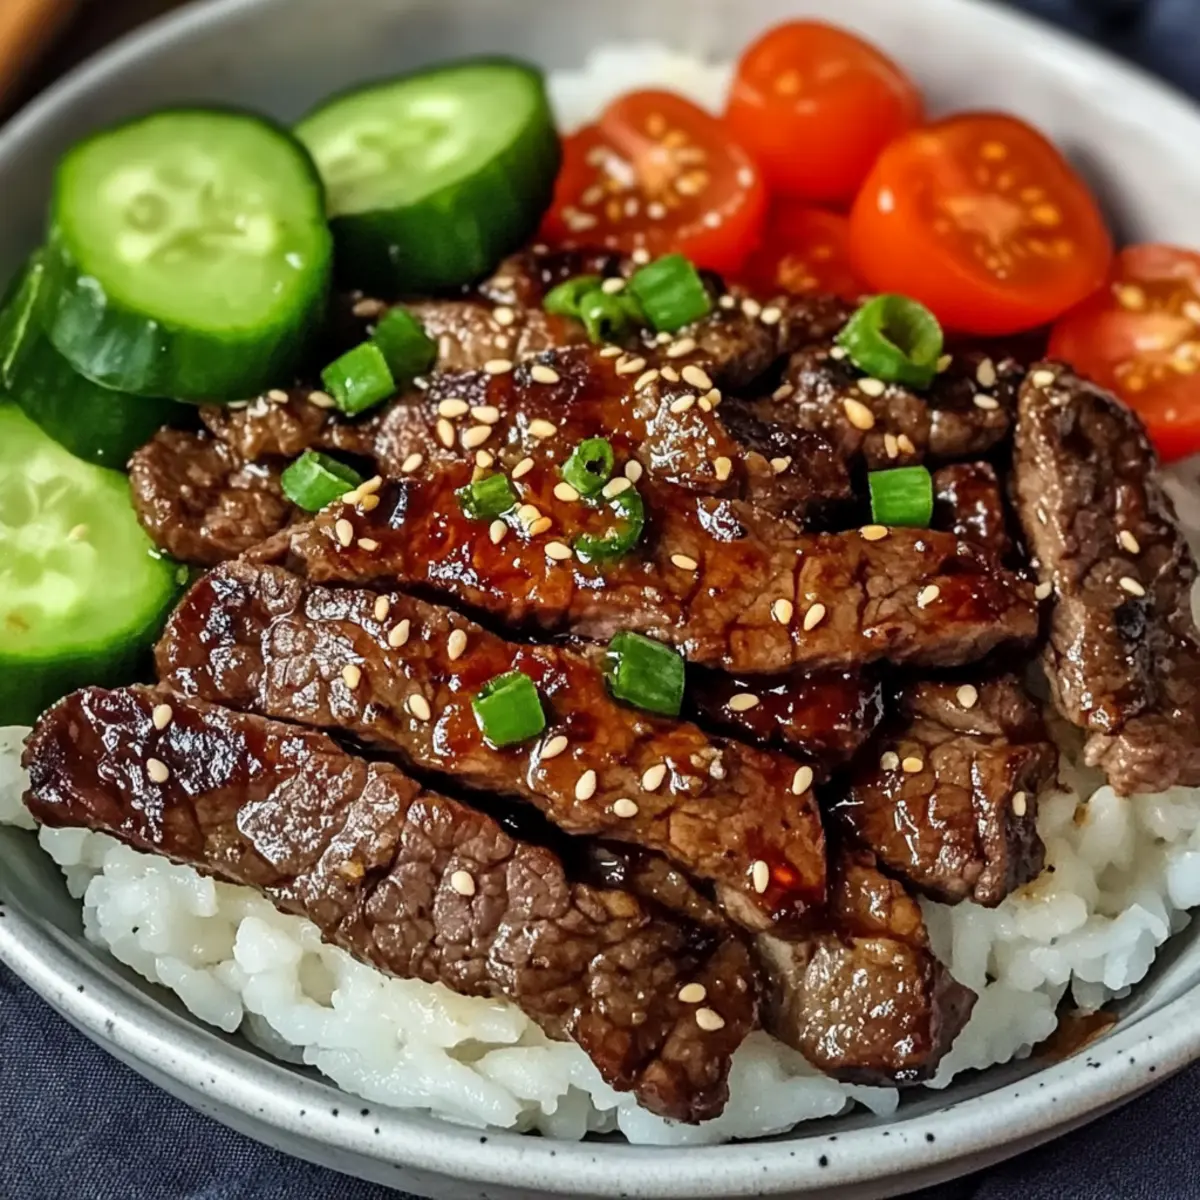
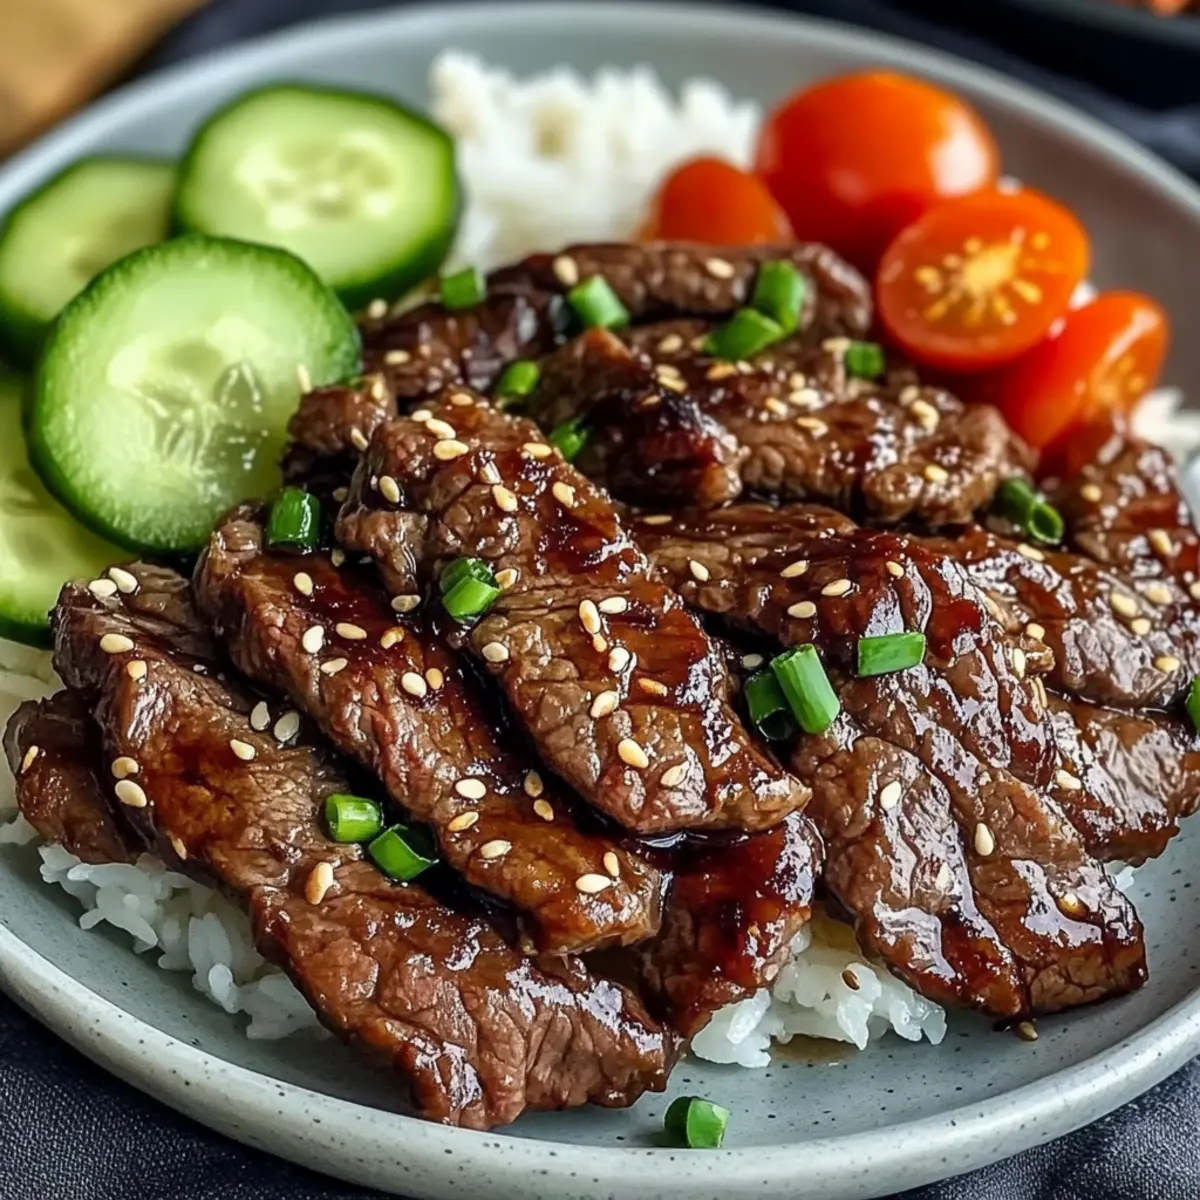
Sesame seeds: Adds delightful texture and visual appeal.
-
Boiled rice: Complements the dish beautifully while providing essential carbohydrates.
-
Chopped cucumber and tomato: Freshness galore to brighten up every bite!
Step‑by‑Step Instructions for Beef Yakiniku
Step 1: Prepare Marinade
In a large mixing bowl, whisk together ⅓ cup of low-sodium light soy sauce, ½ tablespoon of gochujang, 1 tablespoon of mirin, 2 teaspoons of minced ginger, ½ teaspoon of garlic powder or 1 teaspoon of garlic paste, 1 tablespoon of sesame oil, 1 tablespoon of neutral oil, and 4 tablespoons of light brown sugar. Ensure the sugar fully dissolves, creating a cohesive sauce that tantalizes the senses and complements the Beef Yakiniku beautifully.
Step 2: Marinate Steak
Slice the flank or skirt steak thinly against the grain, aiming for even widths to ensure tenderness. Add the prepared beef to the marinade, making sure it is well-coated. Cover the bowl with plastic wrap and refrigerate for at least 2 hours, allowing the flavors to meld and infuse into the meat. If time permits, marinating overnight will yield even more delicious results.
Step 3: Preheat Pan
About 15 minutes before cooking, preheat your wok or a cast-iron skillet over high heat until it begins to smoke lightly—this ensures a perfect sear. While the pan heats, place an oven-safe bowl in a low-temperature oven to warm for serving; this will keep the Beef Yakiniku deliciously hot until you’re ready to enjoy it.
Step 4: Cook Steak
Once the pan is ready, add half of the marinated beef into the hot wok, making sure not to overcrowd it. Sear the beef for about 3 minutes without stirring, allowing it to develop a nice brown crust. Then, stir it gently and continue cooking for an additional 2-3 minutes until it’s browned and slightly crispy. Transfer the beef to the warmed serving bowl and repeat the process with the remaining steak.
Step 5: Garnish and Serve
After cooking, sprinkle the Beef Yakiniku generously with sesame seeds to add a delightful crunch and an appealing finish. Serve it immediately alongside steaming boiled rice and a medley of chopped cucumber and tomato to add a refreshing contrast. Each bite of this savory-sweet dish is sure to be a hit at your dinner table!
Beef Yakiniku Variations & Substitutions
Feel free to get creative and make this Beef Yakiniku your own by trying out these fun variations!
-
Gluten-Free: Swap soy sauce with tamari or coconut aminos to cater to gluten-free diets while maintaining rich flavor.
-
Veggie Boost: Add sliced onions, bell peppers, or mushrooms during cooking for added nutrition and to enhance flavor profiles. These veggies soak up the sauce beautifully!
-
Sriracha Substitute: If you prefer a milder spice, use sriracha or chili paste in place of gochujang for a different flavor twist.
-
Sweetness Variation: Instead of light brown sugar, you can use coconut sugar for a more natural sweetness that still caramelizes well when cooked.
-
Beef Alternatives: Try using chicken thighs or tofu for a lighter protein option, creating a delightful twist on this classic dish that still captures the essence of Yakiniku.
-
Fresh Garnish: Top with sliced green onions or chopped cilantro for a vibrant, fresh finish that brightens up each bite.
-
Rice Substitution: Serve this dish with cauliflower rice for a low-carb alternative or try quinoa for a protein boost that pairs nicely with the flavors.
-
Cooking Method Change: Instead of pan-searing, grill the marinated beef outside for a smoky flavor that elevates your Yakiniku experience. Perfect for family gatherings!
With these variations, your Beef Yakiniku can be transformed and tailored to suit your taste or dietary needs, just like our delightful Korean Ground Beef or Garlic Butter Beef! Enjoy experimenting!
How to Store and Freeze Beef Yakiniku
Fridge: Keep leftover Beef Yakiniku in an airtight container in the refrigerator for up to 3 days. Reheat in a pan over medium heat, adding a splash of water to prevent drying out.
Freezer: Freeze any leftover cooked Beef Yakiniku in a freezer-safe bag or container for up to 2 months. To reheat, thaw overnight in the fridge and warm in a skillet for best texture.
Marinade Storage: You can prepare the marinade ahead of time and store it in the fridge for up to 5 days. Just ensure it’s in a sealed container and shake well before using.
Avoiding Texture Loss: To maintain that tender texture of your Beef Yakiniku, avoid freezing the marinated raw beef, as it can affect the overall quality when cooked.
Expert Tips for Beef Yakiniku
-
Cutting Technique: Slice the beef thinly against the grain for tenderness; chilling the meat first makes it easier to achieve uniform cuts.
-
High Heat Cooking: Ensure your pan is very hot before adding the beef to achieve that delightful caramelization and avoid steaming the meat instead.
-
Batch Cooking: Cook the beef in small batches to maintain the perfect texture and browning, ensuring each piece gets that wonderful sear.
-
Marination Time: For maximum flavor, allow the beef to marinate for at least 2 hours, or better yet, overnight for enhanced taste in your Beef Yakiniku.
-
Use Fresh Ingredients: Opt for fresh ginger and garlic over powdered forms for a more aromatic and flavorful experience in every bite.
What to Serve with Beef Yakiniku
Ready to create a hearty spread that elevates your dining experience?
-
Steamed Jasmine Rice: A fragrant, fluffy base that beautifully soaks up the savory sauce, enhancing each delicious bite of beef.
-
Spicy Kimchi: This vibrant, fermented side adds a tangy crunch that perfectly balances the rich flavors of the Yakiniku.
-
Sautéed Bok Choy: Tender greens cooked until just wilted provide a refreshing, crunchy contrast and pack a nutritious punch.
-
Crispy Tempura Vegetables: Lightly battered and fried veggies offer a delightful crunch that complements the dish’s tender beef, creating a satisfying textural experience.
-
Miso Soup: A warm, comforting classic to start your meal, this light broth complements the savory richness of beef, making each mouthful memorable.
-
Japanese Pickles: A colorful assortment introduces brightness and acidity, cleansing the palate between bites of succulent steak.
-
Chilled Sake or Beer: These beverages enhance the meal while providing a refreshing counterpoint to the warm flavors of your Beef Yakiniku.
-
Green Salad with Sesame Dressing: A crisp, vibrant salad packed with fresh vegetables and drizzled with nutty dressing adds a refreshing touch to balance out the richness of the grilled beef.
-
Mochi Ice Cream for Dessert: Delicate, chewy, and just the right amount of sweet, this delightful treat is a perfect finish to your tasty Japanese feast.
Make Ahead Options
These Beef Yakiniku are perfect for busy home cooks looking to save time during the week! You can prepare the marinade up to 24 hours in advance, ensuring the flavors develop overnight for a more delicious result. Simply whisk together all marinade ingredients and store it in an airtight container. Additionally, slice your steak ahead of time and keep it refrigerated. When you’re ready to eat, simply marinate the beef for at least 2 hours before cooking to allow it to soak in those savory flavors. Cooking the steak just before serving ensures it retains that beautiful caramelized texture. Enjoy a quick, satisfying meal without the hassle!
Beef Yakiniku Recipe FAQs
What type of steak should I use for Beef Yakiniku?
For the best results, thinly sliced flank or skirt steak are ideal choices as they provide tenderness and flavor. If you’re looking for alternatives, sirloin or ribeye can work equally well for a richer taste.
How should I store leftover Beef Yakiniku?
Store leftovers in an airtight container in the refrigerator for up to 3 days. When reheating, do so in a pan over medium heat, adding a splash of water to keep it moist and avoid drying out.
Can I freeze cooked Beef Yakiniku?
Absolutely! Freeze cooked Beef Yakiniku in a freezer-safe bag or container for up to 2 months. For the best texture, thaw overnight in the refrigerator and reheat in a skillet over low heat.
How can I tell if my beef is fresh enough to use?
Look for bright, vibrant color and a slight sheen; avoid any slices with dark spots or a dull appearance. Fresh beef should have a clean, pleasant smell—if it seems off or overly pungent, it’s best to discard it.
Is this recipe suitable for gluten-free diets?
Yes, you can make Beef Yakiniku gluten-free by substituting low-sodium light soy sauce with tamari or coconut aminos. Always check labels, as some sauces may have hidden gluten ingredients.
What can I do if my marinade is too salty?
If you find your marinade a bit too salty, consider adding a bit of sweetness like brown sugar or honey to balance the flavors. Alternatively, increase the volume of the other ingredients, like the beef or vegetables, to dilute the saltiness.
Sizzle Your Dinner with Tender Beef Yakiniku Recipe
Ingredients
Equipment
Method
- In a large mixing bowl, whisk together soy sauce, gochujang, mirin, minced ginger, garlic powder, sesame oil, neutral oil, and light brown sugar.
- Slice the flank or skirt steak thinly against the grain and add to the marinade. Cover with plastic wrap and refrigerate for at least 2 hours.
- Preheat your wok or cast-iron skillet over high heat for about 15 minutes.
- Cook half of the marinated beef in the hot wok for about 3 minutes without stirring, then stir and cook for an additional 2-3 minutes.
- Transfer to a warmed serving bowl and repeat with the remaining steak.
- After cooking, garnish with sesame seeds and serve immediately with boiled rice and chopped vegetables.
Leave a Reply