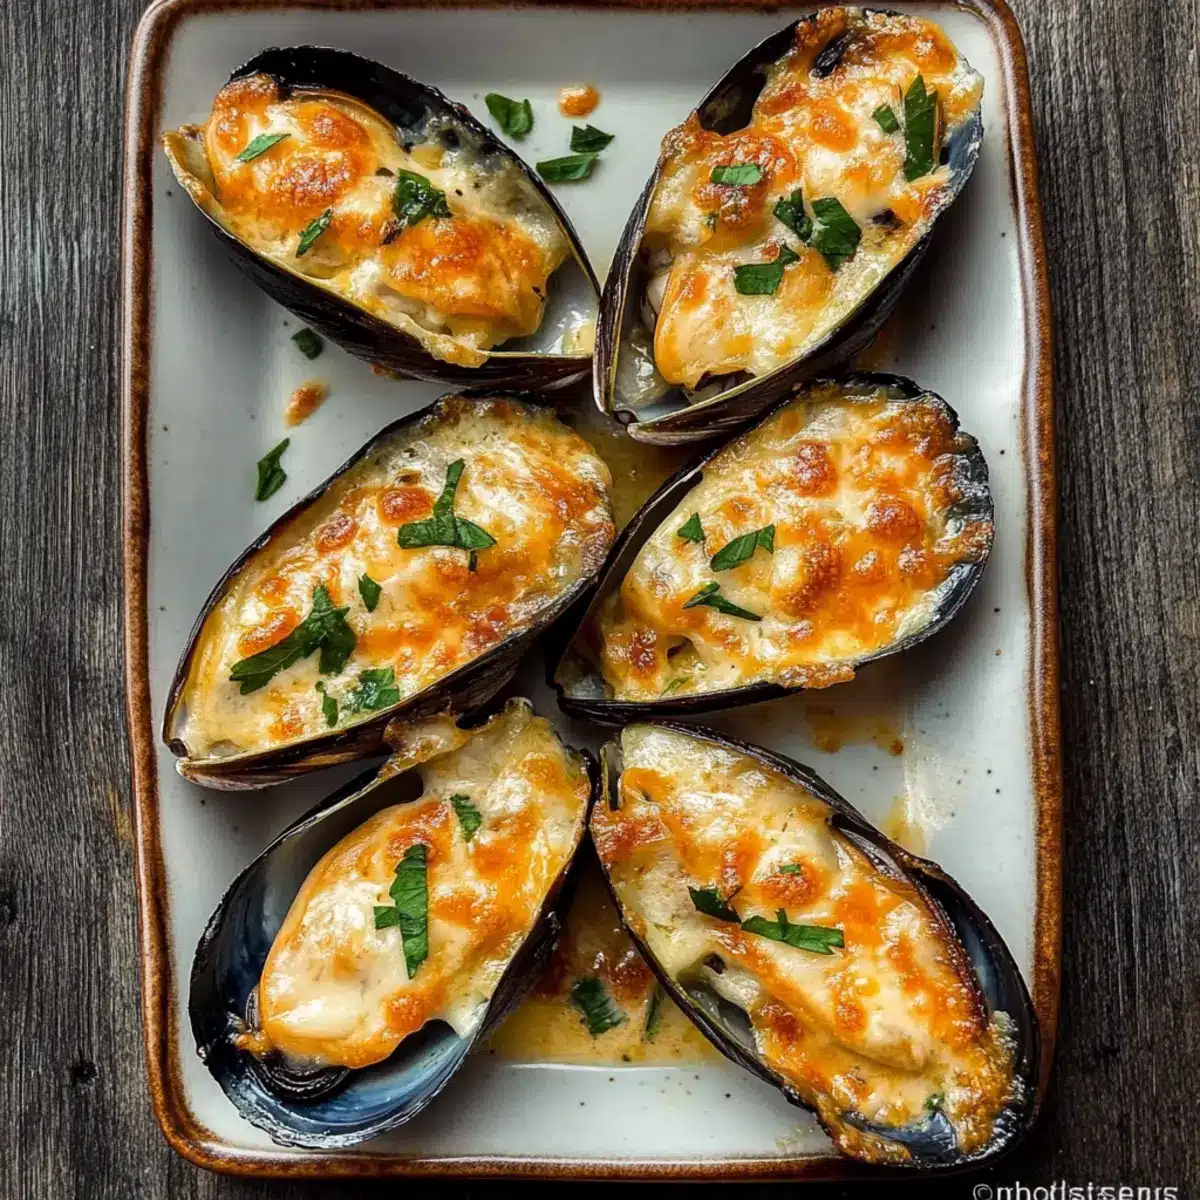
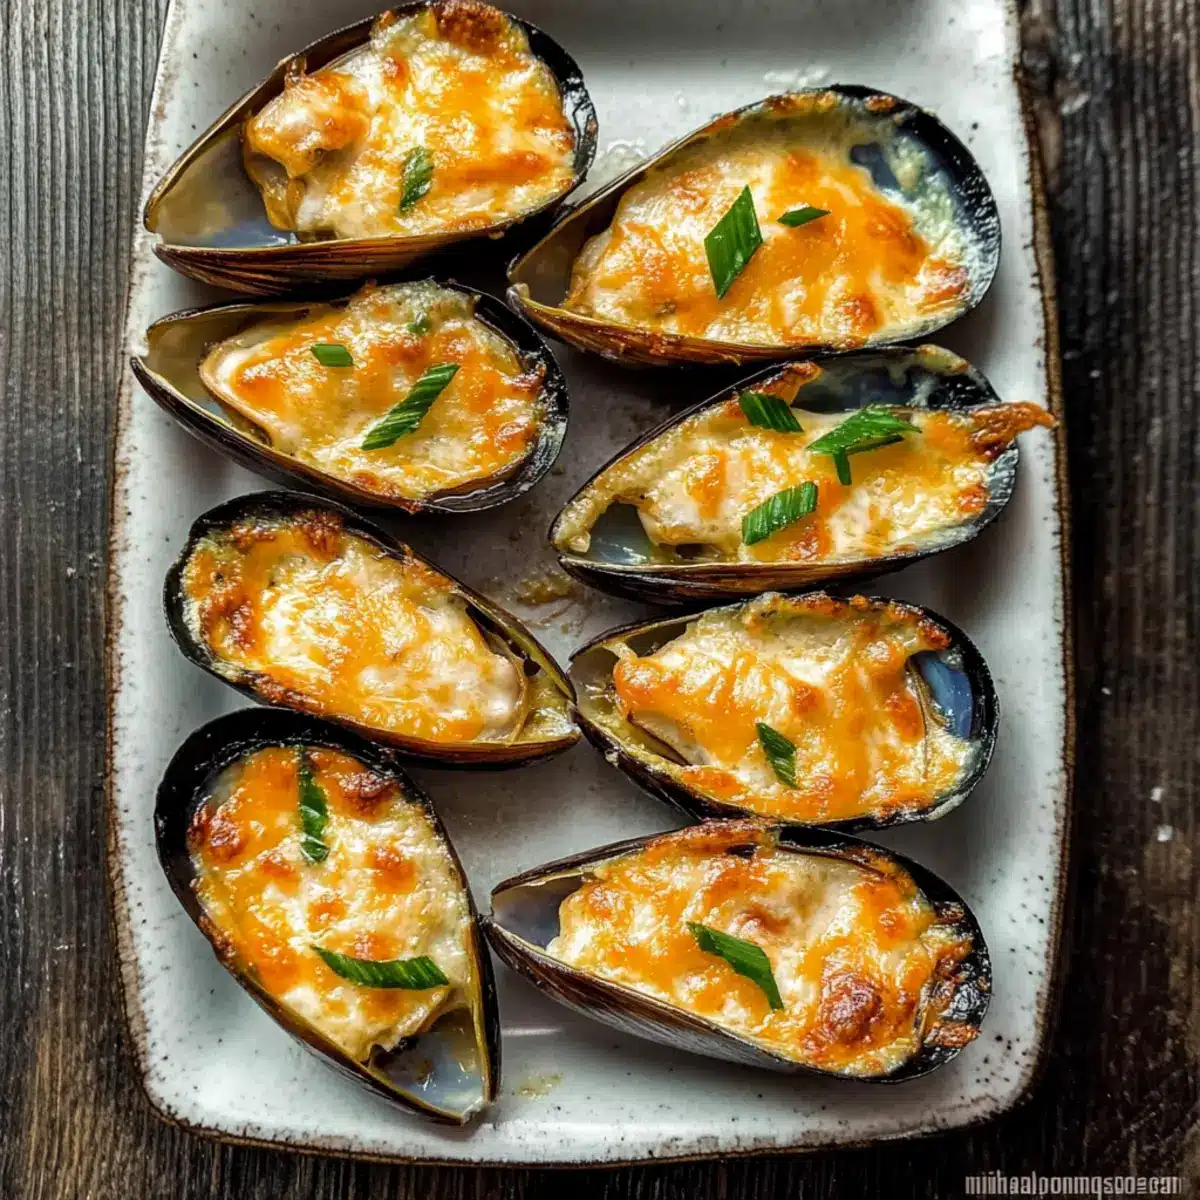
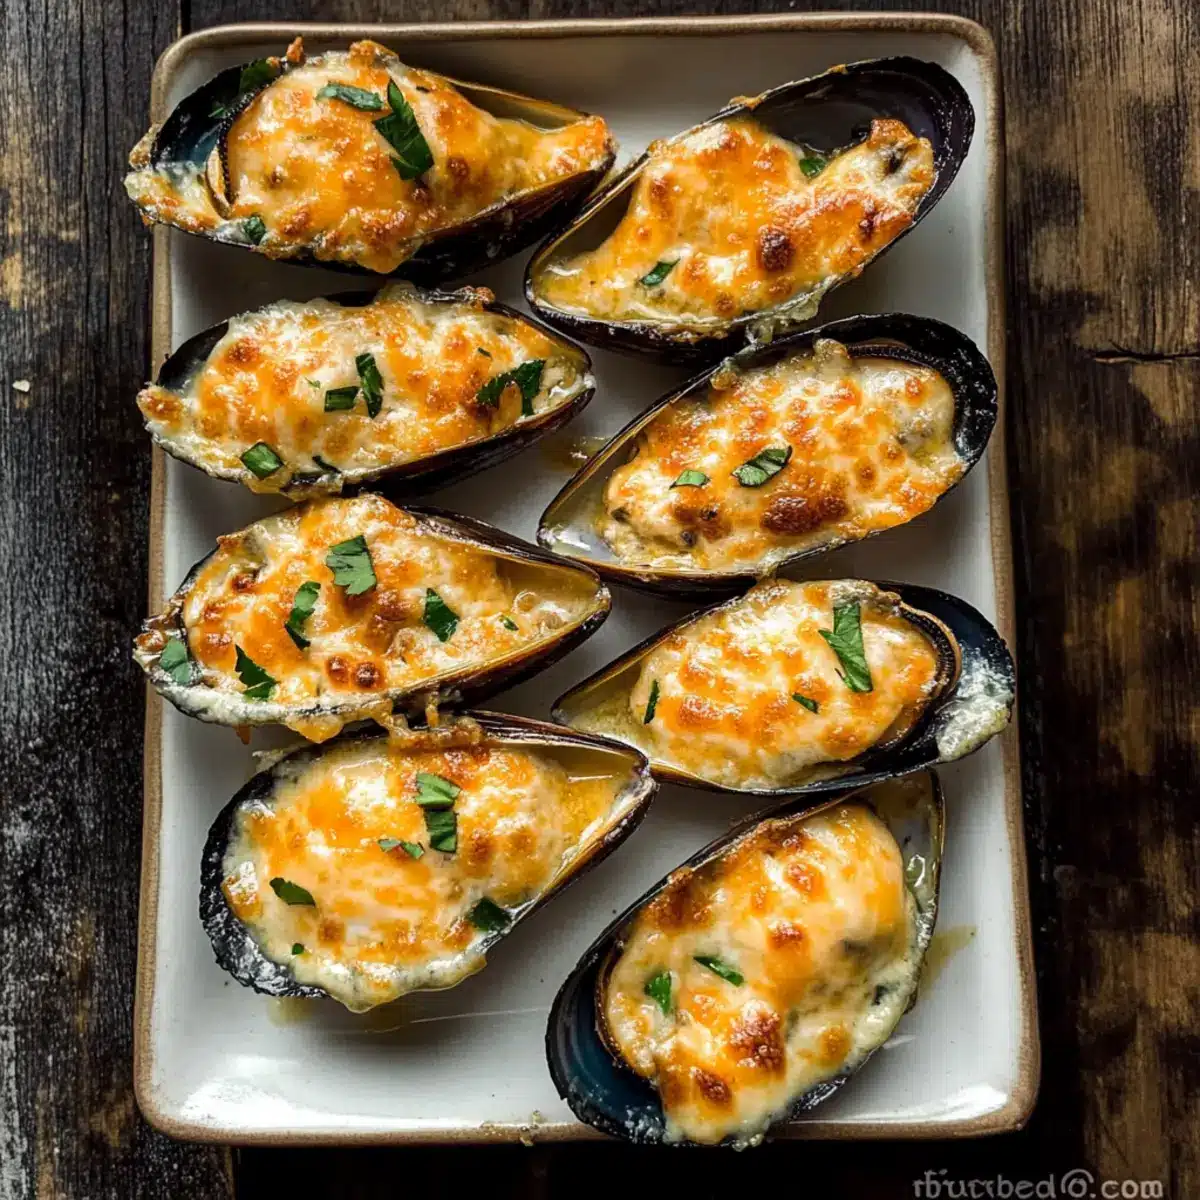
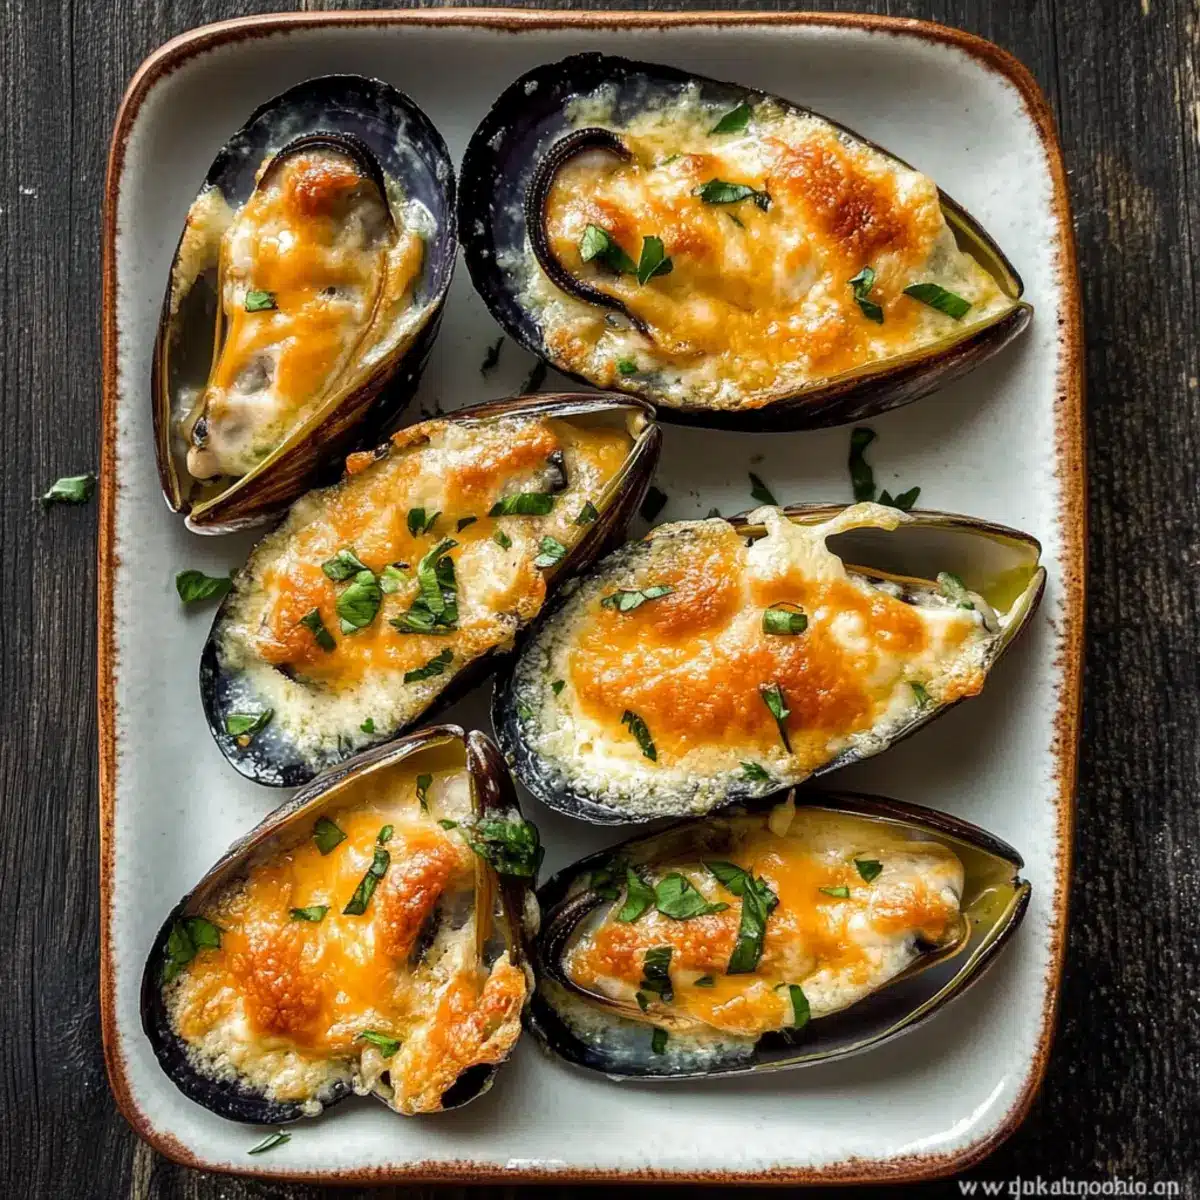
As I walked through the bustling market the other day, the scent of garlic wafted through the air, instantly taking me back to cherished family gatherings. It was here that I first discovered the joy of Garlic Cheese Baked Mussels, a scrumptious fusion that perfectly marries the savory essence of tender mussels with the decadence of creamy garlic cheese. These delightful bites make for an irresistible appetizer, bringing a taste of Asian American fusion right to your home. Not only are they incredibly easy to prepare, but they also guarantee to impress at any gathering. Whether it’s a cozy dinner with friends or a festive celebration, this dish stands out as a crowd-pleaser. Curious about how to recreate this mouthwatering treat? Let’s dive into the simple steps to bring these baked mussels with cheese to life!
Why Are Baked Mussels with Cheese Irresistible?
Flavor Explosion: These baked mussels combine the savory depth of garlic and cream cheese with melted cheddar for an unforgettable taste experience.
Easy Preparation: Perfect for home cooks of all levels, this recipe requires minimal ingredients and straightforward steps, making it ideal for a quick but impressive appetizer.
Crowd-Pleasing Delight: Whether you’re hosting a party or enjoying a quiet dinner, these mussels are sure to be the highlight, just like my Baked Salmon Sushi or Baked Hot Honey dishes!
Versatile Toppings: Feel free to personalize these mussels—add herbs, spices, or even a hint of spice to make them uniquely yours!
Perfect for Sharing: Serve these delicious bites fresh from the oven with some crusty bread, and watch as everyone dives in—just like at my family gatherings!
Baked Mussels with Cheese Ingredients
-
For the Mussels
• Green-Lipped Mussels – Pre-cooked for convenience; they are larger and more flavorful, making them perfect for this dish. -
For the Cheese Mixture
• Cheddar Cheese – Adds richness and delicious savory notes; feel free to substitute with smoked cheddar for a twist.
• Cream Cheese – Essential for that creamy texture; it binds the flavors together beautifully.
• Garlic (finely chopped) – Brings an aromatic kick to the dish; adjust according to your taste preferences.
• Unsalted Butter – Creates a luscious garlic butter base; can be swapped with olive oil for a lighter alternative.
• Chives (or green onions, finely chopped) – Introduces a fresh onion flavor; scallions can be used as a substitute if desired.
• Miso or Light Soy Sauce – Optional for an umami depth; substitute with soy sauce if miso isn’t available.
As you prepare these baked mussels with cheese, remember to enjoy the process and let your kitchen fill with that irresistible garlic aroma!
Step‑by‑Step Instructions for Baked Mussels with Cheese
Step 1: Preheat Your Oven
Start by preheating your oven to 350°F (175°C), ensuring it’s nice and hot for perfectly baked mussels with cheese. This temperature allows the mussels to cook through while the cheese becomes beautifully melted and bubbly. A warm oven sets the stage for a delightful appetizer that will soon fill your kitchen with an irresistible aroma.
Step 2: Prepare the Mussels
Defrost the green-lipped mussels under cold running water for about 2-3 minutes. Once thawed, set them aside and pat dry with a paper towel. Using pre-cooked mussels saves time and guarantees a flavorful dish, ensuring these baked mussels with cheese are ready for the oven in no time.
Step 3: Sauté the Garlic
In a medium-sized pot, melt the unsalted butter over medium heat. Add the finely chopped garlic and sauté for approximately 2 minutes, stirring frequently until it’s fragrant and golden. The rich aroma of garlic will signal that you’re on the right path to creating the creamy base for your garlic cheese filling.
Step 4: Mix the Cheese Filling
Once the garlic is sautéed, combine the melted garlic butter with the cream cheese in a mixing bowl. Stir in the finely chopped chives and, if desired, miso or light soy sauce. Blend these ingredients together until you achieve a smooth and creamy mixture, perfect for spreading on your mussels, enhancing the flavor profile of these baked mussels with cheese.
Step 5: Prepare the Baking Tray
To stabilize the mussels and prevent tipping, crinkle a sheet of aluminum foil and place it on a baking tray. This simple trick creates little wells for each mussel, ensuring they stay upright as they bake. With the baking tray ready, your mussels will be perfectly positioned for that cheesy topping.
Step 6: Assemble the Mussels
Carefully remove the mussels from their shells and spread a heaping teaspoon of the garlic cream cheese mixture onto each mussel. Return the mussels to their shells to keep that delightful presentation intact. This step is crucial to guarantee a tasty blend of textures in every bite of your baked mussels with cheese.
Step 7: Add the Cheddar Topping
Generously sprinkle shredded cheddar cheese over each filled mussel, ensuring all the savory cream cheese is covered. The melted cheddar will create a deliciously rich topping that contrasts beautifully with the tender mussel beneath. This thoughtful layering is what makes your baked mussels with cheese an irresistible appetizer.
Step 8: Bake to Perfection
Place the baking tray with the assembled mussels in the preheated oven and bake for 10-15 minutes. Keep an eye on them; the cheese should be melted and start to bubble. This is the moment when your kitchen fills with an intoxicating aroma, signaling that your baked mussels with cheese are nearly ready.
Step 9: Broil for a Golden Finish
Once baked, switch to broil for an additional 4-5 minutes to achieve a beautifully golden and slightly crisp top. Make sure to monitor closely to prevent burning; you want that perfect balance of gooeyness and crunch. This final touch brings out the irresistible flavor and makes each mussel invitingly attractive.
Step 10: Serve and Enjoy
Remove the mussels from the oven and serve immediately while hot and cheesy. These baked mussels with cheese are best enjoyed fresh, so gather your friends and family around and let them savor each gooey, flavorful bite as you all delight in this gourmet appetizer together!
How to Store and Freeze Baked Mussels with Cheese
Fridge: Store leftovers in an airtight container for up to 3 days. Reheat in the oven at 350°F (175°C) until heated through.
Freezer: You can freeze assembled, uncooked mussels for up to 2 months. Wrap tightly in plastic wrap and foil to prevent freezer burn.
Reheating: For best results, thaw frozen mussels overnight in the fridge before baking. Reheat them in the oven to keep the cheese gooey and delicious!
Make-Ahead: These baked mussels with cheese can be prepped up to 24 hours in advance. Just cover and store in the fridge until you’re ready to bake.
What to Serve with Garlic Cheese Baked Mussels
Elevate your dining experience with delightful pairings that perfectly complement the richness of these scrumptious mussels.
- Crusty Bread: A must-have for scooping up excess cheese and garlic butter, providing a perfect textural contrast.
- Fresh Arugula Salad: The peppery greens add a refreshing palate cleanser that balances the richness of the cheesy mussels. Toss with lemon vinaigrette for brightness!
- Vegetable Sticks: Crisp, fresh veggies like carrots and cucumbers offer a crunch that enhances the meal’s enjoyment, making it feel lighter.
- Garlic Rice: Infused with a touch of garlic, this dish provides a comforting base that matches the flavors of the mussels splendidly.
- Chilled White Wine: A crisp Sauvignon Blanc or a light Pinot Grigio enhances the dish and refreshes the palate with each sip.
- Sweet and Sour Sauce: A drizzle over the mussels can contrast beautifully with the rich flavors, adding an Asian flair to your appetizer spread.
- Grilled Asparagus: Tender spears infused with olive oil and seasoning create a sophisticated side that complements the baked mussels and ups the gourmet factor.
- Citrus Lemonade: This refreshing drink served ice-cold can provide a zesty lift to balance the creamy, cheesy goodness.
- Coconut Sorbet: The creamy sweetness of the sorbet serves as a refreshing dessert that rounds off the meal deliciously, leaving your guests satisfied.
- Chocolate Fondue: For a fun and interactive dessert option, a warm chocolate fondue encourages sharing, making it a hit at any gathering.
Expert Tips for Baked Mussels with Cheese
- Mussel Selection: Always choose fresh, pre-cooked mussels and discard any that are open and do not close when squeezed. This ensures safety and quality.
- Thaw Properly: If using frozen green-lipped mussels, ensure they’re thawed completely under cold water to avoid a rubbery texture.
- Cheese Varieties: Feel free to experiment with different cheeses! Adding smoked cheddar or even cream cheese variations can amp up the flavor in your baked mussels with cheese.
- Baking Time: Monitor closely during baking and broiling; the cheese should bubble and turn golden brown, but watch for burning!
- Presentation Tip: To add a sprig of freshness, sprinkle some finely chopped parsley on top before serving— it elevates the visual appeal!
- Serving Temperature: Baked mussels with cheese are best served immediately while hot to preserve the creamy texture and delightful flavors.
Make Ahead Options
These Garlic Cheese Baked Mussels are perfect for meal prep, allowing you to impress guests with minimal last-minute effort! You can assemble the mussels with the garlic cream cheese mixture up to 24 hours in advance. Simply prepare the mussels and fill them with the cheese mixture, then cover them tightly with plastic wrap and refrigerate. To maintain quality, ensure the mussels are sealed well to prevent drying out. When you’re ready to serve, just sprinkle on the cheddar and bake as directed—this way, you’ll enjoy restaurant-quality results with just a few minutes in the oven!
Baked Mussels with Cheese Variations
Customize your Garlic Cheese Baked Mussels with these delicious twists that will tantalize your taste buds!
-
Spicy Kick: Add diced jalapeños or a few dashes of hot sauce to the cheese mixture for a fiery upgrade. The spicy notes pair wonderfully with the rich cheese, taking excitement to another level.
-
Herb-Infused: Swap in parsley or oregano for the chives to elevate the flavor profile. Fresh herbs add a delightful aroma, creating a beautiful harmony with the cheese.
-
Smoky Flavor: Substitute regular cheddar with smoked cheddar for a deeper, more complex taste. The smoky notes will transform these mussels into a gourmet dish that pays homage to BBQ flavors.
-
Citrus Zing: Serve with a squeeze of fresh lemon juice to bring brightness that cuts through the richness. The acidity adds a refreshing balance, enhancing every bite.
-
Cheese Blend: Experiment with a cheese blend that includes gouda or mozzarella for a unique and creamy experience. Mixing cheeses adds depth, making your dish feel like a melty masterpiece.
-
Pesto Twist: Incorporate a spoonful of basil pesto in the cheese mixture for an aromatic twist. The vibrant flavor of pesto elevates these baked mussels to new culinary heights, reminiscent of Italian delicacies.
-
Seafood Medley: Add cooked shrimp or crab meat to the cheese filling for an impressive seafood combo. This extra protein will not only boost flavor but also make your dish feel more luxurious.
-
Asian Flair: Mix in a teaspoon of sriracha or add a sprinkle of furikake before serving. This brings a delightful fusion twist, reminiscent of the beloved flavors found in Asian cuisine, like those in my Beef Philly Cheesesteaks.
With these variations, you can easily transform your delicious Garlic Cheese Baked Mussels to suit any occasion or palate!
Garlic Cheese Baked Mussels Recipe FAQs
What should I look for when selecting mussels?
Absolutely! When choosing mussels, aim for fresh, pre-cooked green-lipped mussels. Look for ones that are closed tightly; any mussels that are open and do not close when tapped should be discarded, as they may not be safe to eat. Opt for larger ones, as they’re more flavorful and provide a satisfying bite.
How do I store leftover baked mussels?
Great question! Store any leftovers in an airtight container in the refrigerator for up to 3 days. When you’re ready to enjoy them again, simply reheat in the oven at 350°F (175°C) until heated through. This ensures that the cheese remelts beautifully, keeping that gooey texture you love!
Can I freeze baked mussels with cheese?
Yes, you can! To freeze assembled, uncooked mussels, wrap them tightly in plastic wrap and then in aluminum foil to prevent freezer burn. They can be stored in the freezer for up to 2 months. Just remember to thaw them overnight in the fridge before baking to ensure even cooking!
What should I do if my cheese is not melting properly?
Very! If your cheese doesn’t melt as expected, it could be due to a few factors: ensuring your oven is properly preheated or giving it enough time while baking is crucial. Additionally, remember to switch to the broil setting to achieve that perfect golden finish—just keep a close eye on them to prevent any burning!
Are these baked mussels safe for people with seafood allergies?
Absolutely! Baked mussels with cheese are not suitable for those with seafood allergies, as they contain shellfish. Always check for allergy restrictions with your guests before serving this dish. Consider alternative appetizers for those individuals, such as cheesy stuffed mushrooms.
Can I prepare these mussels ahead of time?
Certainly! You can prep the mussels up to 24 hours in advance. Just assemble them, cover, and store in the refrigerator until you’re ready to bake. This makes it easy to have a gourmet appetizer ready to go for your gathering!
Melty Baked Mussels with Cheese for a Flavor Explosion
Ingredients
Equipment
Method
- Preheat your oven to 350°F (175°C).
- Defrost the green-lipped mussels under cold running water for about 2-3 minutes. Pat dry with a paper towel.
- Melt the unsalted butter in a medium-sized pot over medium heat. Sauté the finely chopped garlic for approximately 2 minutes.
- Combine the melted garlic butter with the cream cheese, add chopped chives and miso or light soy sauce. Mix until smooth.
- Crinkle a sheet of aluminum foil and place it on a baking tray to stabilize the mussels.
- Remove the mussels from their shells and spread a heaping teaspoon of the garlic cream cheese mixture onto each mussel. Return them to their shells.
- Sprinkle shredded cheddar cheese over each filled mussel.
- Bake in the preheated oven for 10-15 minutes until the cheese is melted and bubbly.
- Switch to broil for an additional 4-5 minutes to achieve a golden top, monitoring closely to prevent burning.
- Serve immediately while hot and cheesy.
Leave a Reply