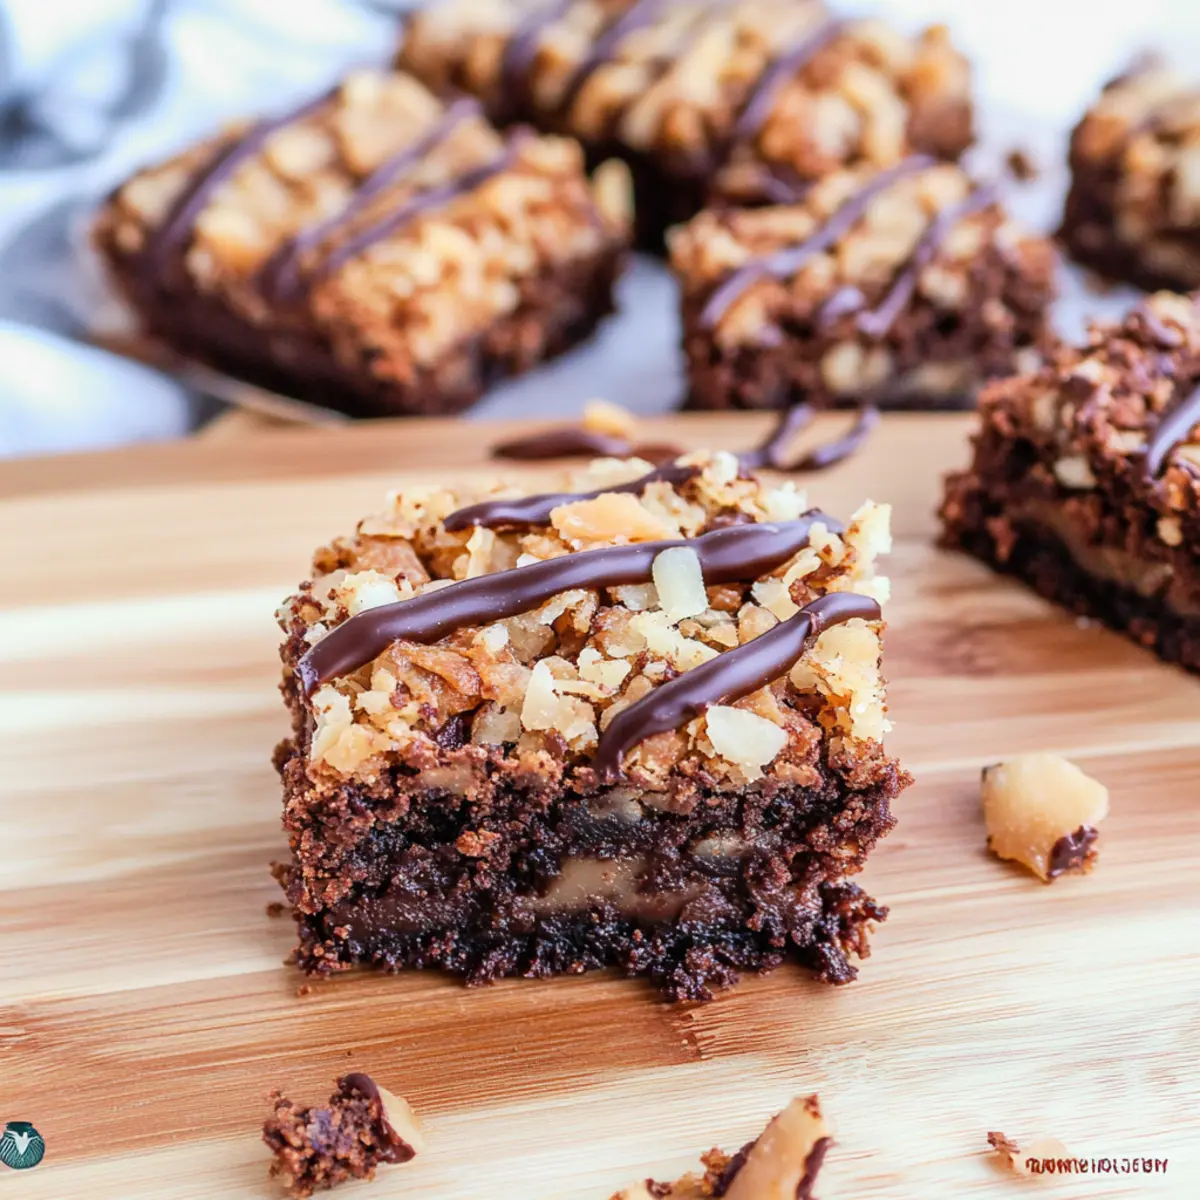
The aroma of toasting coconut wafts through my kitchen, taking me back to cherished childhood moments filled with Girl Scout cookies and the sweet indulgence of Samoa flavors. Today, I’m bringing you a delightful twist on that nostalgia with my Samoa Brownies. These easy-to-make treats combine a rich, chocolatey brownie base with layers of sweet, toasted coconut and sticky caramel, drizzled with luscious chocolate for the perfect finishing touch. Not only are these Samoa Brownies a simple dessert that requires minimal effort, but they’re also an instant crowd-pleaser for gatherings and family nights. Ready to satisfy your sweet cravings while keeping the fuss at bay? Let’s dive into this scrumptious adventure!
Why are Samoa Brownies so irresistible?
Decadent Layers: Each bite of these Samoa Brownies is a heavenly experience, featuring a fudgy chocolate base and delectable layers of chewy caramel and toasted coconut.
Simplicity: Made with a boxed brownie mix, this recipe eliminates the stress of measuring ingredients, making it perfect for both beginners and experienced bakers.
Crowd-Pleaser: Their unique combination of nostalgic flavors is sure to impress friends and family, making them a hit at parties and gatherings.
Customizable: Feel free to switch up the toppings or add your favorite nuts for a personalized touch; the options are endless!
Quick Preparation: Ready in no time, these brownies also make for a fantastic last-minute dessert when you need something sweet without the fuss.
Whether you’re enjoying them with a scoop of ice cream or just by themselves, these Samoa Brownies are destined to become a favorite in your dessert repertoire!
Samoa Brownies Ingredients
For the Brownie Base
• Boxed brownie mix – Forms the rich and chocolatey base; feel free to substitute with your favorite homemade brownie recipe.
• Eggs – Act as a binding agent; make sure they’re at room temperature for best results.
• Oil – Helps to create a moist texture; vegetable or canola oil works perfectly.
For the Topping
• Shredded coconut – Provides a nutty flavor and texture that’s essential to the Samoa theme; opt for unsweetened coconut if you’d like less sweetness.
• Caramel ice cream topping – Adds a gooey layer mimicking traditional Samoa cookies; try homemade caramel for a richer flavor.
• Semi-sweet chocolate chips – Used for drizzling on top; dark chocolate can be swapped in for a more intense taste.
These decadent Samoa Brownies will surely captivate your taste buds and take your dessert experience to new heights!
Step‑by‑Step Instructions for Samoa Brownies
Step 1: Prepare the Brownie Base
Start by preheating your oven to 350°F (175°C). In a mixing bowl, combine the boxed brownie mix, eggs, and oil as per the package instructions. Whisk until smooth, ensuring no lumps remain, then pour the brownie batter into a greased or parchment-lined 9×13-inch baking pan. Bake for 25-30 minutes, or until a toothpick inserted in the center comes out with a few moist crumbs.
Step 2: Toast the Coconut
While your brownies are baking, spread shredded coconut evenly on a parchment-lined baking sheet. Toast the coconut in the oven at 350°F (175°C) for about 3-5 minutes, stirring halfway through, until it turns golden brown and fragrant. Keep a close eye to prevent burning! Once done, remove from the oven and let the coconut cool completely.
Step 3: Make the Caramel-Coconut Layer
In a large bowl, mix the cooled toasted coconut with caramel ice cream topping until thoroughly combined. The mixture should be sticky and smooth, resembling a thick spread. Once your brownies are finished baking and have cooled for about 10 minutes, evenly layer the caramel-coconut mix over the top, gently pressing it down to adhere.
Step 4: Drizzle the Chocolate
Melt semi-sweet chocolate chips in a microwave-safe bowl in 30-second intervals, stirring in between until completely smooth. Transfer the melted chocolate into a piping bag or a ziplock bag with a corner snipped off to create a drizzling tool. Drizzle the rich chocolate over the caramel-coconut layer, creating a beautiful pattern that enhances your Samoa Brownies.
Step 5: Chill and Slice
Place the Samoa Brownies in the refrigerator for about 30 minutes to allow the chocolate to set. Once firm, use a sharp knife to slice the brownies into 16 squares. For cleaner edges, dip your knife in warm water and wipe it dry before each cut. These decadent Samoa Brownies are now ready to be served and enjoyed!
What to Serve with Samoa Brownies
Indulging in these luscious treats opens the door to a delightful array of pairings that elevate your dessert experience.
-
Vanilla Ice Cream: A scoop of creamy vanilla ice cream adds a cool contrast to the rich chocolate and caramel, creating a delightful balance.
-
Whipped Cream: Light and fluffy whipped cream offers a wonderful airy texture that complements the dense fudginess of each brownie, perfect for garnishing.
-
Fresh Berries: Juicy strawberries or raspberries provide a pop of color and a tangy flavor that cuts through the sweetness, making every bite refreshing.
-
Chocolate Milkshake: Thick and velvety, a chocolate milkshake enhances the chocolatey goodness of the brownies, making for a lovingly decadent pairing.
-
Sweet Coffee: Pairing these brownies with a cup of hot, sweetened coffee can highlight the fudgy flavors, making it an excellent ending to a cozy dinner.
-
Toasted Nut Topping: Adding chopped toasted nuts like pecans or walnuts brings a satisfying crunch and nutty flavor, enhancing the overall texture of the brownies.
With these delightful pairings, your Samoa Brownies can shine even brighter, turning every bite into a cherished moment!
Storage Tips for Samoa Brownies
Room Temperature: Keep your Samoa Brownies in an airtight container at room temperature for up to 2 days to maintain their soft and chewy texture.
Fridge: If you want to extend their freshness, store the brownies in the fridge for up to 1 week. Just make sure they are in an airtight container to avoid drying out.
Freezer: For longer storage, freeze the brownies for up to 3 months. Wrap them individually in plastic wrap and then place them in a freezer bag for best results.
Reheating: To enjoy a warm treat, simply thaw at room temperature for an hour, or microwave for 10-15 seconds. The chocolate drizzle will melt back into a gooey goodness!
Expert Tips for Samoa Brownies
-
Parchment Lining: Always line your baking pan with parchment paper! This small step makes removal and cleanup a breeze, ensuring your Samoa Brownies look perfect when served.
-
Watch the Coconut: Keep a vigilant eye on the coconut while it toasts. It can burn quickly, and you want that golden brown hue for optimal flavor in your brownies.
-
Caramel Consistency: If your caramel topping seems too thick after opening, simply heat it in the microwave for a few seconds. This will help it spread smoothly over the brownie base.
-
Chill Before Cutting: For cleaner, neater slices, let your Samoa Brownies chill well before slicing. A warm knife dipped in water will make cutting even easier.
-
Taste Test: Don’t hesitate to taste as you go! This way, you can adjust flavors or add more chocolate drizzle if desired, making your Samoa Brownies uniquely yours.
Samoa Brownies Variations & Substitutions
Feel free to get creative with these Samoa Brownies and tailor them to your taste. Explore flavors and textures that will make you smile!
-
Dark Chocolate: Swap semi-sweet chocolate chips for dark chocolate for a richer, more intense flavor that deepens the overall taste experience.
Using dark chocolate complements the sweetness of the caramel and coconut beautifully. -
Nutty Twist: Add chopped nuts like pecans or walnuts to the brownie batter for an extra layer of crunch.
The contrast of creamy chocolate and crunchy nuts creates a delightful mouthfeel you won’t forget. -
Tropical Delight: Incorporate diced pineapple or banana into the brownie mix for a hint of tropical fruitiness.
This fresh addition adds a burst of unique flavor that pairs well with the caramel and coconut elements. -
Nut-Free Option: Substitute sunflower seed butter for any chocolate drizzle if you want a nut-free version.
This swap maintains that creamy texture and brings a delightful twist to the flavor profile. -
Vegan Version: Use a vegan brownie mix along with flax eggs and dairy-free chocolate chips for a completely plant-based treat.
Making these brownies vegan doesn’t compromise on the yummy indulgence! -
Coconut Milk Caramel: Create a homemade caramel sauce using coconut milk for a dairy-free alternative that’s still rich and creamy.
A luscious coconut caramel truly enhances the Samoa Brownies’ flavor theme. -
Spiced Up: Add a sprinkle of cinnamon or a dash of cayenne pepper to the brownie mix for a hint of warmth and spice.
This touch makes for an unexpectedly delightful flavor combination that teases the palate. -
Double Layer: For a fun twist, create a cookie layer at the bottom by adding a layer of cookie dough before the brownie batter.
This change gives you a delicious contrast of textures while nodding to traditional Samoa cookies.
Feel free to explore these variations, and don’t hesitate to dive into the world of baking by substituting ingredients you have on hand! You might create a new family favorite along the way. And if you’re interested in a delicious topping variation, consider making some homemade caramel to really elevate your Samoa Brownies. Enjoy your baking adventure!
Make Ahead Options
These Samoa Brownies are perfect for busy home cooks looking to simplify dessert prep! You can easily prepare the brownie base up to 24 hours ahead, baking it and allowing it to cool completely before storing it in an airtight container at room temperature. The caramel-coconut layer can also be mixed and stored in the refrigerator for up to 3 days, ensuring it remains fresh and delicious. When you’re ready to serve, simply layer the cold caramel-coconut mix on the brownies, drizzle with melted chocolate, and chill for about 30 minutes to set. This make-ahead approach not only saves you time but also keeps your brownies just as decadent and satisfying!
Samoa Brownies Recipe FAQs
How do I select the best coconut for my Samoa Brownies?
Absolutely! When choosing shredded coconut, look for unsweetened coconut as it provides a nuttier flavor ideal for Brownies. Ensure the coconut is fresh, indicated by a clean, mild scent with no dark spots. Opt for finely shredded coconut if you want a smoother texture or flaked coconut for a more substantial chew.
What is the best way to store leftover Samoa Brownies?
Very! To keep your Samoa Brownies fresh, store them in an airtight container at room temperature for up to 2 days. If you prefer them to last longer, simply refrigerate them; they will stay delicious for up to a week. Make sure the container is sealed tight to avoid drying out!
Can I freeze Samoa Brownies, and how do I do it?
You sure can! To freeze your Samoa Brownies, first, slice them into squares and wrap each piece tightly in plastic wrap. Then, place them in a freezer-safe ziplock bag, removing as much air as possible. They can be frozen for up to 3 months. When you’re ready to enjoy, thaw them at room temperature for about an hour or pop them in the microwave for 10-15 seconds until just warm.
What should I do if my chocolate drizzle isn’t smooth?
Oh no! If your chocolate drizzle appears clumpy or too thick, simply melt it down again in the microwave in 10-15 second intervals, stirring frequently until smooth. Add a small amount of vegetable oil or shortening as you mix if needed for a thinner, more drizzling-friendly consistency. This way, your brownies will look just as beautiful as they taste!
Are there any dietary considerations I should keep in mind for Samoa Brownies?
Very good question! If you’re accommodating allergies, be mindful of both the brownie mix and the toppings. Many boxed mixes may contain gluten, while some brands of caramel may contain dairy or other allergens. Always check labels to ensure they meet your dietary needs. Alternatively, consider using gluten-free brownie mix or vegan caramel for adaptable options that everyone can enjoy!
Samoa Brownies: Decadent Treats that Will Melt in Your Mouth
Ingredients
Equipment
Method
- Preheat your oven to 350°F (175°C). In a mixing bowl, combine the boxed brownie mix, eggs, and oil as per the package instructions. Whisk until smooth and pour into a greased or parchment-lined 9x13-inch baking pan. Bake for 25-30 minutes.
- Spread shredded coconut evenly on a parchment-lined baking sheet. Toast in the oven for about 3-5 minutes, stirring halfway through.
- Mix the cooled toasted coconut with caramel ice cream topping until thoroughly combined. Layer this mix over the brownies after cooling for about 10 minutes.
- Melt semi-sweet chocolate chips in a microwave-safe bowl in 30-second intervals, stirring until smooth. Drizzle over the caramel-coconut layer.
- Chill the brownies in the refrigerator for about 30 minutes. Once firm, slice into 16 squares.
Leave a Reply