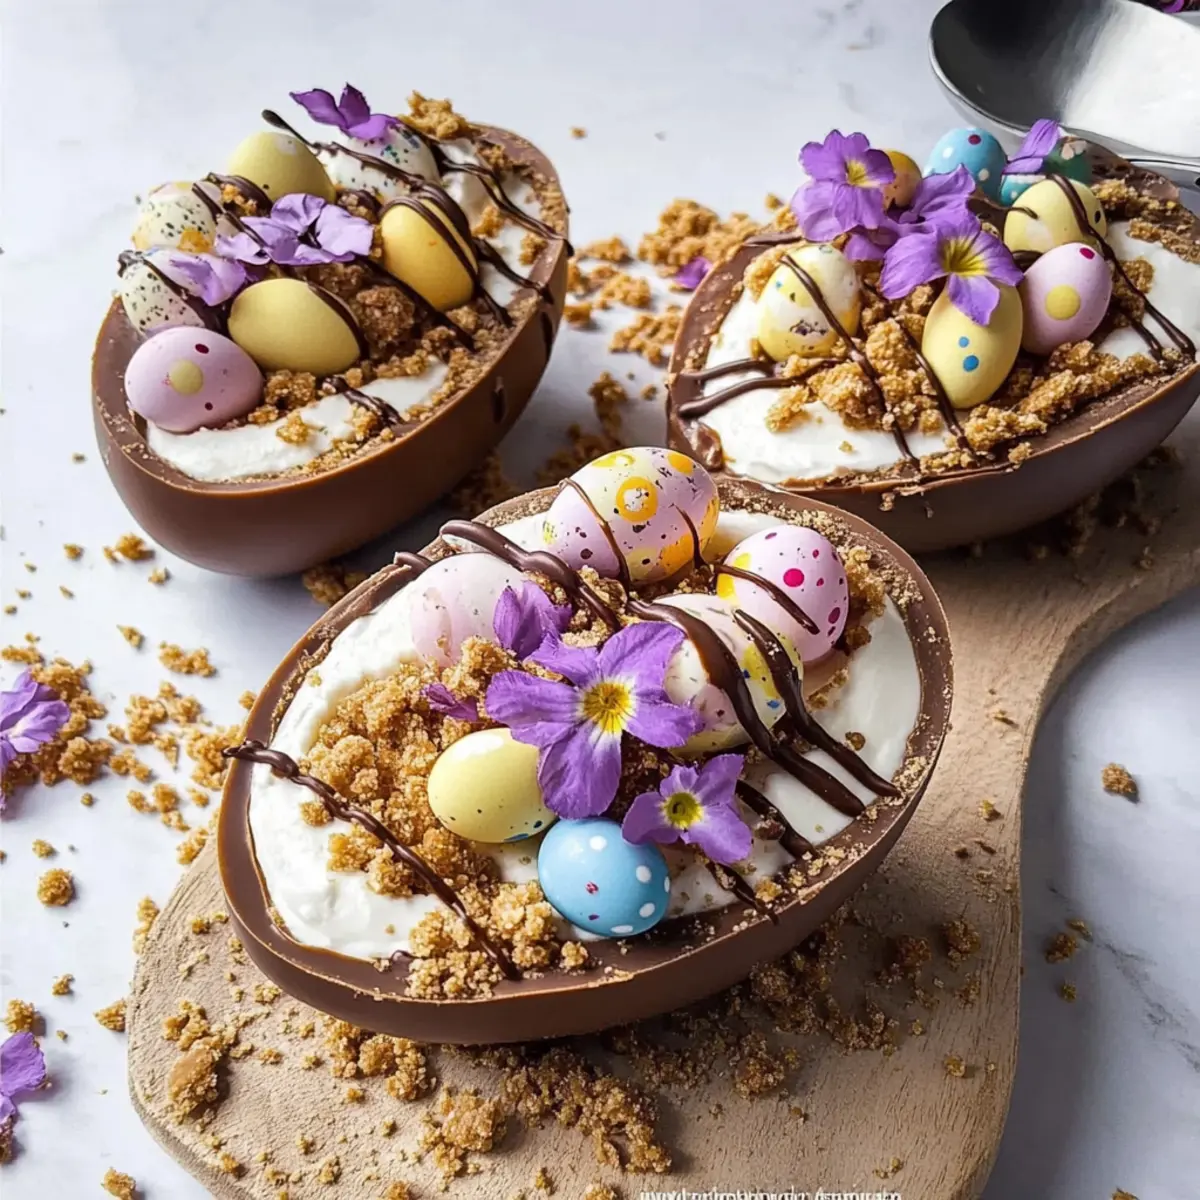
As I was rummaging through my pantry, the most delightful surprise emerged: a handful of hollow chocolate eggs left over from last year’s Easter celebrations! This sparked an idea that melds tradition with an irresistible twist—introducing my Festive No-Bake Easter Egg Cheesecake. This dessert is not just visually stunning; it’s a big win for busy home chefs too, delivering an easy, make-ahead treat that will leave your guests in awe. With a buttery crumb base and a creamy filling nestled inside colorful chocolate eggs, this cheesecake will add a touch of magic to your holiday brunch. Are you ready to wow your loved ones with a dessert that is as fun to make as it is to eat? Let’s hop into the recipe!
Why is this cheesecake a crowd-pleaser?
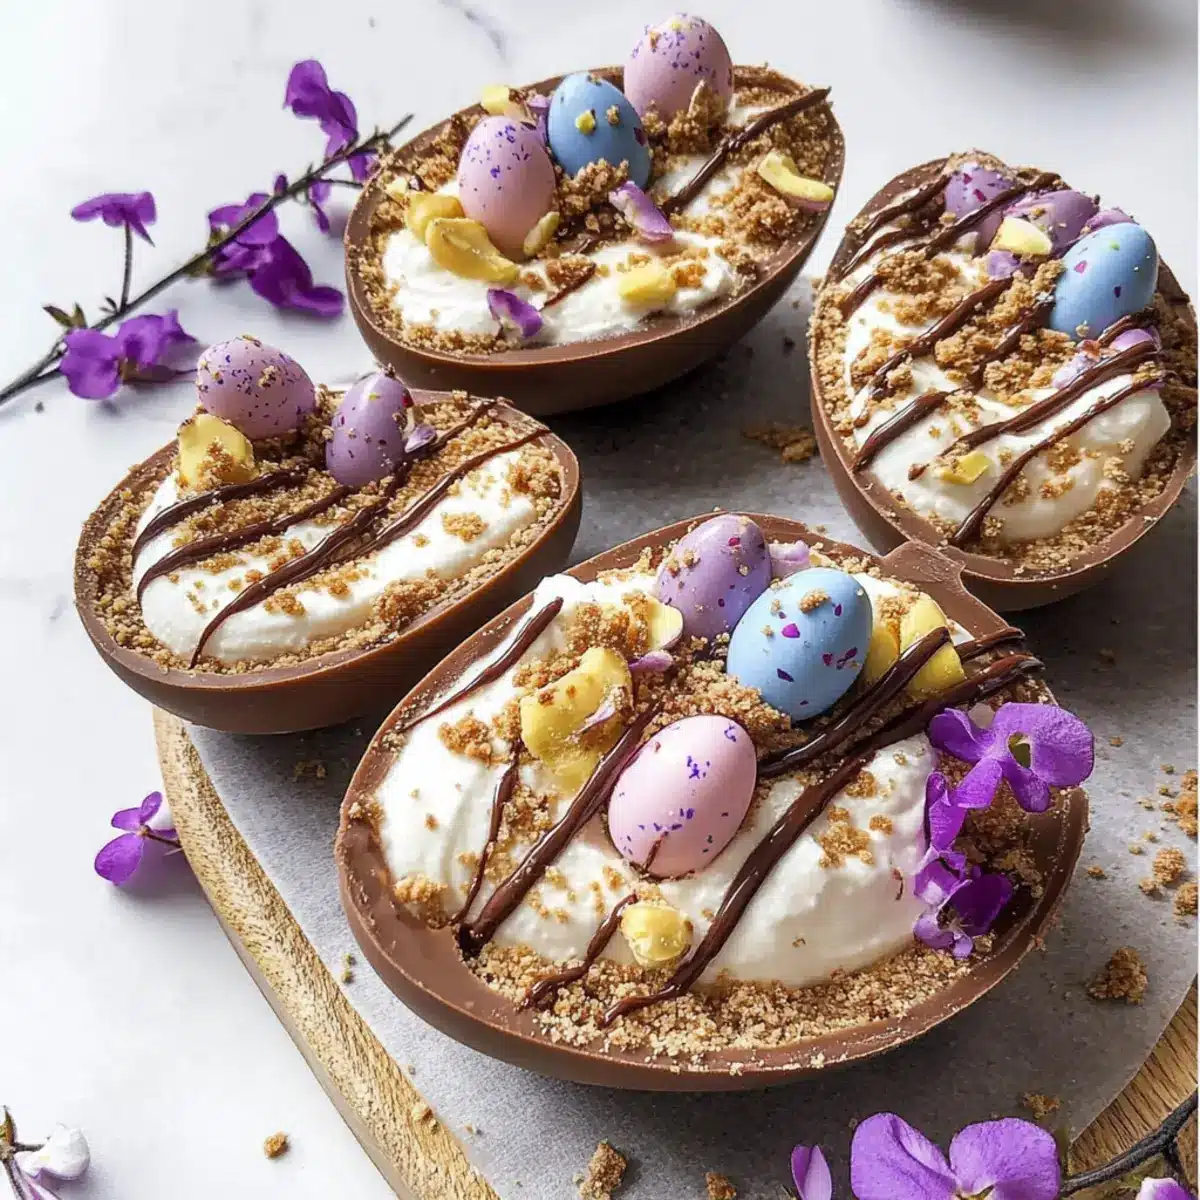
Irresistible Appeal: Who can resist the charm of colorful hollow chocolate eggs filled with creamy cheesecake? This dessert is a showstopper at any gathering!
Easy to Make: With a no-bake approach, you can whip this up without complicating your day. It’s the perfect treat for busy schedules.
Versatile and Fun: Customize your cheesecake with unique flavors, or swap in gluten-free ingredients without compromising taste!
Perfect for Sharing: Ideal for holiday gatherings, this cheesecake serves as a delightful conversation starter that brings everyone together.
Make-Ahead Convenience: Prepare it in advance and chill—just decorate before serving to keep things stress-free!
Elevate your dessert game with this festive treat, and consider trying out other delicious options like Caramel Brownie Cheesecake or Cookie Butter Cheesecake for variety!
Easter Egg Cheesecake Ingredients
-
For the Crust
• Hollow Chocolate Eggs – They form the fun and festive container for your cheesecake filling; Cadbury milk chocolate eggs work great!
• Graham Cracker or Digestive Biscuits – Provides a sweet and crunchy base; opt for gluten-free biscuits for a more inclusive dessert.
• Butter (melted) – Binds the crushed biscuits together; coconut oil is an excellent dairy-free alternative. -
For the Filling
• Cream Cheese – The star of the filling that offers a rich and creamy texture; full-fat cream cheese yields the best results!
• Powdered Sugar – Sweetens the mixture for that perfect cheesecake flavor; granulated sugar can work but may be grainy.
• Heavy Cream – Adds that light and fluffy texture; regular cream can be used if that’s all you have on hand.
• Vanilla Extract – Enhances the overall flavor and aroma; almond extract can provide a unique twist in taste. -
For the Decoration
• Melted Chocolate – Drizzle for an elegant finish and added flavor; any semi-sweet or dark chocolate will do!
• Mini Chocolate Eggs – Perfect for a festive touch; feel free to use other fun candies as alternatives.
Get ready to indulge in this delightful Easter Egg Cheesecake, perfect for any holiday celebration!
Step‑by‑Step Instructions for Easter Egg Cheesecake
Step 1: Prepare Chocolate Eggs
Begin by carefully splitting the hollow chocolate eggs in half. To prevent cracking, use a warm knife—this helps glide through the chocolate smoothly. Lay the egg halves on a baking sheet, lined with parchment paper, and set them aside while you prepare the crust.
Step 2: Make Cookie Base
In a medium bowl, combine crushed graham crackers or digestive biscuits with melted butter until the mixture resembles wet sand. This will create a sturdy base for your Easter Egg Cheesecake. Ensure the crumbs are evenly coated with butter for optimal flavor and texture.
Step 3: Layer Cookie Base
Divide the cookie mixture evenly between the prepared egg halves. Use your fingers or a small spoon to gently press down on the mixture, compacting it firmly to create a solid layer that will hold the cheesecake filling later. Aim for an even layer for a beautiful presentation.
Step 4: Mix Filling
In a large mixing bowl, beat the softened cream cheese with powdered sugar and vanilla extract until smooth and creamy, about 3-4 minutes. In a separate bowl, whip the heavy cream until it reaches stiff peaks, then carefully fold this whipped cream into the cream cheese mixture. This will create a light, airy filling for your Easter Egg Cheesecake.
Step 5: Fill Egg Halves
Using a spoon or piping bag, carefully fill the prepared chocolate egg halves with the cheesecake mixture. Smooth the top with a spatula for a neat finish. Take your time to ensure each egg is filled to the brim, showcasing the delicious filling when they’re served.
Step 6: Decorate and Chill
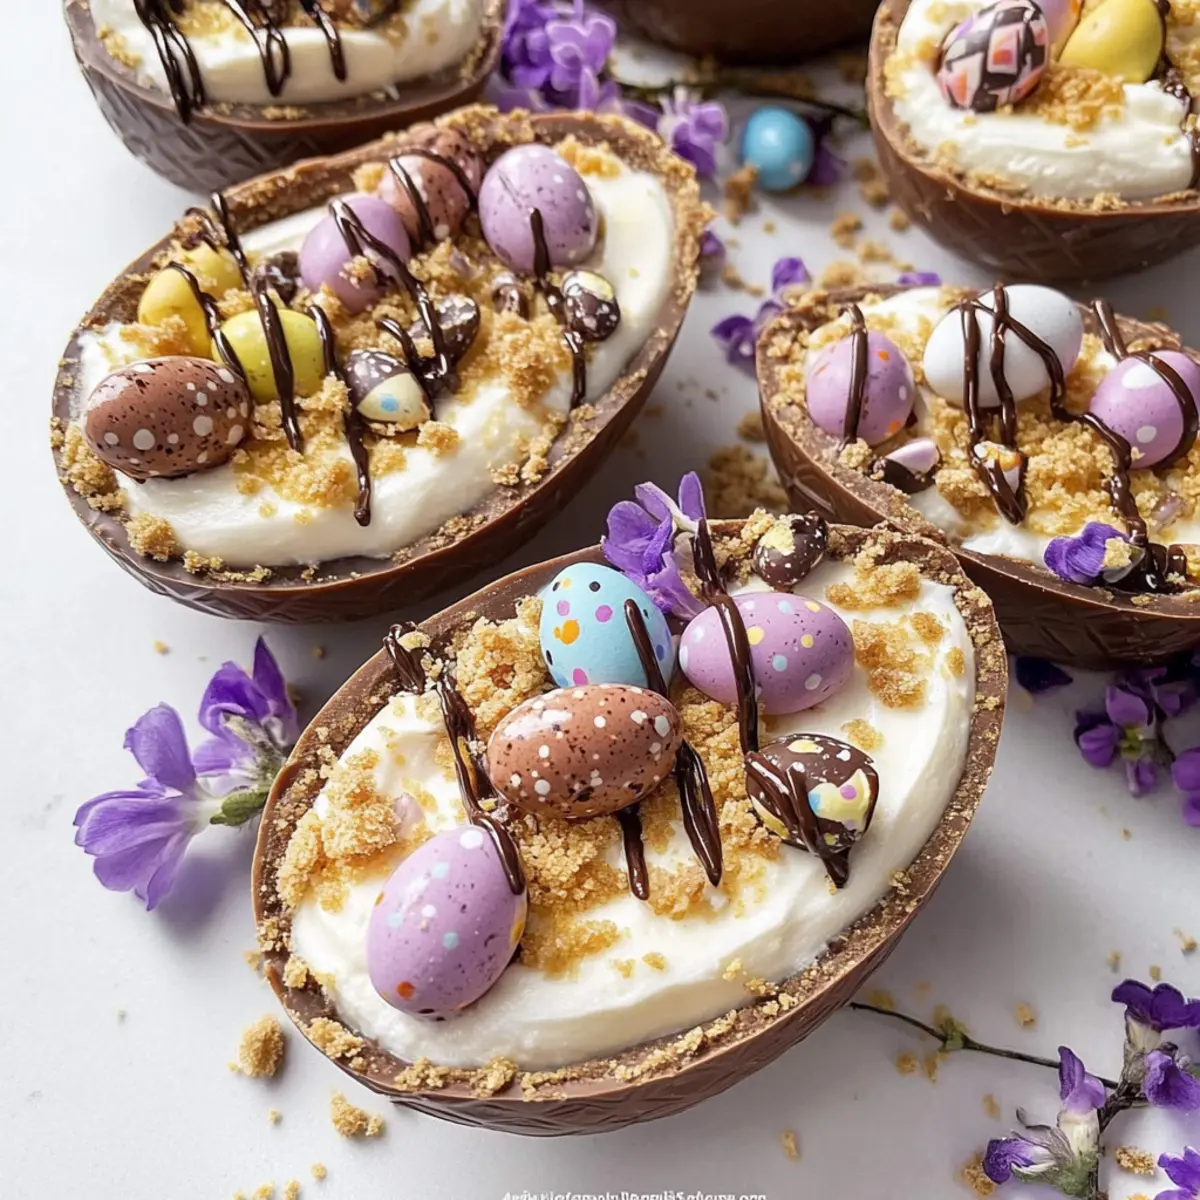
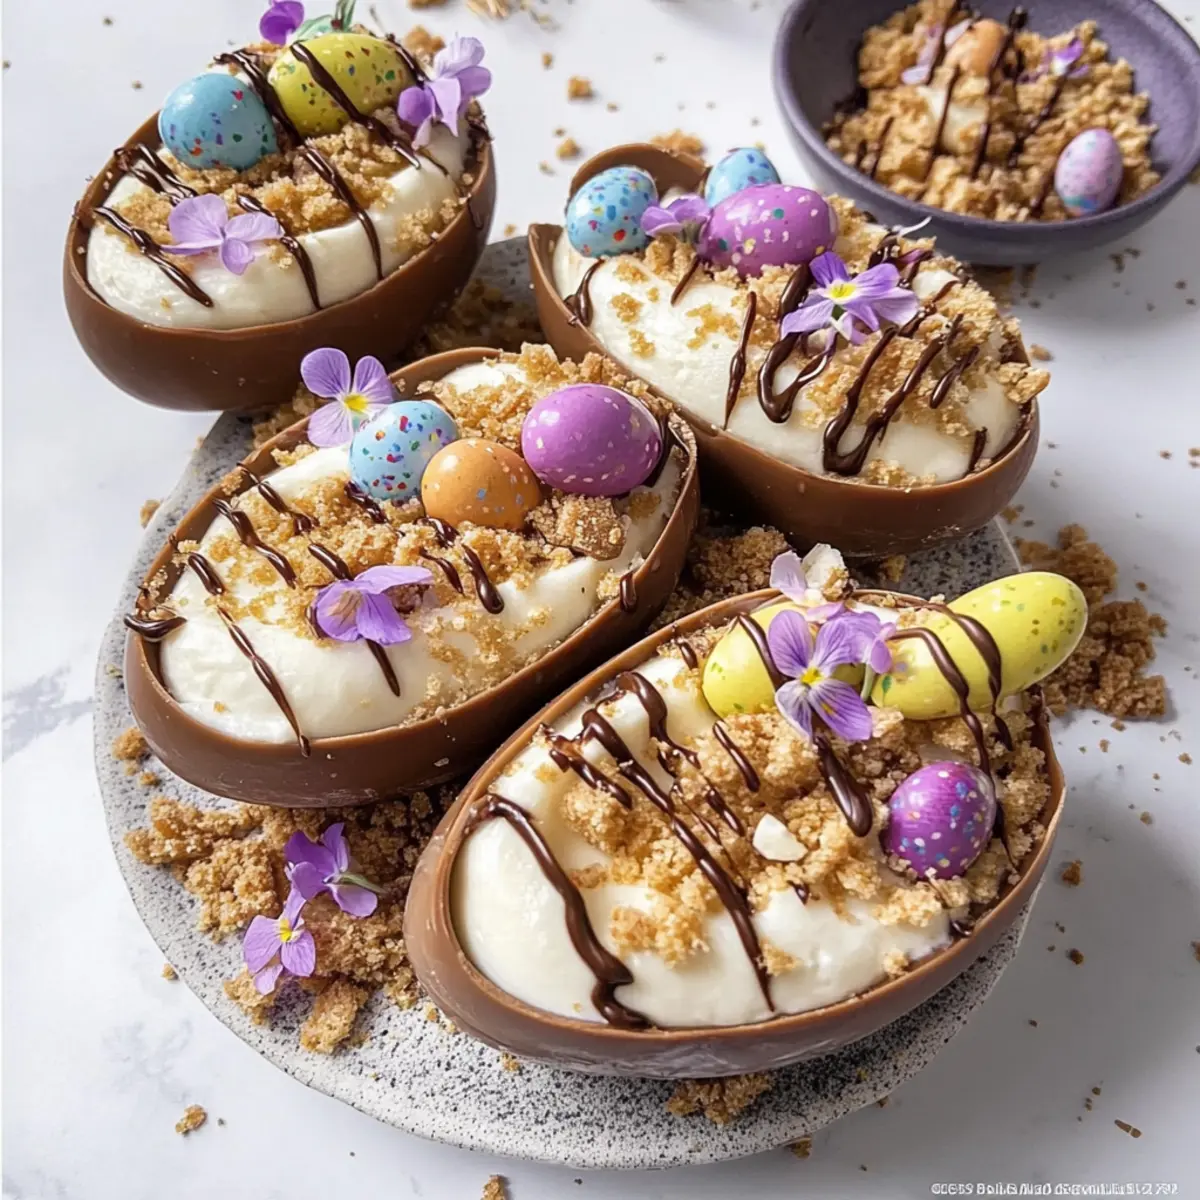
Once filled, drizzle melted chocolate over the tops of the cheesecake-filled eggs for a decorative touch. Finish off with a few mini chocolate eggs placed on top for that festive flair. Refrigerate the assembled Easter Egg Cheesecake for at least 2 hours to let it set beautifully before serving.
What to Serve with Easter Egg Cheesecake
Looking to elevate your holiday feast? Pair the indulgent flavors of this cheesecake with delightful sides and sips!
-
Fresh Berries: Their natural tartness cuts through the creamy cheesecake, adding a refreshing balance that brightens each bite. Consider a medley of strawberries, blueberries, and raspberries for a colorful presentation.
-
Whipped Cream: A dollop of lightly sweetened whipped cream complements the cheesecake’s richness, inviting a textural contrast. A hint of vanilla or a pinch of cocoa powder can enhance its flavor!
-
Chocolate Drizzle: Enhance that chocolate shell with a light drizzle over the plate for a visual treat. Not only does it tie the dessert together, but it adds extra richness that chocolate lovers will adore.
-
Mint Leaves: A sprig of fresh mint positioned alongside the cheesecake brings a vibrant, herbal note. This garnish not only looks appealing but also refreshes the palate between bites.
-
Coffee or Espresso: The bold flavors of a freshly brewed cup of coffee or espresso provide a wonderful contrast to the sweet cheesecake. The bitterness of the coffee complements the dessert’s sweetness beautifully.
-
Sparkling Water with Lemon: For a light, refreshing drink option, serve sparkling water with a splash of lemon. Its effervescence cleanses the palate and lifts the festive spirit of the gathering.
-
Mini Pastries: Serve an assortment of mini pastries or cookies as a delightful accompaniment. Their varying textures provide an interesting element for guests to enjoy alongside the cheesecake.
-
Fruit Salad: A simple fruit salad can add a fresh, healthy element to your dessert spread. The mix of juicy fruits enhances the overall vibe of spring and complements the holiday theme.
-
Caramel Sauce: Serve a side of warm caramel sauce for drizzling over the cheesecake. The sweet, buttery flavor adds an irresistible twist that will have everyone swooning with delight!
Storage Tips for Easter Egg Cheesecake
- Fridge: Keep your Easter Egg Cheesecake refrigerated for up to 3 days in an airtight container to maintain its freshness and flavor.
- Freezer: For longer storage, you can freeze the cheesecake for up to 3 months. Wrap it tightly in plastic wrap and aluminum foil.
- Thawing: To enjoy frozen cheesecake, thaw it in the refrigerator overnight before serving. Note that the texture may slightly change upon thawing.
- Reheating: This cheesecake is best served cold, so no reheating is necessary. Just grab it from the fridge and it’s ready to delight your guests!
Make Ahead Options
These delightful Easter Egg Cheesecakes are perfect for meal prep! You can prepare the cookie base and fill the chocolate egg halves up to 24 hours in advance, allowing the flavors to meld beautifully. To do this, simply follow Steps 1-3 and store the filled egg halves in an airtight container in the refrigerator. This keeps them fresh without compromising their texture. When you’re ready to serve, just whip up the cheesecake filling (Step 4), fill the already-prepped eggs (Step 5), and decorate (Step 6) before chilling for at least 2 hours. This way, you’ll have a stunning, stress-free dessert ready for your celebration, saving you precious time on the big day!
Easter Egg Cheesecake Variations
Feel free to get creative and personalize your Easter Egg Cheesecake with these delightful twists and substitutions.
- Gluten-Free: Swap regular biscuits for gluten-free cookies to cater to dietary restrictions without sacrificing deliciousness.
- Dairy-Free: Replace cream cheese with a dairy-free alternative and use coconut cream for a luscious and creamy filling that’s entirely plant-based.
- Fruit-Infused: Fold in crushed strawberries or raspberries into the cheesecake mixture for a refreshing burst of fruity flavor that’s vibrant and inviting.
- Chocolate Lovers: Use chocolate graham crackers instead of plain ones for an extra chocolatey base that enhances both flavor and fun.
- Spicy Kick: Add a sprinkle of cayenne pepper or cinnamon into the filling for a surprise zing that complements the sweetness beautifully.
For a festive complement to this cheesecake, consider trying out other indulgent desserts like a Caramel Brownie Cheesecake or Cookie Butter Cheesecake.
- Mini Cheesecakes: Skip the chocolate eggs and use silicone muffin molds instead for individual-sized cheesecakes that are simple to serve and enjoy.
- Nutty Crunch: Fold in crushed nuts like pecans or walnuts to the biscuit base for added texture and a wholesome flavor twist.
With these variations, you can tailor your dessert to suit your taste or dietary preferences while keeping the essence of this lovely Easter treat intact!
Expert Tips for Easter Egg Cheesecake
- Handle with Care: Be gentle when splitting the chocolate eggs; a warm knife helps prevent cracks, ensuring your presentation is flawless.
- Chill For Flavor: Let your cheesecake filling chill overnight for a richer flavor; this extra time enhances the overall taste of your Easter Egg Cheesecake.
- Keep it Simple: Limit decorations to avoid overwhelming the chocolate shells; add mini eggs just before serving to maintain freshness.
- Even Layers Matter: Press the cookie base firmly in the egg halves; uniform layers create a balanced texture and beautiful slices.
- Mixing Necessities: Make sure cream cheese is at room temperature for easy mixing; this ensures a smooth filling without lumps.
Easter Egg Cheesecake Recipe FAQs
How do I choose the right hollow chocolate eggs?
Absolutely! Look for high-quality, seasonal hollow chocolate eggs, like Cadbury milk chocolate eggs, which are smooth and delicious. Visual cues to ensure freshness include shiny surfaces and no cracks—avoid eggs with dark spots or dull finishes.
What’s the best way to store leftover Easter Egg Cheesecake?
Very! Keep your Easter Egg Cheesecake refrigerated in an airtight container for up to 3 days. This will maintain its creamy texture and delicious flavor, allowing you to enjoy leftovers without compromise.
Can I freeze Easter Egg Cheesecake?
Absolutely! For longer storage, you can freeze your cheesecake for up to 3 months. First, wrap each filled egg half tightly in plastic wrap and then in aluminum foil to prevent freezer burn. When you’re ready to serve, thaw them in the refrigerator overnight for the best texture.
What should I do if my cheesecake filling is too runny?
Don’t worry, it can happen! If your filling is too runny, it may not have been whipped properly or the cream cheese might not have been at room temperature, causing it to mix unevenly. To fix this, try refrigerating the mixture for about 30 minutes to thicken, and whip the heavy cream to stiff peaks before folding it in again.
Are there any dietary considerations for this cheesecake?
Absolutely! If you’re worried about allergies, be mindful of using full-fat cream cheese and butter, which contain dairy. If you’re making a gluten-free version, simply substitute the graham crackers with gluten-free biscuits. For a dairy-free option, coconut oil can replace butter, and dairy-free cream cheese is available in many grocery stores.
Can I make Easter Egg Cheesecake ahead of time?
Very! This dessert is perfect for make-ahead convenience. I often prepare it a day in advance and chill it overnight. Just remember to decorate with the mini chocolate eggs right before serving for the freshest presentation!
Delicious No-Bake Easter Egg Cheesecake for a Sweet Celebration
Ingredients
Equipment
Method
- Prepare Chocolate Eggs: Carefully split the hollow chocolate eggs in half using a warm knife to prevent cracking. Line a baking sheet with parchment paper and set the halves aside.
- Make Cookie Base: In a medium bowl, combine crushed graham crackers or digestive biscuits with melted butter until the mixture resembles wet sand.
- Layer Cookie Base: Divide the cookie mixture evenly between the prepared egg halves and compact firmly.
- Mix Filling: Beat cream cheese with powdered sugar and vanilla extract until smooth. Whip heavy cream to stiff peaks and fold into the cream cheese mixture.
- Fill Egg Halves: Carefully fill the chocolate egg halves with the cheesecake mixture and smooth the top with a spatula.
- Decorate and Chill: Drizzle melted chocolate over the cheesecake-filled eggs and top with mini chocolate eggs. Refrigerate for at least 2 hours.
Leave a Reply