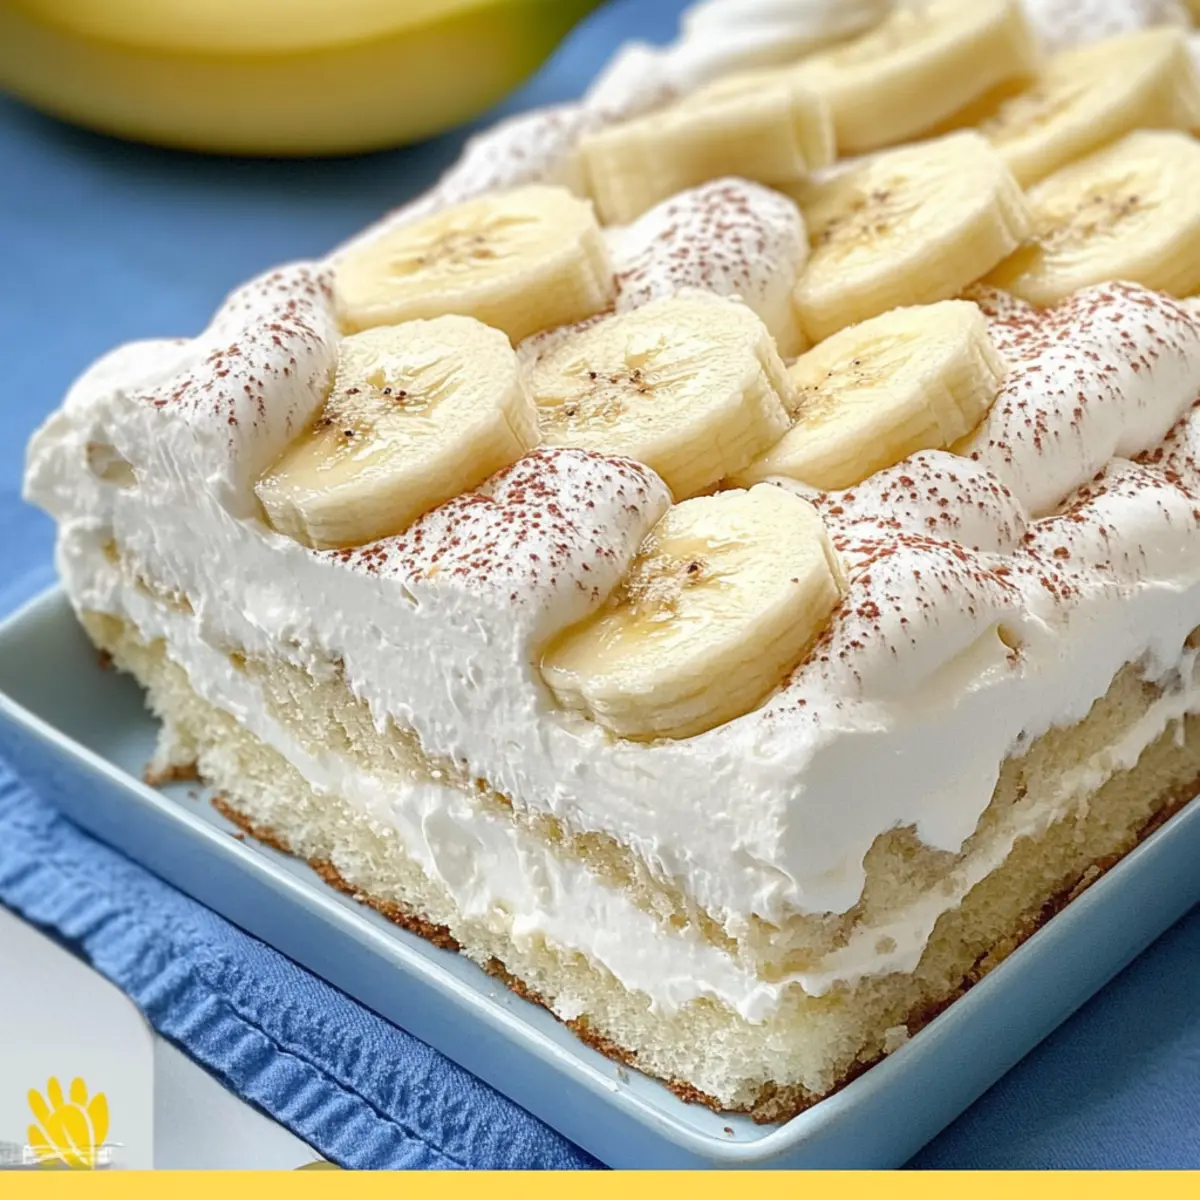
As the summer sun begins to shine brighter, I find myself searching for the perfect dessert that not only satisfies my sweet tooth but also invites joyful gatherings with loved ones. Enter the delightful Banana Tiramisu—a no-bake masterpiece that’s as easy to whip up as it is to devour. Layered with soft ladyfingers, luscious mascarpone, and slices of fresh bananas, this dessert promises a creamy bliss that’s ideal for potlucks and holiday celebrations alike. With its quick prep time, you’ll be the star of any summer soirée, and best of all, it can be made ahead, freeing you up to enjoy the fun. So, are you ready to elevate your dessert game and impress your guests with this scrumptious twist on a classic?
Why is Banana Tiramisu a Must-Try?
Irresistible flavor combination: The blend of rich mascarpone cheese, sweet ripe bananas, and fluffy cream creates an explosion of taste!
Quick and easy: No-bake means minimal effort and a speedy prep time, perfect for last-minute gatherings.
Crowd pleaser: This dessert is always a hit at potlucks and holiday parties—everyone loves a delicious, fruity treat!
Versatile options: Feel free to swap ladyfingers for chocolate cake layers or try strawberries for a seasonal twist.
Make ahead: Prepare it the day before, allowing flavors to meld, so you can relax and enjoy your company!
Banana Tiramisu Ingredients
• Get ready to whip up this delightful no-bake dessert!
For the Base
- Ladyfingers – These serve as the structural foundation. You can replace them with sponge cake if desired.
- Orange Juice – Adds moisture and a hint of citrus. Lemon juice can be used as a substitute.
For the Cream Layer
- Mascarpone Cheese – This creamy layer elevates the richness of the dish; cream cheese can be used for a lighter alternative.
- Heavy Whipping Cream – This ingredient contributes volume and lightness; coconut cream is a great dairy-free option.
- Powdered Sugar – Provides the needed sweetness; feel free to reduce the amount for a less sweet version or use a sugar alternative.
- Vanilla Extract – Enhances the flavors; almond extract gives a lovely nutty twist if you prefer.
For the Fruit
- Bananas – Gives natural sweetness and a pleasant texture; try substituting with strawberries for a fruity variation.
For the Topping
- Cool Whip – Adds creaminess and stability; you can make homemade whipped cream if you want a fresh touch.
- Garnish (optional) – Use sliced bananas for an appealing presentation.
This Banana Tiramisu is sure to impress and delight your guests—it’s the perfect no-bake dessert for any occasion!
Step‑by‑Step Instructions for Banana Tiramisu
Step 1: Whip the Cream
In a large mixing bowl, pour in the heavy whipping cream. Using an electric mixer, beat on medium speed until soft peaks form, about 2-3 minutes. This should create a fluffy and light texture. Once ready, set aside, ensuring the bowl and beaters are chilled for best results.
Step 2: Mix the Mascarpone
In the same bowl, gently fold in the mascarpone cheese, powdered sugar, and vanilla extract with a spatula. Continue to mix until you achieve stiff peaks, which takes around 2 minutes. The mixture should become thick and creamy. This layer will bring richness to your Banana Tiramisu!
Step 3: Prepare the Ladyfingers
Grab a 9×13 baking dish and begin arranging the ladyfingers in a single layer at the bottom. Brush half of them generously with orange juice, allowing it to soak in for a moment to add moisture and flavor. Keep an eye out for the softening texture; this step sets the foundation for your dessert.
Step 4: Assemble the First Layer
Spread half of the mascarpone mixture evenly over the ladyfingers, smoothing it out to ensure complete coverage. Next, layer the sliced bananas atop the mascarpone, creating a delightful fruity contrast. This step adds sweetness and freshness to your creamy Banana Tiramisu.
Step 5: Repeat the Layers
Now, repeat the process by placing another layer of ladyfingers on top, brushing them with the remaining orange juice. Follow this with the rest of the mascarpone mixture, spreading it carefully over the ladyfingers, and finish by adding another layer of banana slices. The combination of flavors will build beautifully.
Step 6: Add the Topping
Once your layers are complete, gently spread the Cool Whip over the top, covering the bananas and creating a smooth surface. This final layer adds a creamy finish. You may use a spatula to create swirls; just ensure it looks inviting and delightful on the outside too!
Step 7: Chill the Dessert
Cover the Banana Tiramisu with plastic wrap and place it in the refrigerator to chill for at least 4 hours, or ideally, overnight. This chilling time allows flavors to meld and the ladyfingers to soften perfectly, ensuring your dessert is enjoyable and has the right creamy texture.
Step 8: Garnish and Serve
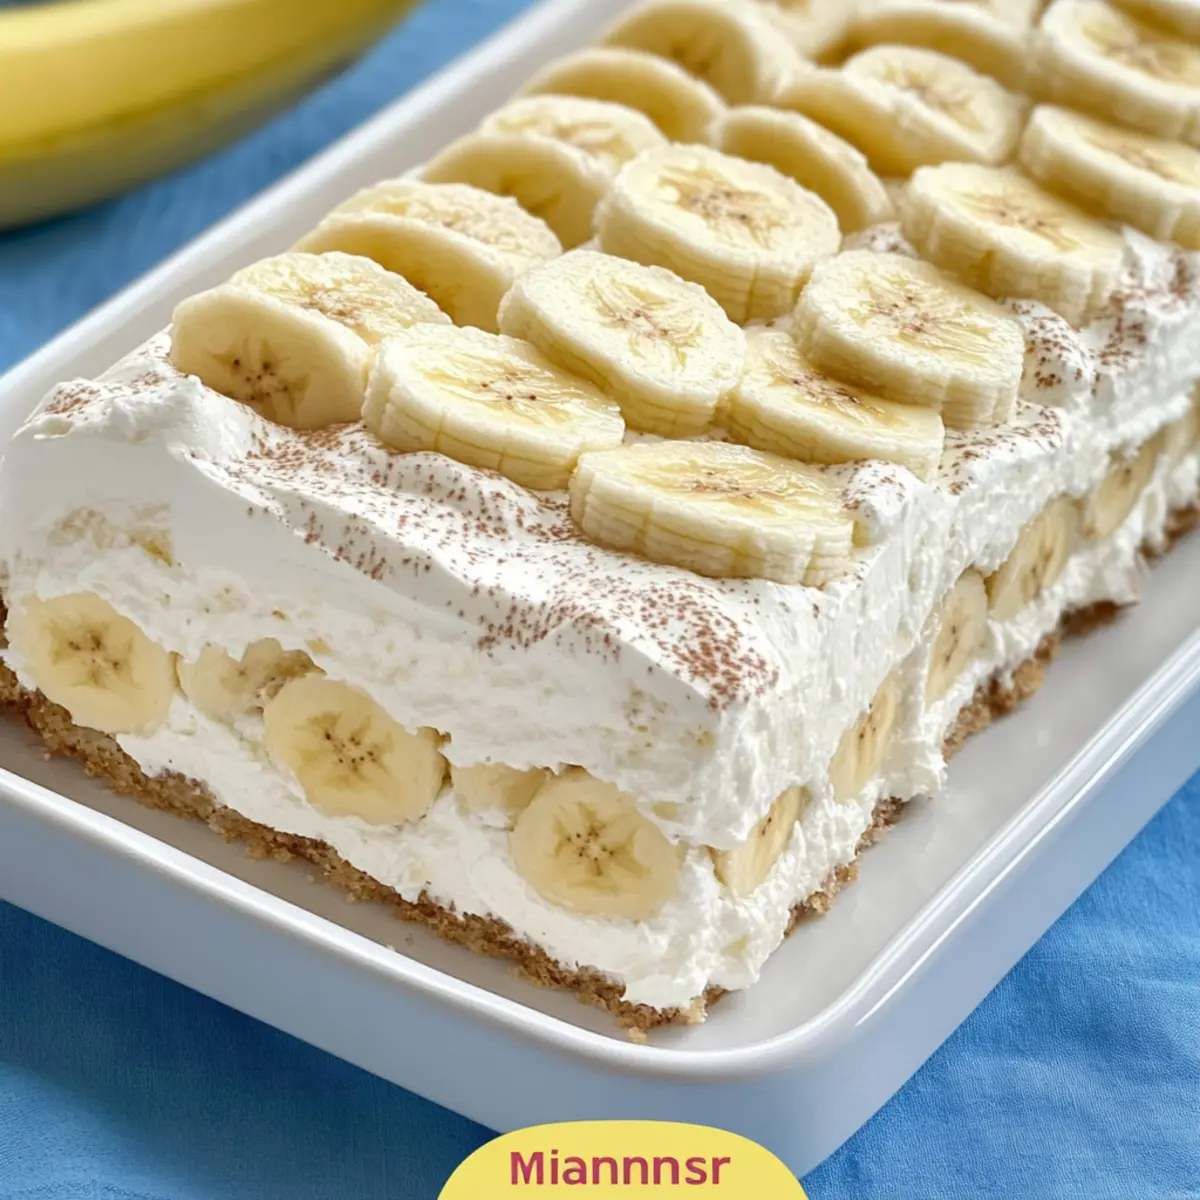
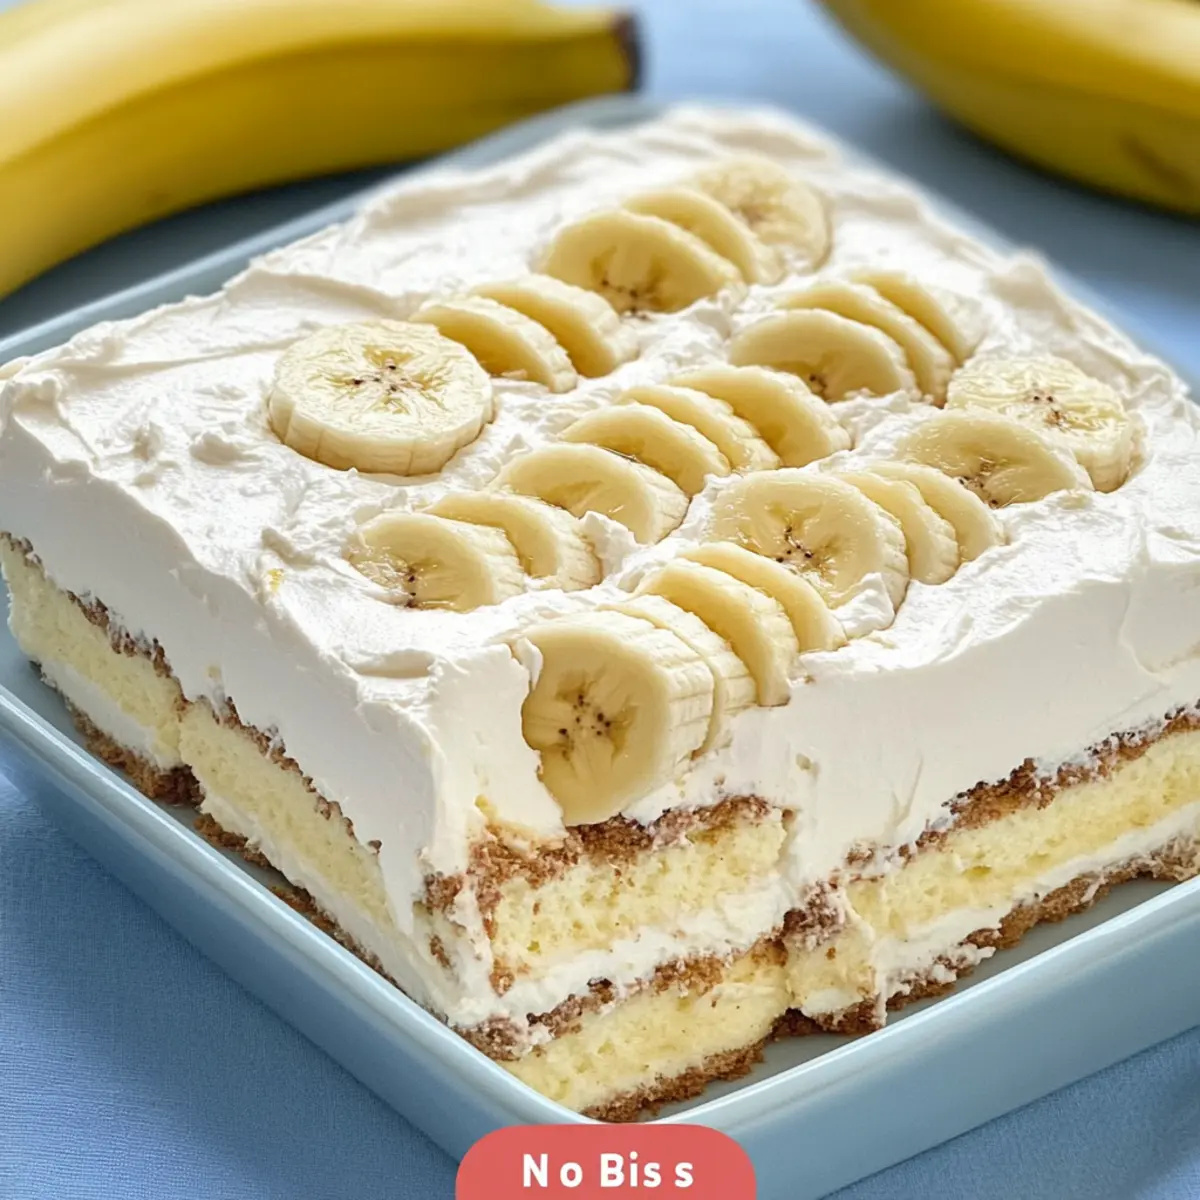
Before serving, remove the Banana Tiramisu from the fridge and garnish with fresh banana slices on top for a pop of color. Slice it into squares for a delightful presentation. This no-bake dessert is now ready to impress your guests, bringing smiles to any gathering!

Banana Tiramisu Variations & Substitutions
Feel free to get creative with this luscious Banana Tiramisu—there are so many ways to make it your own!
-
Dairy-Free: Substitute heavy whipping cream and mascarpone with coconut cream and vegan cream cheese for a delightful dairy-free treat.
-
Nutty Flavor: Instead of vanilla extract, swap in almond extract to add a lovely nutty profile that complements the bananas beautifully.
-
Chocolate Delight: For a twist, replace ladyfingers with chocolate cake layers and drizzle chocolate syrup between the layers for a decadent experience.
-
Fruit Splash: Try replacing bananas with fresh strawberries or peaches for a vibrant fruity variation that’s just as delightful.
-
Coffee Kick: Soak ladyfingers in brewed coffee instead of orange juice for a flavorful coffee-infused dessert—perfect for coffee lovers!
-
Health-Conscious: Swap powdered sugar with a natural sweetener like maple syrup or stevia to enjoy a guilt-free indulgence.
-
Citrus Zing: For an added pop of flavor, mix in a splash of lime or grapefruit juice to your mascarpone mixture for a zesty surprise.
-
Bourbon Infusion: For those who enjoy a spirited dessert, brush ladyfingers with a splash of bourbon for an adult twist, enhancing flavors profoundly.
Feel free to explore these variations and personalize your Banana Tiramisu; after all, the beauty of cooking lies in the joy of making it your own. If you’re looking for other delicious dessert ideas, don’t miss out on our easy chocolate mousse or no-bake strawberry cheesecake!
Make Ahead Options
These easy no-bake Banana Tiramisu treats are perfect for meal prep! You can prepare the ladyfingers soaked in orange juice, mascarpone cream, and banana layers up to 24 hours in advance. Simply assemble everything in your baking dish as instructed, then cover and refrigerate. To maintain the dessert’s quality, be sure to place plastic wrap directly on the surface to prevent exposure to air, which can lead to browning of the bananas. When you’re ready to serve, add the Cool Whip topping and garnish with fresh banana slices just before presentation for a stunning result that’s just as delicious! This not only saves time but allows the flavors to meld beautifully, making your gathering stress-free.
How to Store and Freeze Banana Tiramisu
- Fridge: Store covered in the refrigerator for up to 3 days. This keeps the Banana Tiramisu fresh while allowing the flavors to develop.
- Freezer: For longer storage, freeze it for up to 2 months. Wrap tightly in plastic wrap and foil to prevent freezer burn before placing it in an airtight container.
- Thawing: When ready to enjoy, thaw the Banana Tiramisu in the fridge overnight. Avoid microwaving, as it may compromise the texture.
- Serving Tips: Once thawed, garnish with fresh banana slices just before serving to keep them vibrant and fresh. Enjoy the creamy delight!
Expert Tips for Banana Tiramisu
-
Banana Preservation: To avoid browning, brush sliced bananas with lemon juice before layering them in your dessert.
-
Chilling Time: Refrigerate for at least 4 hours, or overnight if possible. This step is essential for the flavors to meld and softening the ladyfingers.
-
Whip with Care: Use a chilled bowl and beaters when whipping cream; this promotes better aeration for a fluffy texture in your Banana Tiramisu.
-
Slicing Technique: Utilize a serrated knife to cut into your Tiramisu, ensuring clean slices and maintaining the dessert’s structure.
-
Creative Variations: Don’t hesitate to experiment! Try using chocolate cake instead of ladyfingers for a unique twist on this traditional dessert.
What to Serve with Easy No-Bake Banana Tiramisu
Imagine indulging in a sweet, creamy dessert alongside delightful companions that enhance your dining experience.
- Creamy Mashed Potatoes: This classic comfort food provides a wonderful contrast to the sweet, fruity notes of the tiramisu with its rich texture.
- Fresh Berry Salad: A vibrant mix of seasonal berries adds a refreshing touch that brightens the meal, playing off the banana’s sweetness beautifully.
- Light Whipped Coffee: This espresso-based drink complements the dessert’s creaminess while providing just the right caffeine boost for an after-dinner treat.
- Chocolate Chip Cookies: Soft, warm cookies introduce a delightful twist; their gooey texture creates a wonderful contrast to the chilled tiramisu layers.
- Zesty Lemon Bars: The tartness of these bars balances the sweetness of the Banana Tiramisu, cleansing the palate between the creamy bites.
- Vanilla Ice Cream: A scoop of smooth vanilla ice cream acts as a dreamy pairing, melting into the tiramisu for an indulgent experience.
- Iced Green Tea: This refreshing drink is a perfect palate cleanser, offering a light, herbal note that complements the sweet dessert flavors.
- Nutty Biscotti: Crunchy and slightly sweet, these cookies add a satisfying texture alongside the creamy layers of the tiramisu, ideal for dipping.
- Chocolate Mousse: Rich and velvety, chocolate mousse rounds out the meal with a decadent touch that resonates with the creamy banana dessert.
- Honeycomb and Yogurt Parfait: Layers of tangy yogurt and sweet honeycomb introduce a healthy and crunchy element, balancing the richness of the tiramisu.
Banana Tiramisu Recipe FAQs
What kind of bananas should I use for Banana Tiramisu?
Absolutely! Use ripe bananas that are just yellow with a few brown spots. These will be sweet and provide the best texture. Avoid overripe bananas with dark spots all over, as they can turn mushy in the dessert.
How should I store leftover Banana Tiramisu?
You can keep it covered in the refrigerator for up to 3 days. Make sure it’s well-wrapped to prevent it from absorbing other odors. After this timeframe, it might start to lose its freshness and creamy texture.
Can I freeze Banana Tiramisu?
Yes, you can! Wrap the Banana Tiramisu tightly in plastic wrap and then in foil, storing it in an airtight container. It’ll last for up to 2 months in the freezer. When you’re ready to enjoy it, thaw it in the fridge overnight. I recommend adding fresh banana slices as a garnish just before serving to refresh its look.
Why is my Banana Tiramisu too runny?
If your Banana Tiramisu seems too runny, it might be due to overwhipping the cream or not allowing it to chill for the proper time. For best results, ensure you whip the cream until it reaches stiff peaks and let it chill for at least 4 hours to allow the ladyfingers to absorb the moisture and set properly.
Can I make Banana Tiramisu dairy-free?
Very! You can substitute the mascarpone cheese with dairy-free cream cheese or cashew cream, and use coconut cream instead of whipping cream. Additionally, make sure to choose a dairy-free cool whip or whip up some homemade coconut whipped cream for topping.
Irresistible Banana Tiramisu for Easy No-Bake Delight
Ingredients
Equipment
Method
- In a large mixing bowl, pour in the heavy whipping cream and beat on medium speed until soft peaks form, about 2-3 minutes. Set aside.
- Gently fold in the mascarpone cheese, powdered sugar, and vanilla extract. Mix until you achieve stiff peaks, around 2 minutes.
- Arrange the ladyfingers in a single layer in a 9x13 baking dish. Brush half with orange juice and let soak briefly.
- Spread half of the mascarpone mixture over the ladyfingers, then layer sliced bananas on top.
- Repeat with another layer of ladyfingers, brushing with remaining orange juice, followed by the rest of the mascarpone mixture and more banana slices.
- Spread Cool Whip over the top, creating a smooth surface.
- Cover with plastic wrap and refrigerate for at least 4 hours, or overnight, to allow flavors to meld.
- Garnish with fresh banana slices just before serving and slice into squares.
Leave a Reply