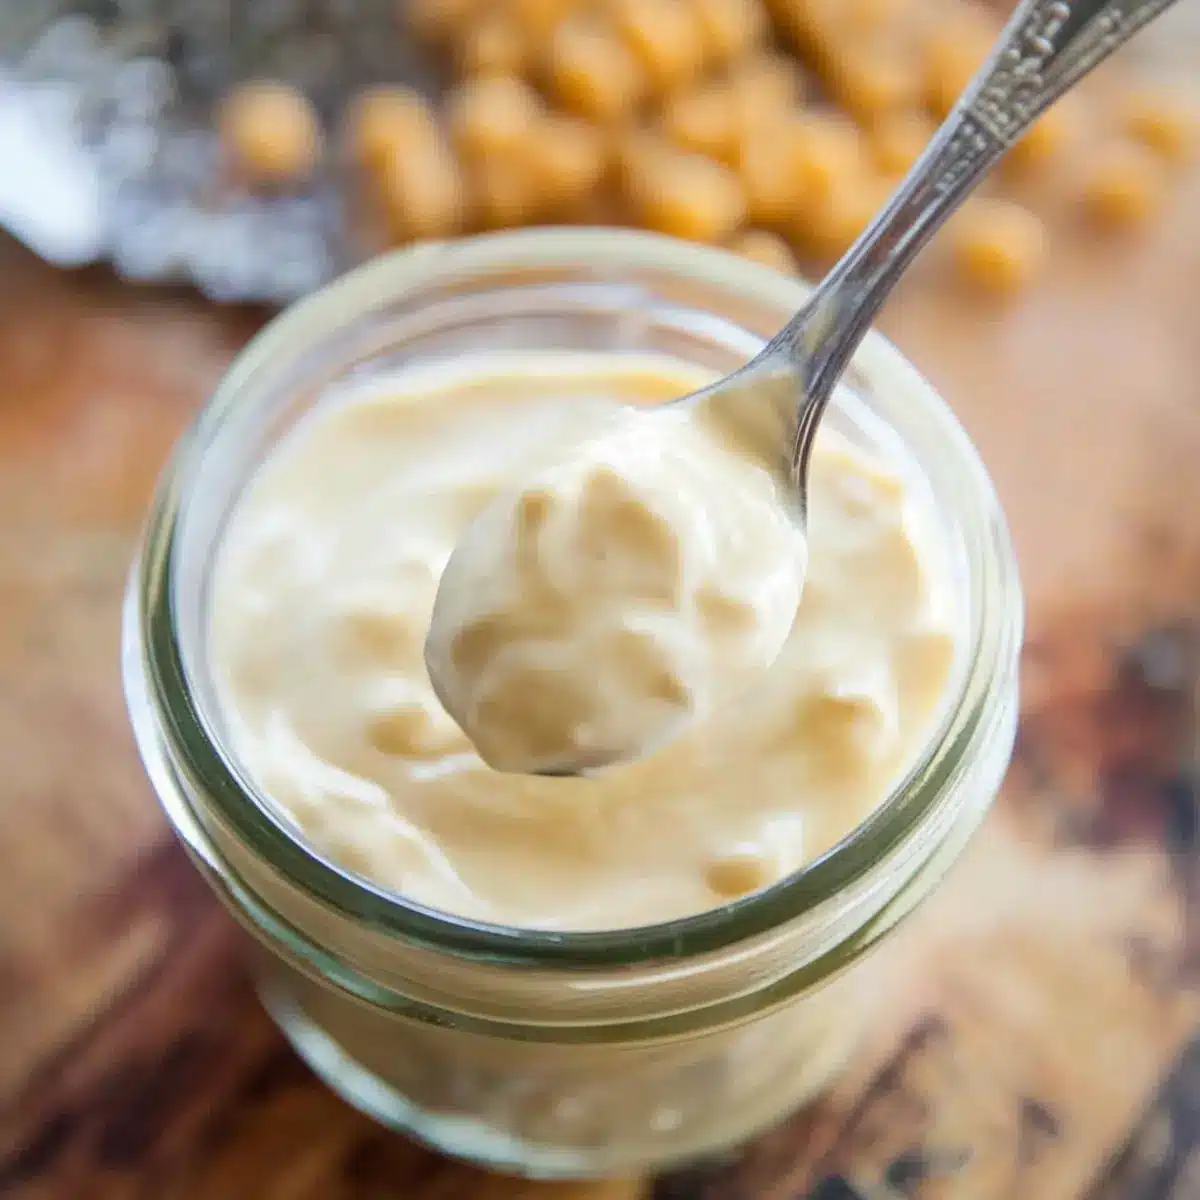
In just half a minute, I discovered the secret to whipping up a creamy, tangy delight that leaves traditional mayo in the dust. This Easy Homemade Vegan Mayo recipe transforms simple pantry staples into a luscious condiment using aquafaba, making it perfect for anyone looking for a plant-based alternative. With its quick prep time and egg-free goodness, it’s an effortlessly versatile addition, whether you’re whipping it up for a summer picnic or replacing store-bought mayo in your favorite recipes. Imagine slathering this creamy spread on sandwiches or using it to elevate your salads! Ready to uncover a mayo that’s not only delicious but also aligns with your values? Let’s dive into this game-changing recipe together!
Why Choose This Vegan Mayo Recipe?
Quick and Effortless: In just 30 seconds, you can create a creamy masterpiece that rivals store-bought mayo. No complicated steps required!
Plant-Based Perfection: Made with aquafaba, this egg-free mayo is an ideal choice for those following a vegan lifestyle or dealing with egg allergies.
Versatile Flavors: Customize it to your liking by adding garlic or spices for an extra flavor kick. You can even experiment with different vinegars for unique twists!
Healthy Choice: With no preservatives and wholesome ingredients, it’s not only delicious but also good for you. Serve it with sandwiches, salads, or even as a base for homemade dressings like Stuffing Holiday Comfort.
Budget-Friendly: By making your own, you save money and reduce waste—no more throwing away jars of mayo! You can even whip up a double batch ahead of time for all your summer gatherings.
This mayo is your answer to elevating everyday dishes while staying true to your values and dietary needs!
Easy Homemade Vegan Mayo Ingredients
For the Mayo Base
- 1 cup avocado oil (or neutral oil) – Adds richness and creaminess; grapeseed oil or light olive oil work well as a substitute.
- 3 tbsp aquafaba – Acts as an emulsifier and replaces eggs; use liquid from canned chickpeas for the best results.
- 1 tbsp Dijon mustard – Aids emulsification and gives flavor; dry mustard can be a great alternative for a milder taste.
- 1 tbsp apple cider vinegar (or other vinegar) – Introduces acidity for balance; lemon juice makes a refreshing switch.
- 1/4 tsp salt (Himalayan recommended) – Enhances overall flavor; regular salt can substitute in a pinch.
Optional Ingredients
- 1 clove garlic – Infuses a classic aioli flavor; easily omit for a simpler taste.
- Pinch cayenne pepper – Adds a delightful hint of spice; adjust to your preference or skip entirely.
With these simple ingredients, you’re just 30 seconds away from creating a delicious, Easy Homemade Vegan Mayo that will transform your meals!
Step‑by‑Step Instructions for Easy Homemade Vegan Mayo
Step 1: Combine Ingredients
In a tall, narrow jar, add 3 tablespoons of aquafaba, 1 tablespoon of Dijon mustard, 1 tablespoon of apple cider vinegar, and 1/4 teaspoon of salt. If desired, include 1 clove of garlic for an extra kick and a pinch of cayenne pepper for heat. This mixture will serve as the flavor base for your Easy Homemade Vegan Mayo.
Step 2: Add the Oil
Pour in 1 cup of avocado oil (or your choice of neutral oil) over the combined ingredients. Allow the oil to settle on top of the mixture for about 30 seconds; this helps visually separate the layers and primes the ingredients for emulsification, ensuring a perfectly creamy mayo.
Step 3: Blend the Mixture
Insert an immersion blender all the way to the bottom of the jar, ensuring it touches the ingredients for optimal blending. Turn the blender on high and hold for about 20 seconds without moving it; you’ll observe the mixture starting to emulsify and thicken into a smooth consistency.
Step 4: Incorporate the Oil
After 20 seconds, slowly lift the immersion blender up while blending. This technique helps gradually incorporate the oil throughout the mixture, transforming it into a thick and creamy Easy Homemade Vegan Mayo. Continue blending until all ingredients are fully combined and the mayo reaches your desired consistency.
Step 5: Store the Mayo
Transfer your freshly made vegan mayo into an airtight container and refrigerate. It’s best enjoyed within two weeks, making it a fantastic option to elevate your meals without the hassle of frequent preparation.
Easy Homemade Vegan Mayo Variations
Feel free to get creative and customize your vegan mayo to suit your taste buds and dietary needs!
- Aquafaba Swap: Use homemade aquafaba from cooking chickpeas instead of canned. Just ensure it’s reduced for a thicker texture.
- Vinegar Variety: Switch out apple cider vinegar for red wine or balsamic vinegar for a different flavor profile that adds depth.
- Herb-Infused: Add fresh herbs like basil or dill to create a zesty herb mayo that brightens up sandwiches and salads alike.
Once you experiment with fresh herbs, you’ll find delightful flavor combinations that elevate your meals.
- Spicy Kick: For those who love heat, mix in some sriracha or a dash of chipotle powder for a spicy twist to your creamy condiment.
- Smoky Flavor: Incorporate smoked paprika for a lovely smoky taste that’s perfect for sandwiches or as a flavorful dip.
This addition makes an unbeatable combo with crispy veggies!
- Sweeten the Deal: If you’re looking for a hint of sweetness, add a teaspoon of maple syrup or agave to balance out the tang.
- Nutty Texture: Blend in a tablespoon of tahini for an extra creamy texture with a nutty flavor that pairs wonderfully with roasted veggies.
And if you’re a pasta lover, substituting your mayo with this nutty version makes a fantastic dressing for a Savory Homemade Pasta!
- Garlic Lovers: For an intense garlic flavor, increase the garlic to two cloves, or try roasting the garlic first for a milder flavor. This can add a whole new element to your dipping sauces or spreads!
With these variations, every batch of your Easy Homemade Vegan Mayo can become a new experience, tailored to your cravings and culinary adventures!
What to Serve with 30-Second Vegan Mayo
Elevate your meals and tantalize your taste buds by pairing this homemade creamy delight with fresh, wholesome dishes.
-
Crispy Sweet Potato Fries: These irresistible fries offer a crunchy texture that beautifully complements the smoothness of your vegan mayo. Perfect for dipping!
-
Fresh Garden Salad: A vibrant assortment of veggies tossed in a light vinaigrette pairs wonderfully, giving your mayo an opportunity to shine as a creamy dressing.
-
Grilled Vegetable Wraps: Add layers of flavor with roasted veggies and a generous smear of mayo. The rich taste enhances every bite, making lunchtime truly delicious.
-
Chickpea Salad Sandwich: Stuffed with protein and flavor, this satisfying sandwich benefits from the creamy texture of vegan mayo, creating blissful flavor harmony.
-
Savory Quinoa Bowl: With grains, roasted veggies, and a drizzle of vegan mayo, this bowl brings together wholesome ingredients for a filling, nutritious meal.
-
Spicy Potato Tacos: The creamy tang of the mayo tempers the heat of the spices, creating a perfect balance in these mouthwatering tacos.
-
Zucchini Fritters: Crunchy on the outside, soft and tender within, these fritters become delightful bites when paired with the smooth, flavorful mayo.
-
Refreshing Coleslaw: Add a creamy twist to your crunchy coleslaw with vegan mayo, enhancing the dish’s flavor profile and bringing it all together.
-
Sparkling Lemonade: Quench your thirst with a fizzy drink; it pairs perfectly with the rich, creamy flavors of the mayo, refreshing your palate.
-
Chocolate Avocado Mousse: Finish the meal on a sweet note with this rich dessert that plays nicely with the savory bites earlier—it’s a delightful surprise!
How to Store and Freeze Easy Homemade Vegan Mayo
Fridge: Store your Easy Homemade Vegan Mayo in an airtight container in the refrigerator for up to 2 weeks. Make sure the lid is tightly sealed to maintain freshness and prevent odors from other foods.
Freezer: While homemade mayo is best fresh, you can freeze it for up to 1 month in ice cube trays. Once frozen, transfer the cubes to a zip-top bag for convenient use in future recipes.
Thawing: To thaw, simply leave the required amount in the fridge overnight, or allow it to sit at room temperature for a few hours. Reblend if needed to restore the creamy consistency before serving.
Avoiding Separation: If the mayo separates during storage, a quick blend with an immersion blender will help recombine the ingredients for smoother spreads and dips.
Expert Tips for Easy Homemade Vegan Mayo
- Choose the Right Jar: Use a tall and narrow jar to ensure proper emulsification. A wide container may cause the mayo to not thicken well.
- Room Temperature Ingredients: Ensure all ingredients are at room temperature for optimal blending and to avoid separation in your Easy Homemade Vegan Mayo.
- Troubleshoot Thickness: If your mayo doesn’t thicken, chill it in the fridge and then reblend. This often helps to achieve your desired creamy consistency.
- Aquafaba Storage: Freeze leftover aquafaba in ice cube trays; this makes it easy to have on hand for future batches of mayo or other recipes.
- Ingredient Quality Matters: Opt for high-quality oils and fresh ingredients, as these significantly influence the flavor and texture of your mayo.
Make Ahead Options
These Easy Homemade Vegan Mayo preparations are perfect for busy weeknights or meal preps! You can whip up the mayo base—combining aquafaba, Dijon mustard, apple cider vinegar, and salt—up to 24 hours in advance and store it in an airtight container in the refrigerator. To maintain its creamy texture, add the oil right before blending; allow the mixture to sit for 30 seconds before blending to ensure proper emulsification. When you’re ready to enjoy, simply blend in the oil, and your homemade vegan mayo will be just as delicious as when freshly made. This will save you time while delivering flavor-packed results for your meals!
Easy Homemade Vegan Mayo Recipe FAQs
What is aquafaba and why is it essential for this recipe?
Aquafaba is the liquid from canned chickpeas or the cooking water from homemade chickpeas. It serves as an emulsifier, which is crucial for binding the oil and creating that delicious creamy texture similar to traditional mayonnaise. Using preservative-free aquafaba ensures the best results!
How should I store the Easy Homemade Vegan Mayo?
Store your Easy Homemade Vegan Mayo in an airtight container in the refrigerator for up to 2 weeks. Make sure to keep the lid tightly sealed to maintain freshness and prevent any unwanted odors from mingling with other foods in your fridge.
Can I freeze the Easy Homemade Vegan Mayo?
Yes, you can freeze it! While it’s best enjoyed fresh, you can freeze your mayo for up to 1 month. Use an ice cube tray to portion it out, then transfer the frozen cubes to a zip-top bag for easy thawing later. Just remember to blend again after thawing to restore its creamy consistency!
What if my mayo doesn’t thicken?
No worries! If your mayo fails to thicken, it might be a temperature issue. Chill your ingredients in the fridge before blending, and try re-blending after cooling. This often helps achieve the right consistency. Also, ensure you’re using a tall jar for proper emulsification!
Are there any dietary considerations for this recipe?
This Easy Homemade Vegan Mayo is vegan, egg-free, and gluten-free, making it suitable for most diets. However, if you’re allergic to mustard or have sensitivities to certain oils, consider using alternatives like dry mustard or light olive oil. Always double-check the labels on your ingredients for allergens.

Whip Up Easy Homemade Vegan Mayo in Just 30 Seconds
Ingredients
Equipment
Method
- In a tall, narrow jar, add the aquafaba, Dijon mustard, apple cider vinegar, and salt. Include garlic and cayenne if desired.
- Pour in the avocado oil over the combined ingredients, allowing it to settle on top for about 30 seconds.
- Insert the immersion blender to the bottom of the jar and blend on high for about 20 seconds.
- Slowly lift the immersion blender while blending to incorporate the oil into the mixture, blending until smooth.
- Transfer the mayo to an airtight container and refrigerate. Best enjoyed within two weeks.
Leave a Reply