The scent of something warm wafts through the kitchen as I prepare these delightful Cottage Cheese Wraps, and every time I make them, I feel a wave of nostalgia and satisfaction. With over 21 grams of protein per serving, these wraps are not only low-carb and gluten-free but also incredibly easy to whip up—no flour or expert techniques required! They’re a true game-changer for meal prep, transforming seamlessly from savory sandwiches to hearty breakfast burritos or even creative thin pizza crusts. If you’re tired of fast food or looking for a healthier alternative, these wraps are just what you need. So, let’s dive in and discover how to create a deliciously versatile wrap that will elevate your meals in an enjoyable way! What will you stuff yours with?
Why are Cottage Cheese Wraps a Must-Try?
Protein-Packed Goodness: Each serving boasts over 21 grams of protein, making these wraps an ideal choice for fitness enthusiasts and anyone looking to increase their protein intake.
Versatile Delight: These wraps can be enjoyed in countless ways—fill them with grilled veggies, spread them with hummus, or create breakfast burritos!
Easy to Make: With just a blend and bake, no complex techniques are required. You’ll whip these up in no time, perfect for busy weeknights.
Diet-Friendly: Low-carb and gluten-free, these wraps fit seamlessly into keto diets—a delicious alternative to traditional wraps.
Nostalgic Comfort: Enjoying these wraps is not just a meal, it’s a journey back to wholesome cooking, reminiscent of days spent in the kitchen. Try them alongside a light salad or stuffed with your favorite ingredients! Looking for more thrills? Check out our Caramel Brownie Cheesecake for a decadent dessert!
Cottage Cheese Wraps Ingredients
For the Wraps
• Full-Fat Cottage Cheese – Provides moisture and rich flavor; substitute with low-fat for a lighter option, but texture may differ.
• Large Eggs – Binds the mixture and adds protein; avoid replacement to maintain structure.
• Grated Parmesan Cheese – Adds savory flavor and helps bind the wraps; mozzarella works as a suitable substitute.
• Garlic Powder – Enhances flavor; feel free to reduce or swap for fresh garlic if you prefer.
• Italian Seasoning – Offers a blend of herbs for depth of flavor; can be substituted with individual herbs like oregano or basil.
These Cottage Cheese Wraps are not only easy to prepare but also packed with nutrition, making them a fantastic addition to your meal rotation!
Step‑by‑Step Instructions for Cottage Cheese Wraps
Step 1: Preheat and Prepare
Start by preheating your oven to 350°F (175°C). While waiting, line a large baking sheet with parchment paper and lightly grease it. This preparation will prevent your Cottage Cheese Wraps from sticking, ensuring a smooth release once baked.
Step 2: Blend the Ingredients
In a blender, combine the full-fat cottage cheese, large eggs, grated Parmesan cheese, garlic powder, and Italian seasoning. Blend this mixture on high for about 1 minute until you achieve a silky-smooth consistency. This creamy blend is crucial for achieving the best texture in your wraps.
Step 3: Spread the Mixture
Carefully pour the blended mixture onto the prepared baking sheet. Using a spatula, spread it into a thin, uniform rectangle, ensuring even thickness throughout. A well-spread mixture will cook evenly, resulting in perfectly pliable Cottage Cheese Wraps that are ready to be filled.
Step 4: Bake Until Golden
Place the baking sheet in the preheated oven and bake for 30-35 minutes. Keep an eye on the wraps as they cook; they should look set and be lightly golden around the edges. This visual cue indicates that your wraps are ready to come out of the oven.
Step 5: Cool the Wraps
Once baked, remove the baking sheet from the oven and allow the wraps to cool completely on the tray. This step is essential as it helps the Cottage Cheese Wraps firm up, making them easier to handle without tearing when you’re ready to cut and fill them.
Step 6: Cut and Fill
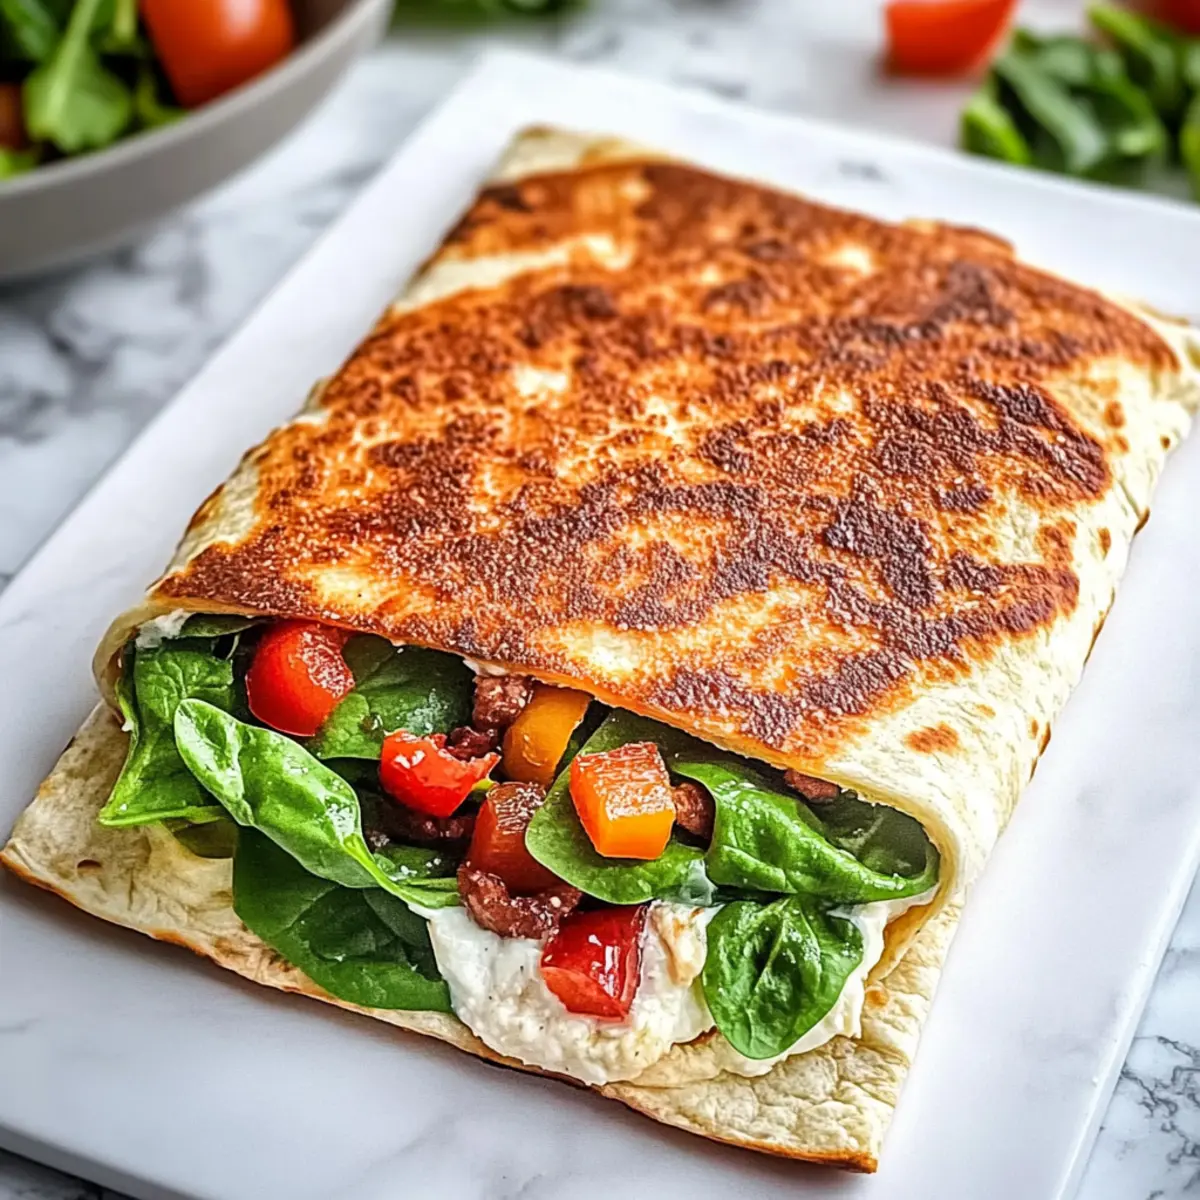
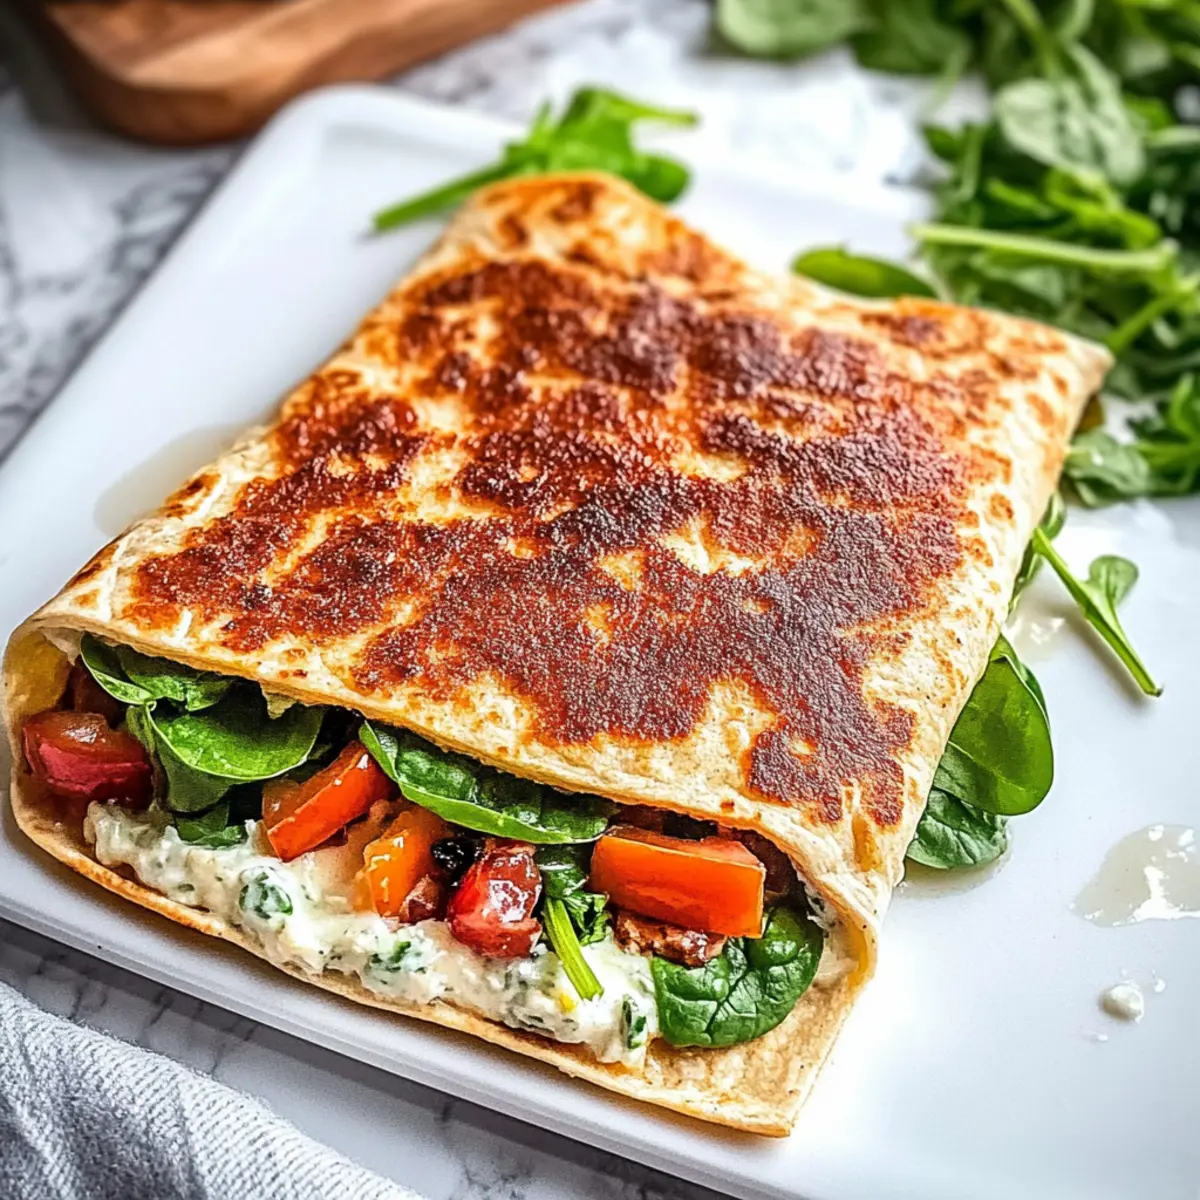
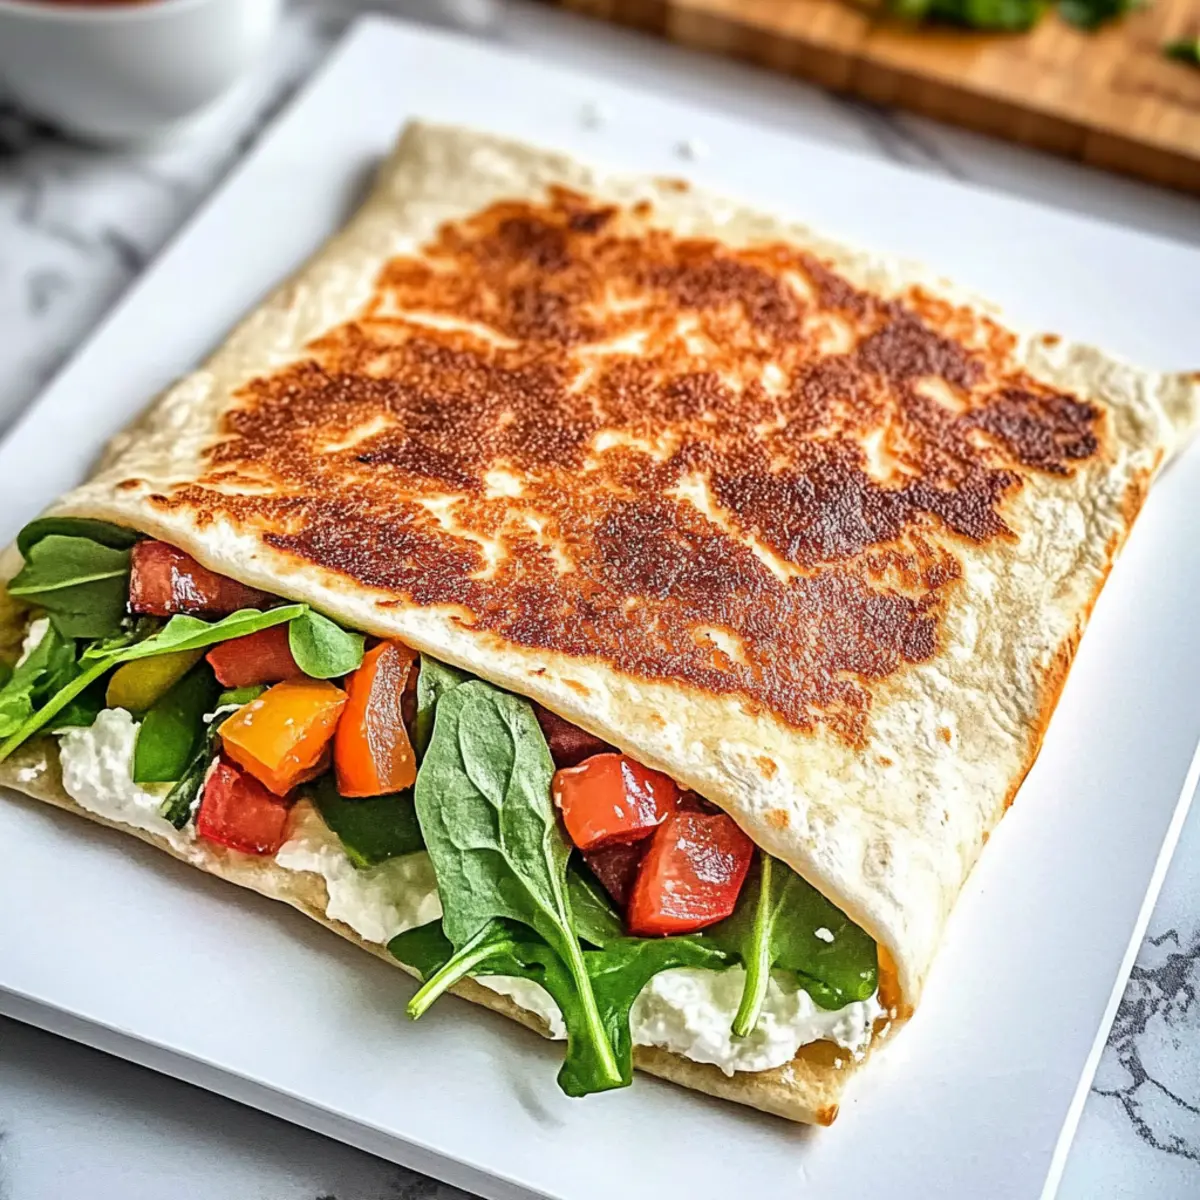
After the wraps have cooled, gently peel them off the parchment paper. Using a sharp knife, cut the wraps into sections based on your filling preferences. Now, they are ready to be filled with your favorite ingredients—get creative with grilled meats, fresh veggies, or zesty spreads for a delicious meal!
Tips for the Best Cottage Cheese Wraps
Well-Greased Sheet: Ensure the baking sheet is properly greased to prevent sticking, which can ruin the delicate texture of your Cottage Cheese Wraps.
Cool Completely: Allow the wraps to cool fully on the tray. This helps them firm up and makes cutting and filling easier, reducing the chance of tearing.
Uniform Thickness: Spread the mixture evenly to ensure consistent baking, leading to the best texture and flexibility in your Cottage Cheese Wraps.
Experiment with Fillings: Don’t hesitate to try different fillings like deli meats, fresh vegetables, or even breakfast ingredients to keep your meals exciting and fresh!
Monitor Baking Time: Ovens can vary; check your wraps around the 30-minute mark. They should be set and slightly golden for the best results.
Cottage Cheese Wraps: Endless Possibilities
Let your creativity shine as you customize these delightful Cottage Cheese Wraps with flavors and ingredients that excite your palate!
- Vegetarian Delight: Fill your wraps with roasted red peppers, feta cheese, and fresh arugula for a Mediterranean twist that bursts with flavor.
- Dairy-Free Option: Replace the Parmesan with nutritional yeast or a dairy-free cheese alternative to keep the recipe light and still satisfy your cravings.
- Spicy Twist: Add a teaspoon of chili powder or cayenne pepper to the batter for a warm kick—perfect for heat enthusiasts!
- Herb Variations: Swap Italian seasoning for fresh herbs like cilantro or basil to lend distinct aromas and tastes to every bite.
- Breakfast Style: Stuff with scrambled eggs, diced tomatoes, and avocado for a wholesome breakfast burrito that’s both filling and refreshing.
- Pizza-Inspired: Spread the batter into a round shape and top with your favorite pizza toppings before baking for a fun low-carb pizza experience.
- Savory-Sweet Fusion: Incorporate a touch of cinnamon into the batter, then fill with peanut butter and banana slices for a deliciously unexpected treat.
- Crunchy Texture: Sprinkle nuts or seeds into the wrap mixture before baking for added crunch and nutrition—it’s a texture delight!
Feel free to explore and mix things up! If you want a sweet treat to balance your savory wraps, try our heavenly Cookie Butter Cheesecake—it’s a delightful way to end your meal!
How to Store and Freeze Cottage Cheese Wraps
Fridge: Keep your Cottage Cheese Wraps in an airtight container for up to 5 days. This will maintain their freshness and pliability for easy meals throughout the week.
Freezer: For longer storage, freeze the wraps flat with parchment paper between each layer to prevent sticking. They can last in the freezer for up to 2 months.
Reheating: When ready to eat, thaw in the fridge overnight if frozen, then reheat in a microwave or in a skillet over medium heat until warmed through, enhancing their soft texture.
Avoid Moisture: To maintain quality, ensure the wraps are completely cooled before storing; excess moisture can lead to sogginess and affect their delightful texture.
Make Ahead Options
These Cottage Cheese Wraps are fantastic for meal prep enthusiasts looking to save time during busy weekdays! You can blend the wrap mixture and pour it into the baking sheet up to 24 hours in advance. Just cover the baking sheet with plastic wrap and refrigerate. When you’re ready to enjoy them, simply bake as directed. Alternatively, the baked wraps can be stored in an airtight container in the refrigerator for up to 5 days. For longer storage, freeze the wraps flat with parchment paper in between each to prevent sticking; they’ll last up to 2 months. When it’s time to serve, thaw the wraps in the fridge overnight, and fill them with your favorite ingredients for a delicious, protein-packed meal with minimal effort!
What to Serve with Cottage Cheese Wraps
These wraps are perfect for creating a satisfying and balanced meal, offering a world of flavor combinations.
- Mixed Green Salad: A light, refreshing salad drizzled with balsamic vinaigrette adds a crisp counterpoint to the wraps’ soft texture.
- Sautéed Vegetables: Flavorful veggies like zucchini, bell peppers, and spinach sautéed with garlic enhance both taste and nutrition, making for a colorful side.
- Guacamole: Creamy avocado dip provides healthy fats and a creamy texture that pairs beautifully with the protein-packed wraps.
- Hummus and Veggies: Serve with crunchy vegetable sticks and smooth hummus for a delightful crunch and rich flavor that complements every bite.
- Cottage Cheese Dip: For a cohesive theme, serve a cottage cheese-based dip flavored with herbs; it mirrors the main ingredient and elevates the meal.
- Sparkling Water: A glass of sparkling water with a splash of lemon refreshes your palate and cleanses the taste buds between bites.
- Berries and Yogurt: End the meal with a sweet note by serving a bowl of fresh berries with a dollop of Greek yogurt; it’s a nutritious dessert option.
- Cheese Platter: Create a delightful cheese platter with assorted cheeses like feta and gouda to enhance the savory elements of the wraps.
- Fruit Salad: A vibrant fruit salad provides a sweet contrast to the savory wraps and adds a burst of freshness to your plate.

Cottage Cheese Wraps Recipe FAQs
How do I choose the right cottage cheese for wraps?
Absolutely! For the best Cottage Cheese Wraps, opt for full-fat cottage cheese, which provides a rich flavor and moisture. If you’re looking for a lighter version, you can use low-fat cottage cheese, but be aware that the texture may be slightly different—sometimes a little looser.
How should I store leftover wraps?
You can keep your Cottage Cheese Wraps in an airtight container in the fridge for up to 5 days. Just make sure they are completely cooled before storing to prevent excess moisture, which could make them soggy.
Can I freeze cottage cheese wraps, and how?
Very! To freeze your Cottage Cheese Wraps, let them cool completely first. Then, stack them with parchment paper between each layer to prevent sticking. Place the stack in an airtight container or a freezer-safe bag. They will last up to 2 months in the freezer. When ready to eat, thaw them in the fridge overnight and reheat gently in the microwave or skillet.
Why did my wraps come out too thin or break easily?
No worries! If your wraps are too thin, ensure you’re spreading the mixture evenly on the baking sheet. Aim for a thickness similar to a thick pancake. Also, allow them to cool completely on the tray after baking; this helps them firm up and will significantly reduce breakage.
Can these wraps be made nut-free or dairy-free?
Certainly! To cater to specific dietary needs, you can explore alternatives. For a dairy-free option, use a plant-based cottage cheese substitute, ensuring it has a similar texture. If you’re avoiding nuts, just follow the original recipe, as it is nut-free. If anyone has allergies, always double-check ingredient labels!
What fillings work best with Cottage Cheese Wraps?
You have a world of options! For savory fillings, grilled chicken with veggies, turkey with avocado, or even creamy spreads like hummus work wonderfully. If you’re in the mood for breakfast, consider scrambled eggs with spinach and cheese. The more the merrier—get creative with your favorites!
Cottage Cheese Wraps: High-Protein Delights Made Easy
Ingredients
Equipment
Method
- Preheat your oven to 350°F (175°C) and line a large baking sheet with parchment paper, lightly greasing it.
- Blend the full-fat cottage cheese, large eggs, grated Parmesan cheese, garlic powder, and Italian seasoning until silky-smooth.
- Pour the mixture onto the prepared baking sheet and spread it into a thin, uniform rectangle.
- Bake for 30-35 minutes until set and lightly golden around the edges.
- Remove from oven and cool completely on the tray to firm up.
- Gently peel the wraps off the parchment and cut into sections, ready to fill with your favorite ingredients.
Leave a Reply