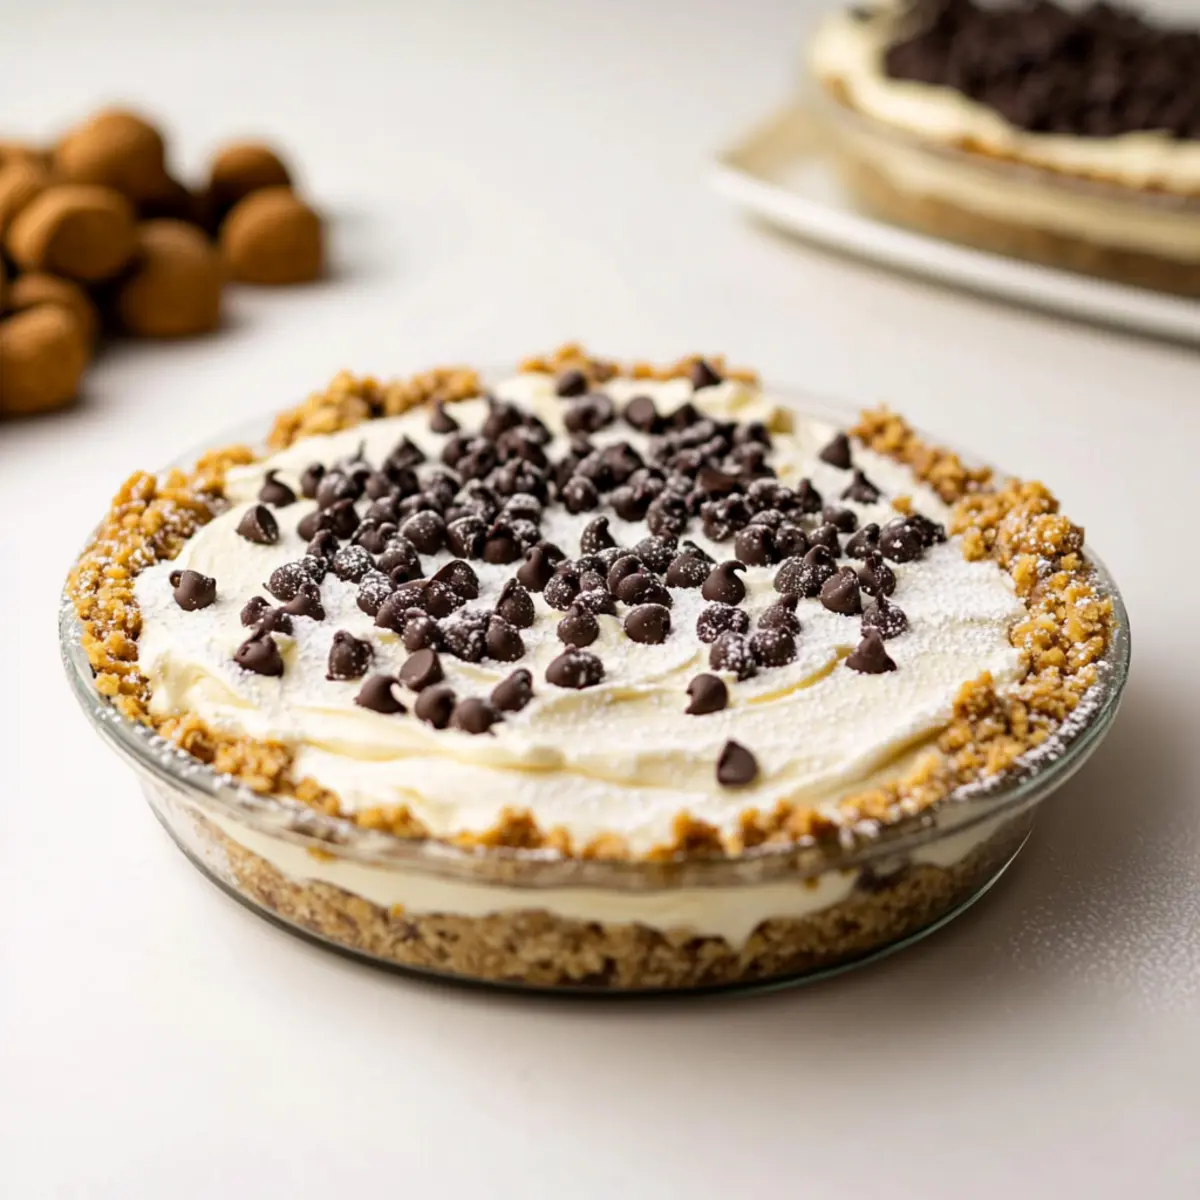
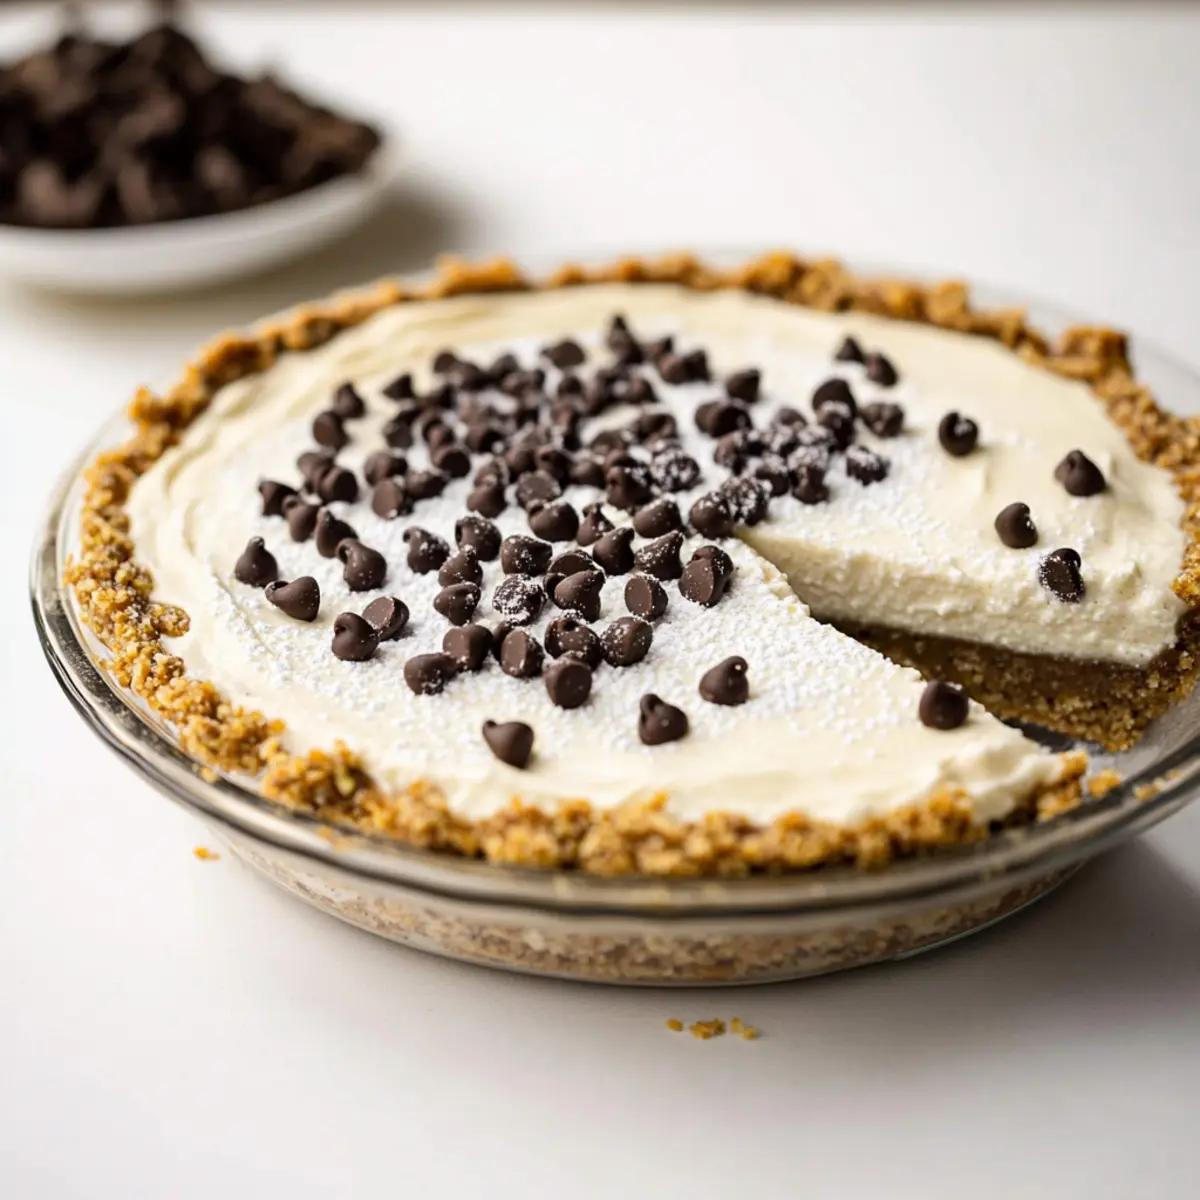
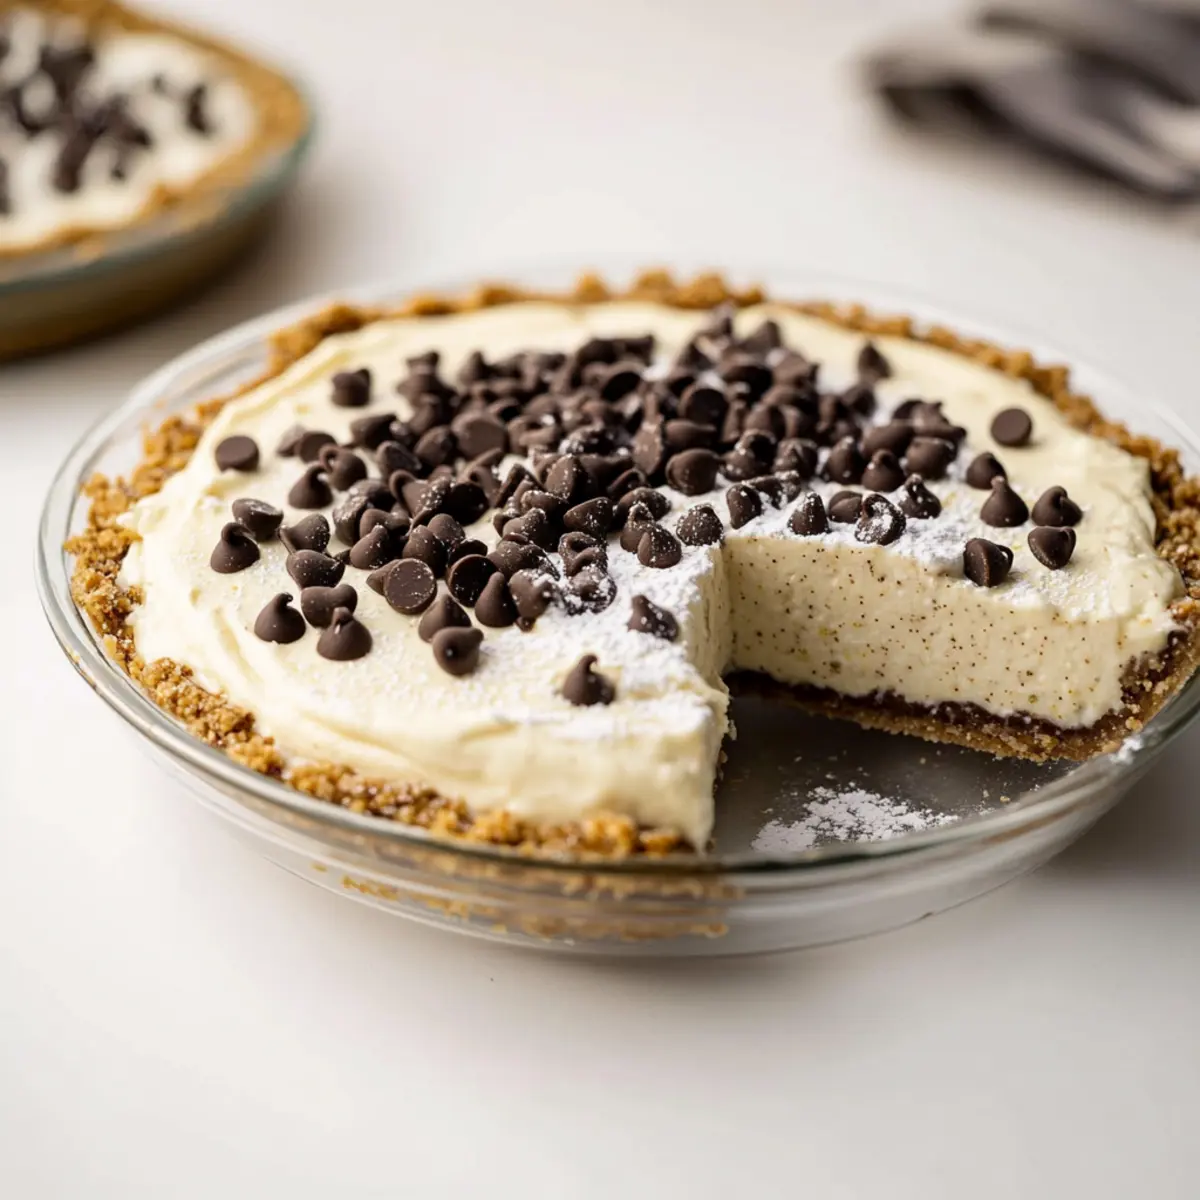
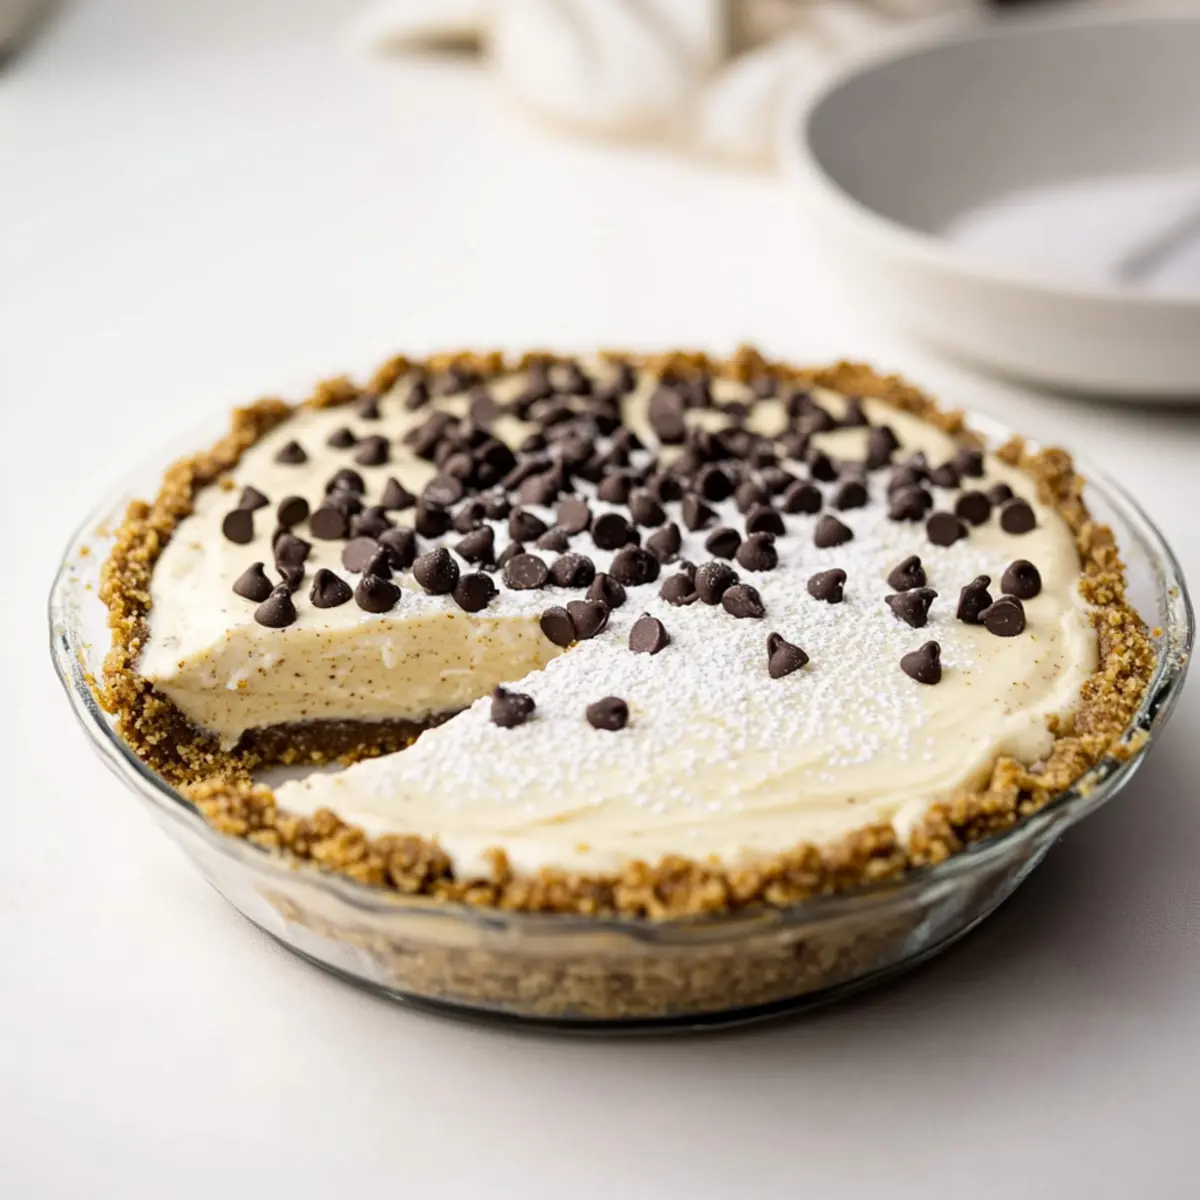
Wait, you mean I can savor the beloved taste of cannoli without turning on the oven? That was my exact thought when I stumbled upon this No-Bake Cannoli Pie recipe. It has quickly become a sweet staple in my home—perfect for those days when I crave a delicious dessert but don’t want to spend hours in the kitchen. With its creamy mascarpone and ricotta filling nestled in a crunchy vanilla wafer and pistachio crust, this pie is not just remarkably easy to whip up; it also makes for a show-stopping centerpiece for gatherings. Plus, it’s completely make-ahead, so you can focus on enjoying your time with family and friends. Are you ready to uncover the secret to this delightful Italian classic that will have everyone coming back for seconds?
Why Is No-Bake Cannoli Pie So Appealing?
Quick and Easy: This dessert requires no baking, making it perfect for any skill level! Just mix, layer, and chill to create a stunning showpiece without the fuss.
Creamy Indulgence: The combination of mascarpone and ricotta offers a luxurious filling that melts in your mouth, satisfying your sweet tooth without feeling heavy.
Flavorful Twist: Infused with a hint of orange zest and paired with a crunchy pistachio crust, this pie elevates popular cannoli flavors into a convenient and modern dessert.
Make-Ahead Convenience: Prepare it in advance for stress-free gatherings. Your guests will be amazed, while you enjoy the extra time to mingle!
Customizable Options: Feel free to swap ingredients like adding chocolate wafers or omitting nuts for a nut-free version—this pie caters to everyone!
If you love Italian-inspired treats, check out my Pumpkin Pie Flaky or indulge in a slice of Pecan Cream Pie for more deliciousness.
No-Bake Cannoli Pie Ingredients
For the Crust
• Vanilla Wafers – The foundation of the crust, providing sweetness and structure; any brand works well!
• Pistachios – Adds a delightful nutty flavor mimicking traditional cannoli shells; substitute with more vanilla wafers for nut-free options.
• Unsalted Butter – Binds the crust together for a rich taste; start with 6 tablespoons and adjust as necessary for texture.
For the Filling
• Heavy Cream – Creates a light and fluffy filling; be sure to whip to stiff peaks for the best results.
• Mascarpone Cheese – Provides a creamy and rich texture; opt for full-fat for the ultimate indulgence.
• Ricotta Cheese – Brings the authentic cannoli flavor; make sure it’s high quality and strain if needed to avoid excess moisture.
• Powdered Sugar – Sweetens the filling and contributes to that dreamy creamy texture.
• Orange Zest – Adds a refreshing citrus note that brightens up the filling.
For Garnishing
• Mini Chocolate Chips – Perfect for a classic cannoli touch and a lovely finishing touch!
Step‑by‑Step Instructions for No-Bake Cannoli Pie
Step 1: Prepare the Crust
In a food processor, combine about 2 cups of vanilla wafers and ½ cup of pistachios. Pulse until the mixture resembles sandy crumbs. Gradually add 6 tablespoons of melted unsalted butter, mixing until fully combined. Press this mixture firmly into a 9-inch pie plate to create a solid crust. Chill the crust in the refrigerator for at least 30 minutes to set.
Step 2: Make the Filling
While the crust chills, whip 1 cup of heavy cream in a large mixing bowl until stiff peaks form; then set aside. In another bowl, mix 8 ounces of mascarpone cheese, 1 cup of powdered sugar, and the zest of one orange until fluffy and well combined. Gently fold in 1 cup of ricotta cheese until thoroughly blended and creamy.
Step 3: Combine the Creams
Next, take half of the whipped cream and gently fold it into the ricotta and mascarpone mixture to lighten the filling. Be careful not to deflate the whipped cream; use a spatula for best results. Once this is mixed, fold in the remaining whipped cream until no streaks remain, ensuring a fluffy and airy filling for your No-Bake Cannoli Pie.
Step 4: Assemble the Pie
Once your filling is ready, take the chilled crust out of the refrigerator. Spread the creamy filling evenly into the prepared crust, smoothing the top with a spatula for a nice finish. Cover the pie with plastic wrap and refrigerate for at least 4 hours, or preferably overnight, to allow it to set properly.
Step 5: Serve the Pie
Before serving, remove the pie from the refrigerator. Garnish the top with a generous sprinkle of mini chocolate chips and a dusting of powdered sugar for a delightful final touch. Slice the No-Bake Cannoli Pie into wedges, serve chilled, and enjoy the delicious blend of flavors that everyone will love!
No-Bake Cannoli Pie Variations
Discover the endless possibilities to personalize your No-Bake Cannoli Pie, adding your own touch to this delightful dessert!
- Chocolate Twist: Replace vanilla wafers with chocolate wafer cookies for a decadent chocolate crust that complements the creamy filling beautifully.
- Nut-Free Option: Substitute pistachios with crushed graham crackers or more vanilla wafers to keep it nut-free while still delicious.
- Almond Extract Variation: Add 1 teaspoon of almond extract to the filling for a unique flavor twist reminiscent of traditional Italian cannoli.
- Fruit Flavors: Mix in 1/2 cup of finely chopped cherries or strawberries into the filling for a fresh, fruity take on this classic dessert.
- Zesty Lemon: Swap orange zest for lemon zest for a bright, refreshing flavor that cuts through the richness of the filling.
- Additional Garnishes: Top with crushed pistachios, additional chocolate shavings, or a drizzle of caramel sauce for added texture and flavor.
- Yogurt Alternative: For a lighter version, replace half of the mascarpone with Greek yogurt, keeping the creamy essence while adding a tangy twist.
- Spice Up the Filling: Add a pinch of cinnamon or nutmeg into the filling for a warm flavor that pairs beautifully with the cannoli crust.
Whatever your choice, tailoring your No-Bake Cannoli Pie can transform this already delightful dessert into something uniquely yours! For more delicious inspiration, try my Pumpkin Pie Flaky or treat yourself to a slice of Pecan Cream Pie.
Storage Tips for No-Bake Cannoli Pie
Fridge: Store covered in the refrigerator for up to 2 days. This will keep the filling creamy and the crust fresh for serving.
Freezer: For longer storage, freeze the No-Bake Cannoli Pie for up to 1 month. Wrap tightly in plastic wrap or keep in an airtight container to prevent freezer burn.
Thawing: When ready to enjoy, allow it to thaw in the refrigerator overnight or at room temperature for about 1 hour before slicing.
Serving Tip: For best results, slice after it has thawed slightly, as this helps maintain the structured layers of the pie.
What to Serve with No-Bake Cannoli Pie
Elevate your dessert experience by pairing this delightful treat with complementary flavors and textures!
- Espresso or Coffee: The boldness of espresso balances the creamy sweetness, making it the perfect after-dinner drink.
- Fresh Berries: Juicy strawberries or raspberries add a refreshing tartness that brightens each bite, enhancing the overall indulgence.
- Whipped Cream: A dollop of lightly sweetened whipped cream on top gives an airy contrast to the rich filling.
- Chocolate Drizzle: A warm chocolate sauce drizzled over the top adds a decadent touch that chocolate lovers will adore.
- Limoncello: A glass of this zesty Italian liqueur cuts through sweetness while echoing the citrus notes in the pie.
- Pistachio Ice Cream: Served alongside, its creamy nutty essence complements the pie’s crust and filling—pure bliss in every bite!
- Mint Leaves: Fresh mint is an excellent garnish, offering a crisp breath of freshness that cleanses the palate beautifully.
- Almond Biscotti: Crunchy almond biscotti not only provides great texture but pairs harmoniously with the Italian flavors of the pie.
- Coconut Macaroons: These chewy treats bring a hint of sweetness and a delightful contrast to the pie’s smooth texture.
- Chocolate Covered Strawberries: The rich chocolate and juicy strawberries create a visually stunning and mouthwatering combination alongside your dessert.
Expert Tips for No-Bake Cannoli Pie
-
Chill Thoroughly: Ensure the pie sets in the refrigerator for at least 4 hours. Chilling is essential for the filling to achieve the perfect creamy texture.
-
Avoid Watery Ricotta: Always use high-quality ricotta and strain it if necessary. A watery ricotta can make the filling runny, compromising your beautiful No-Bake Cannoli Pie.
-
Perfect Whipping: When whipping heavy cream, look for stiff peaks. This lightness will help your filling achieve that dreamy, airy essence.
-
Sample Before Serving: Taste your filling before topping. You can adjust sugar or orange zest to your preference for an ideal flavor balance.
-
Garnish at the Last Minute: For the best presentation, add mini chocolate chips and powdered sugar only right before serving to maintain freshness and texture.
Make Ahead Options
These No-Bake Cannoli Pie preparations are a lifesaver for busy home cooks! You can whip up the crust and filling up to 24 hours in advance, making meal prep a breeze. After preparing the crust and chilling it as directed, store it covered in the refrigerator. You can also mix the filling ingredients and refrigerate them separately; just avoid folding in the whipped cream until you’re ready to assemble, to maintain that delightful lightness. When it’s time to serve, simply spread the filling into the chilled crust and refrigerate again for at least 4 hours or overnight. This way, you’ll have a stunning dessert waiting for you, just as delicious and fresh as if made the same day!
No-Bake Cannoli Pie Recipe FAQs
What type of vanilla wafers should I use?
You can use any brand of vanilla wafers for the crust, but I recommend using a softer variety as they create a better texture when mixed with melted butter. Look for ones without dark spots, as they tend to taste fresher and sweeter.
How long can I store No-Bake Cannoli Pie in the refrigerator?
You can store the No-Bake Cannoli Pie covered in the refrigerator for up to 2 days. It’s best to enjoy it within this timeframe to maintain the creamy filling and crunchy crust. Just be sure to keep it sealed to prevent drying out.
Can I freeze No-Bake Cannoli Pie?
Absolutely! You can freeze the pie for up to 1 month. To freeze, wrap it tightly in plastic wrap or place it in an airtight container to avoid freezer burn. When you’re ready to enjoy it, let it thaw in the refrigerator overnight or at room temperature for about 1 hour before slicing for the best texture.
What should I do if my filling is too runny?
If you notice your filling is too runny, it might be due to using a watery ricotta cheese. To fix this, strain the ricotta through a cheesecloth or a fine mesh sieve to remove excess moisture before mixing it with other ingredients. This step will ensure a perfectly creamy filling that holds up well.
Are there any nut-free alternatives for this recipe?
Yes, if you prefer a nut-free version of the No-Bake Cannoli Pie, you can substitute the pistachios in the crust with additional vanilla wafers or use crushed graham crackers. This maintains the texture and sweetness of the crust while accommodating dietary preferences.
Is it safe to serve No-Bake Cannoli Pie to pets?
While the ingredients are generally safe for human consumption, I recommend keeping this dessert away from pets. The high dairy content, especially if your pet is lactose intolerant, could cause upset stomachs. Always double-check with your veterinarian if you’re unsure about specific ingredients.
Decadent No-Bake Cannoli Pie for Effortless Indulgence
Ingredients
Equipment
Method
- In a food processor, combine about 2 cups of vanilla wafers and ½ cup of pistachios. Pulse until sandy crumbs. Gradually add 6 tablespoons melted unsalted butter, mixing fully. Press into a 9-inch pie plate and chill for 30 minutes.
- Whip 1 cup of heavy cream in a mixing bowl to stiff peaks; set aside. In another bowl, mix 8 ounces mascarpone, 1 cup powdered sugar, and orange zest until fluffy. Gently fold in 1 cup ricotta until creamy.
- Fold half of the whipped cream into the ricotta and mascarpone mixture to lighten it. Gently fold in the remaining whipped cream until no streaks remain.
- Spread the filling evenly into the chilled crust. Cover with plastic wrap and refrigerate for at least 4 hours or overnight to set.
- Before serving, garnish with mini chocolate chips and a dusting of powdered sugar. Slice and serve chilled.
Leave a Reply